In this post you’ll learn about my favourite lead capture tool. This isn’t just a ConvertBox review, because you’ll learn how to set it up and discover some ways you can use it that go beyond just simple lead generations.
Because this is a standalone lead generation tool, you can use it on any website, including WordPress. If you’re on WordPress, it’s extremely easy to set up.
I’ll dig into some of the best features here, but this is not a full guide on everything it can do. If you have any questions, just drop in a comment at the end and I’ll see if I can help!
Why I like ConvertBox
It’s simple – it’s designed to be set up and implemented quickly. So many tools in this space are finicky and a pain to use. ConvertBox provides simple, proven templates that convert. If you’re a designer who wants control over every little bit over your lead gen forms, it’s probably not for you.
It’s SaaS – To me, having it external to our site, NOT a WordPress plugin is a good thing. It’s not adding yet another plugin on your site just slowing things down or making updates difficult. The previous plugin I used was REALLY bad at this.
It’s more than just a lead capture tool – I’ve used ConvertBox as a “choose your own adventure”, helping visitors to quickly get where they need to
The price is good – Right now it’s a lifetime deal, no monthly fees. By the time you watch this it may or may not still be around. Get the lifetime deal here.
Setting it up
Setting it up is super easy.
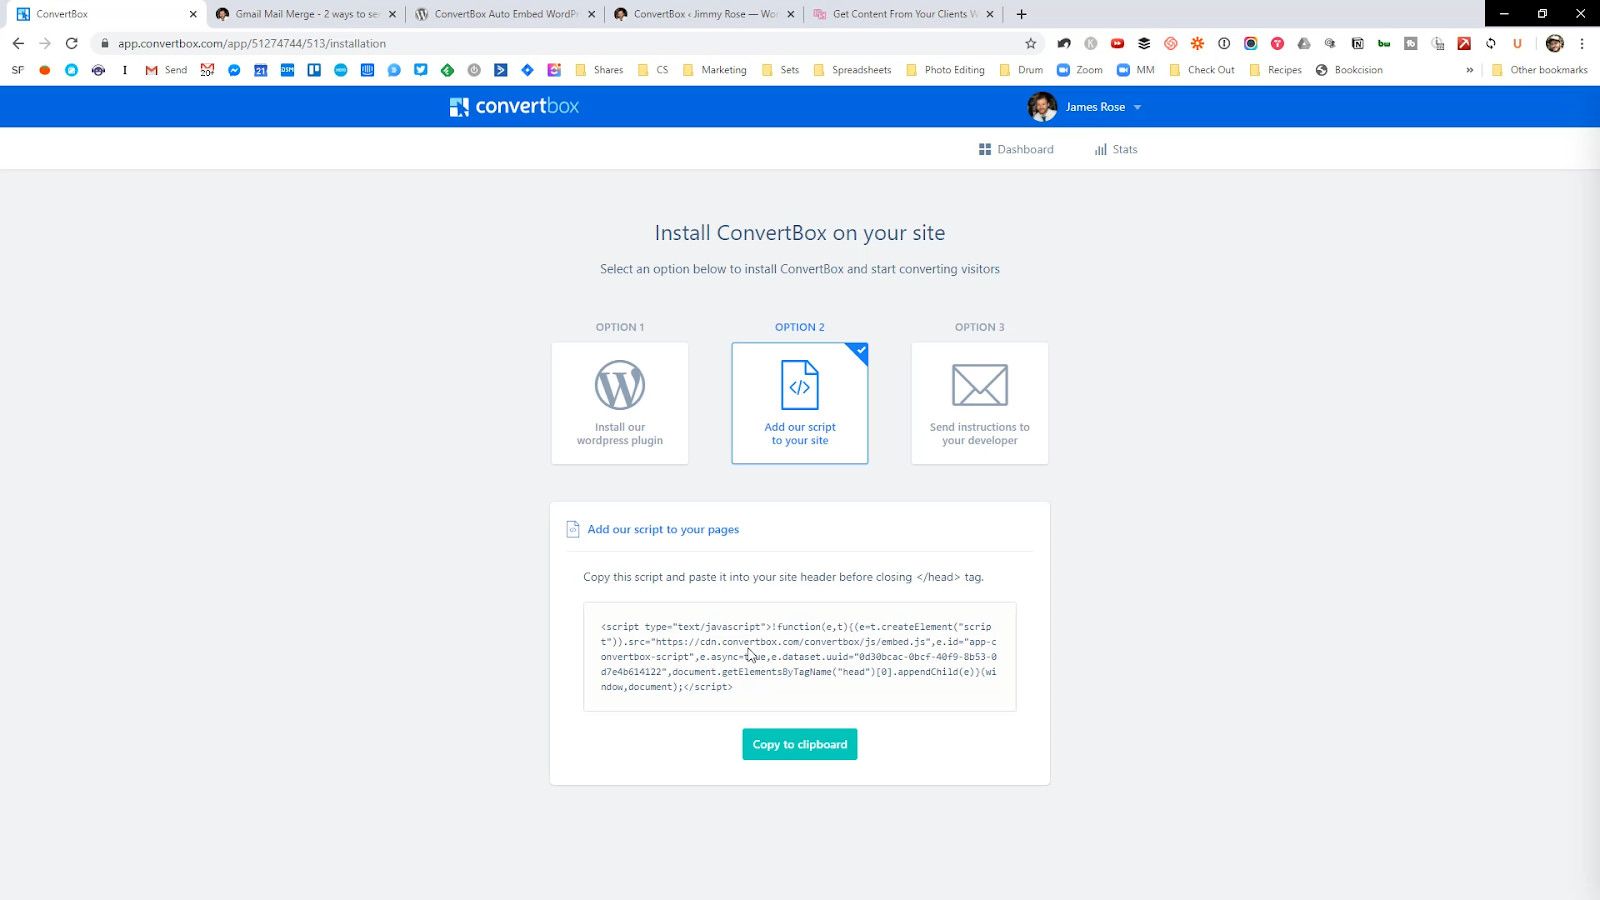
Basic info and installation
- Create a site – it’s just your domain
- Install the script, or install the plugin – this is the same as any other script you install on a site. But if you’re on WordPress, I recommend using the plugin as it adds some hidden functionality. It will allow you to trigger popups and opt-ins on posts with certain categories or tags. This doesn’t work with the script install.

Create a lead generation form or “ConvertBox”
Back on your dashboard, create a new ConvertBox.
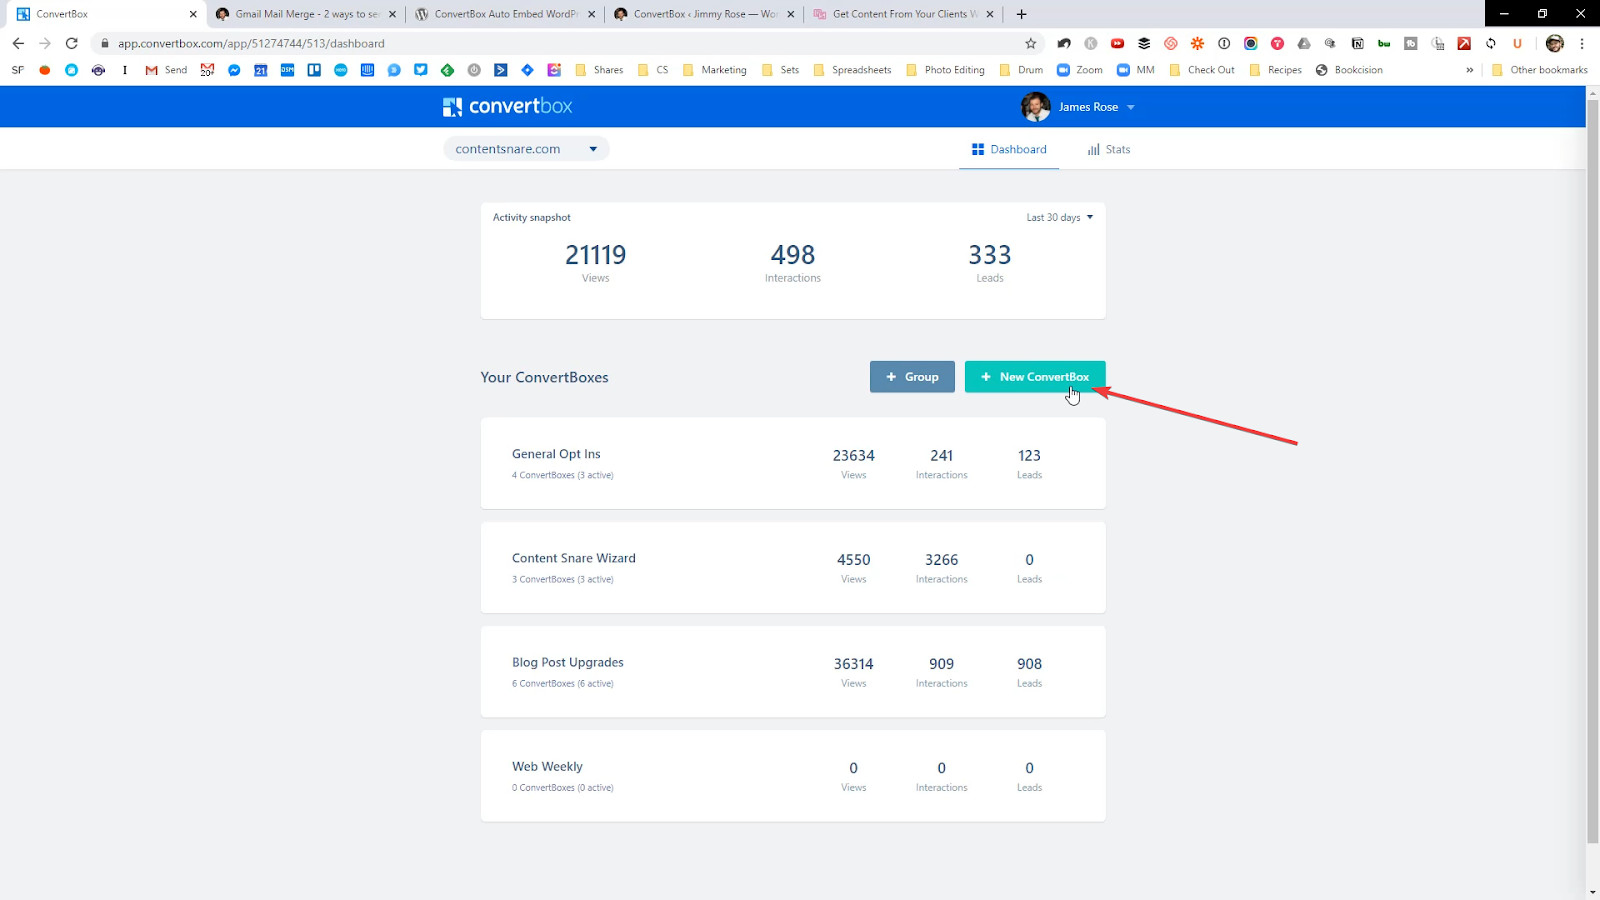
You only have to give it a name and a group.
What’s a group?
It’s kind of like a folder, but there is an extra feature built into this.
Let’s say you have a few different ways that people can opt in for the same PDF. You have a popup in one place, a sticky bar somewhere else and another opt in. If someone downloads your PDF, you don’t want to keep showing them the other two.
That’s where group goals come in. You would put all of these opt-ins in one group and tell ConvertBox to not show any of them once the person has opted in to one of them.
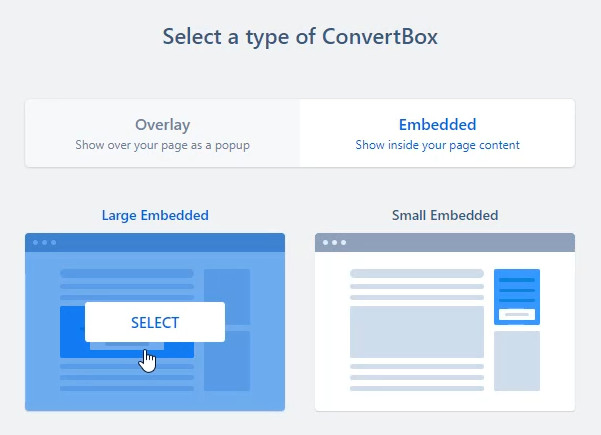
Create your lead capture form
ConvertBox supports all the usual forms you would have come to expect like:
- Sticky Bar – Bar that displays across the top of your site and stays in one place (sticky)
- Callout modal – Some people call this a slide-in and it shows in the corner of your site, on the left or right
- Center modal – More commonly referred to as a popup
- Full page – Takes over your entire site until the person scrolls down or closes it
- Embedded forms – These are also called inline forms and can be displayed in your blog posts or sidebars

Choose a template
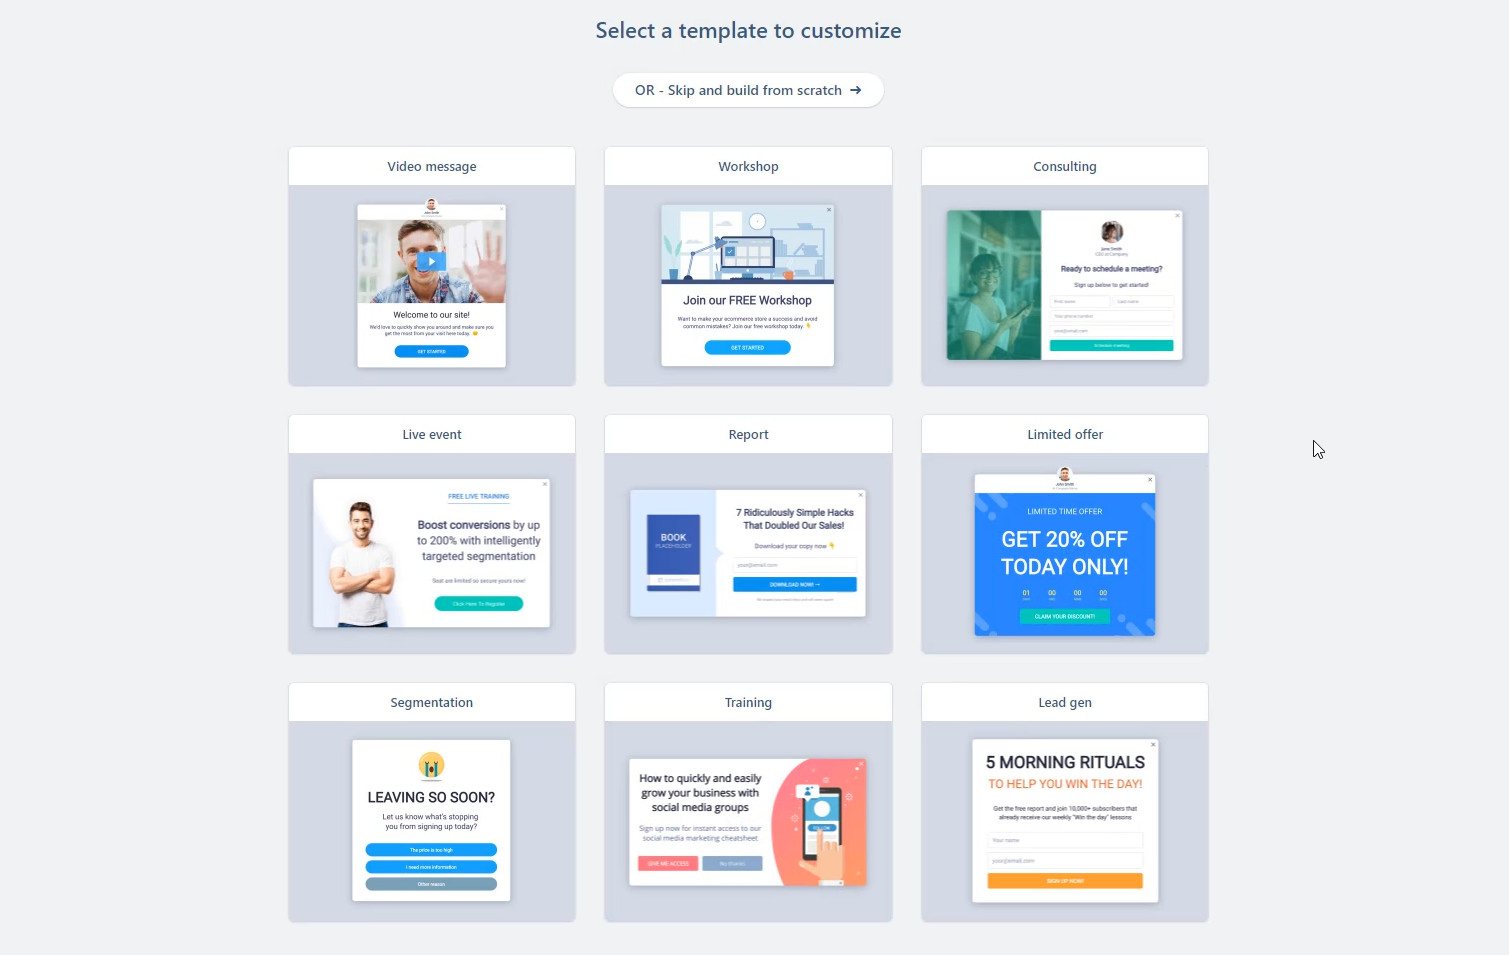
This is where you select a template.
All of the ones that come with ConvertBox are super simple. But don’t let this fool out – they work. But you can of course customize them
.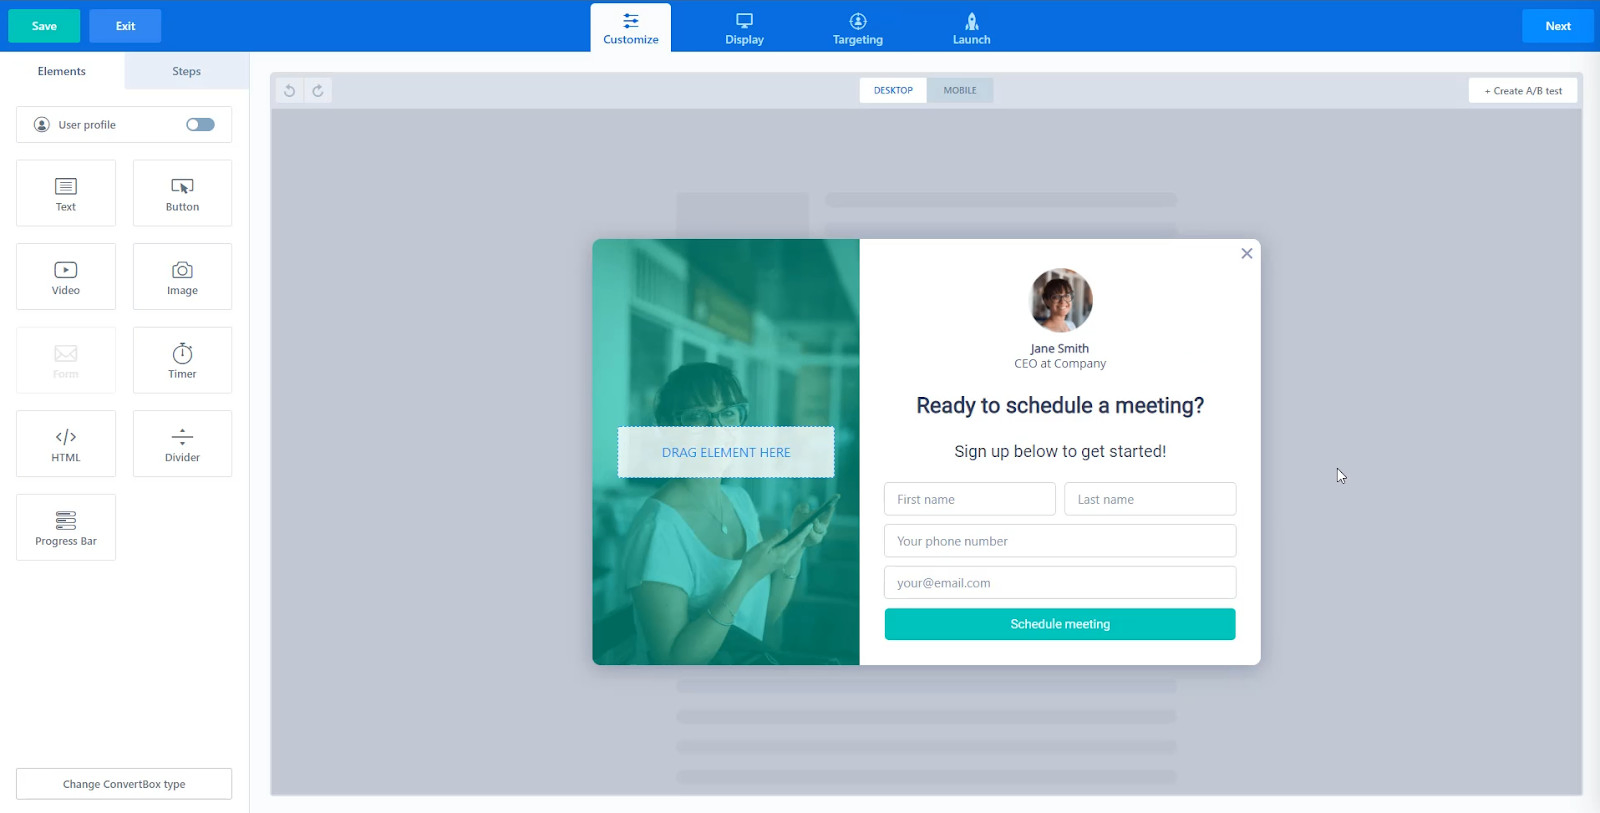
This is where you can customize your form. I’m not going into detail on that in this post but if you’d like to learn more drop in a comment.
If you click on different elements, the left bar changes to allow you to editor fonts, colours etc.
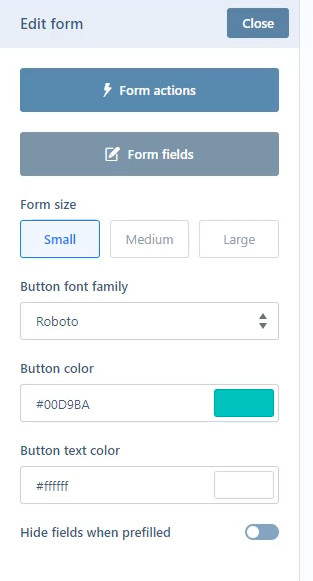
You can edit different parts of the design. Not going into a lot of detail here but if you’d like to see a video on more detailed editing drop in a comment.
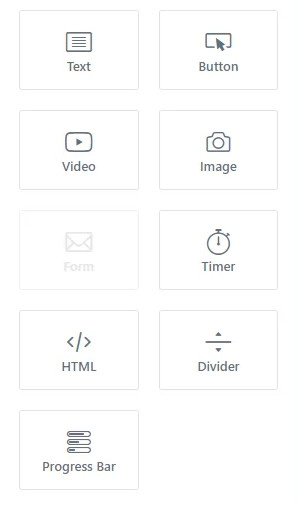
ConvertBox allows you to add all kinds of elements, including:
- Text
- Buttons (including side-by-side buttons)
- Videos
- Images
- Times
- Progress bars (for multi-step forms)
- Custom HTML
- And of course… opt-in forms
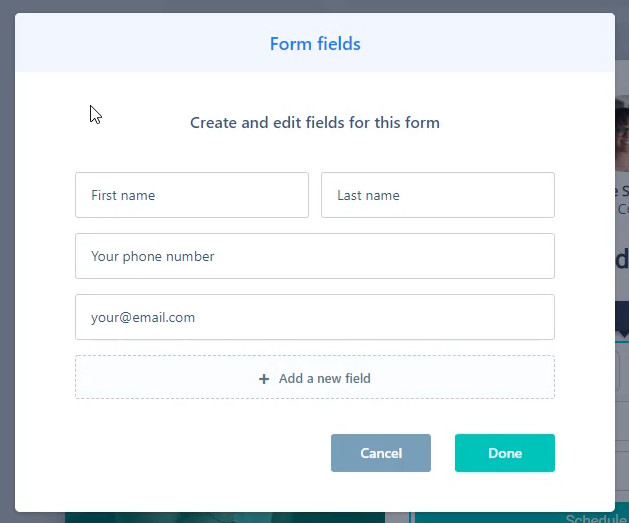
The main piece is the form. When you click on a form, you can edit the fields as you would expect, if you need more info from your leads.
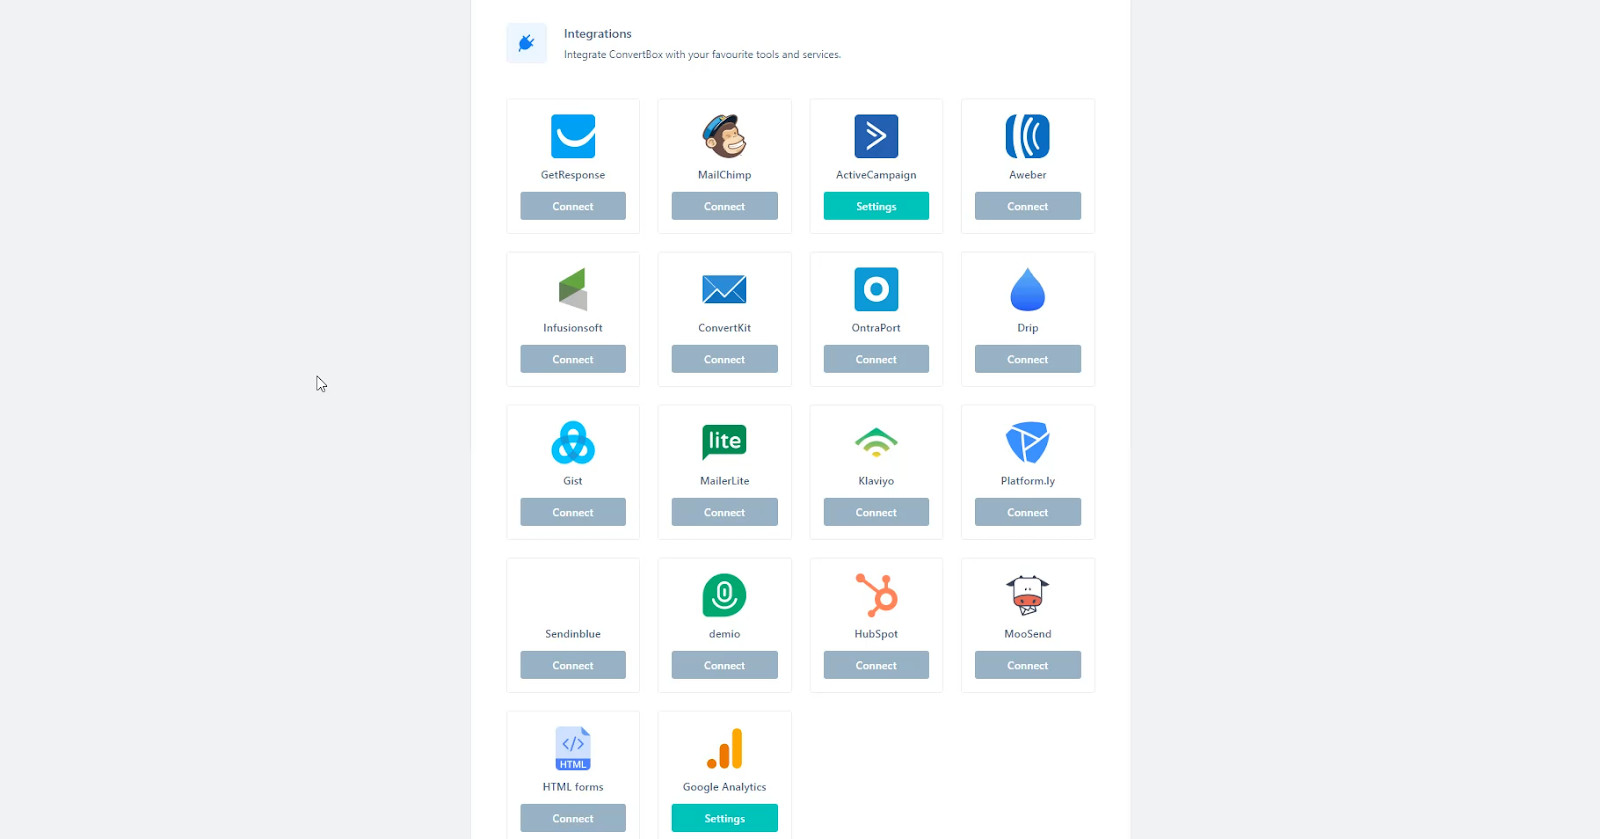
But the magic happens under “Form Actions”.
This is where you build your integrations with your CRM. By default there are loads of CRMs integrated.
If the one you want isn’t listed, you can always use HTML forms (most CRMs provide these) or webhooks. ConvertBox can send a webhook to Zapier and then push that through to your CRM.
Learn more about catching webhooks with Zapier here.
You can chain integrations together, so it might add them to a list, run an automation and tag them all at the same time. You may even want to add them to multiple CRMs.
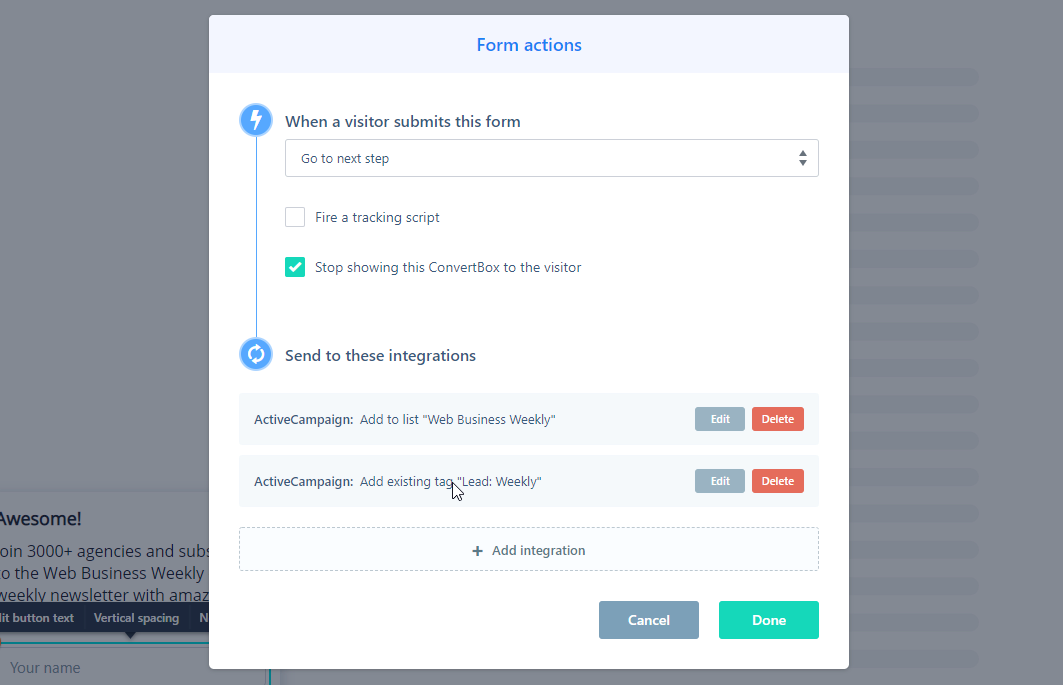
In this example, the form is going to move to the next step – in this case that is a “thank you” step – add them to a list, and add a tag in Active Campaign.
Define when the form will show
ConvertBox allows you to define all kinds of conditions on when the form should be shown.
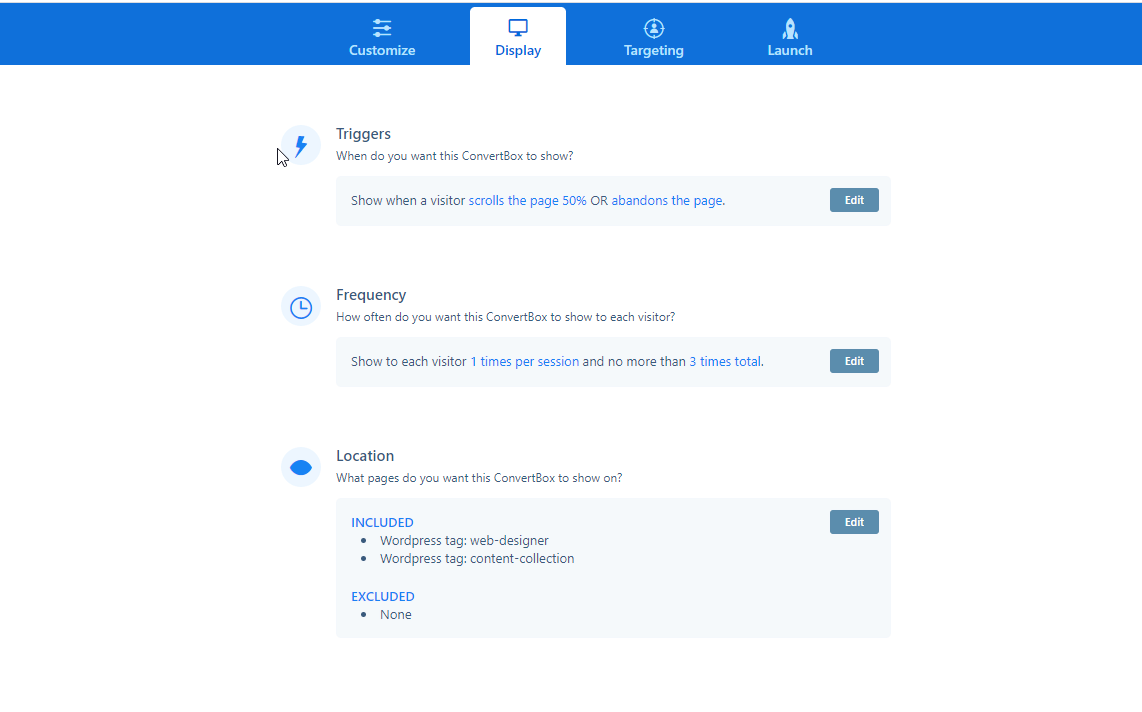
Triggers can include:
- Time on page
- How far the user has scrolled (scroll percentage)
- Period of no activity
- Page abandonment (detects when they are going to close the page)
- Clicking a link on the page*
* The ‘clicking a link’ trigger allows you to use a special link in buttons on your website that then pops up the lead generation form. You may have seen this in use around this site. There are normally two spots in each post that ask you if you’d like to sign up. They are both text links that trigger a ConvertBox.
Frequency determines how often you show the forms to the same visitor. These settings are nice so that you don’t annoy people.
Location determines where on the site you will display the forms. This can be a combination of different URLs and – if you have installed the WordPress plugin – tags and categories.
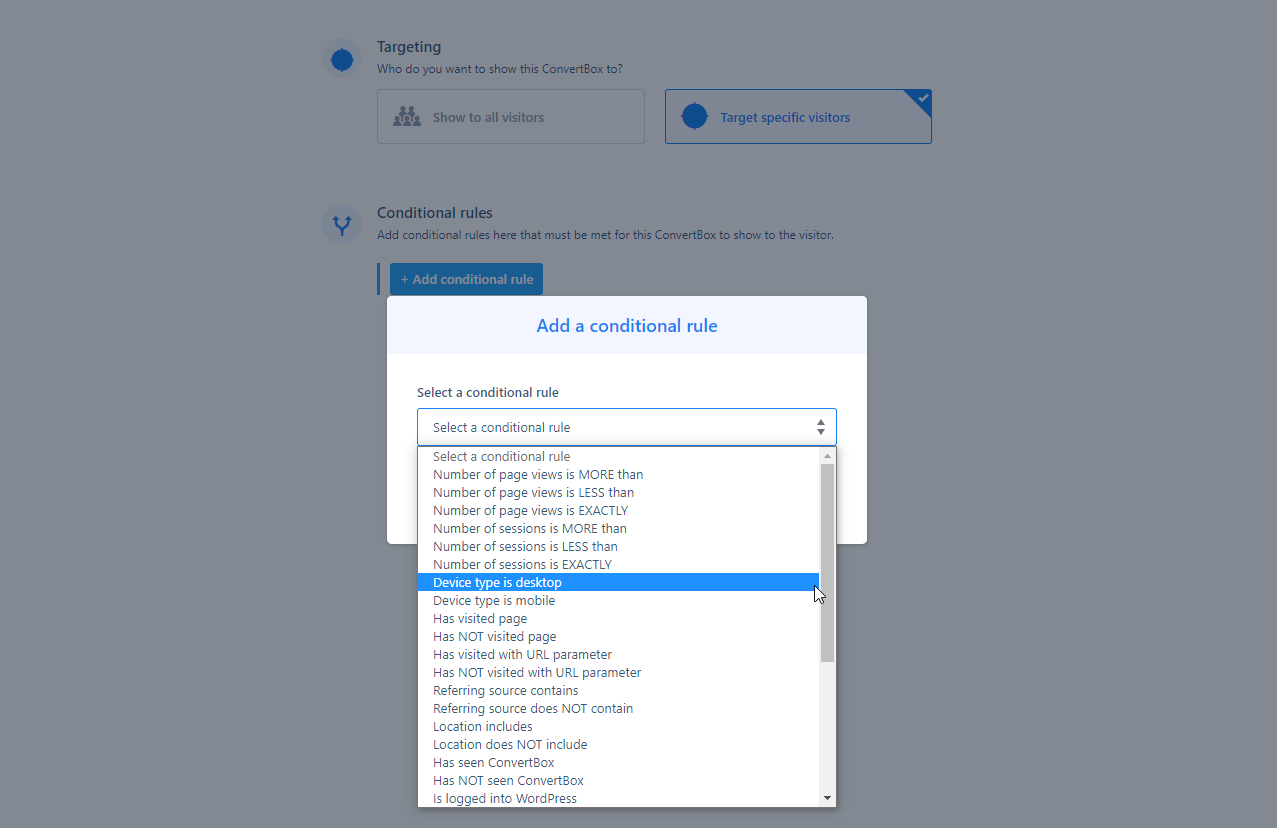
Define who the form will show to
This is a very cool feature where ConvertBox will show different forms to people based on what tags they have in your CRM.
So if they have opted in for your PDF, you might show them a different form for a 5-day challenge, or show them a discount code for one of your products.
You can set conditions based on how many pages they have viewed, where the came from (if they were referred from another website), or many other conditions.
Launch your lead capture form
On the final step, you give it a name and are able to schedule the form for certain times or days.
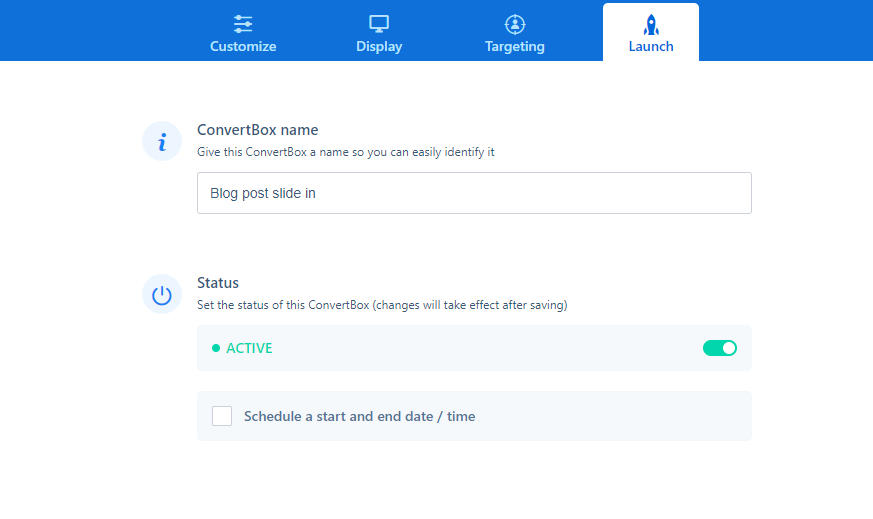
At this point, the popup is live! Because you’ve already installed the code, there is nothing else you need to do.
The exception to that is if you used a clicked link as the trigger. You’ll need to add that link on your website.
The cooler stuff
Multi-step forms, segmentation & choose your own adventure
This is where things start getting really fun if you’re a big nerd.
ConvertBox can be used in ways that go beyond lead capture.
You can create multi-step forms. Visitors navigate between steps by clicking buttons. Check out this form we used to have on our home page
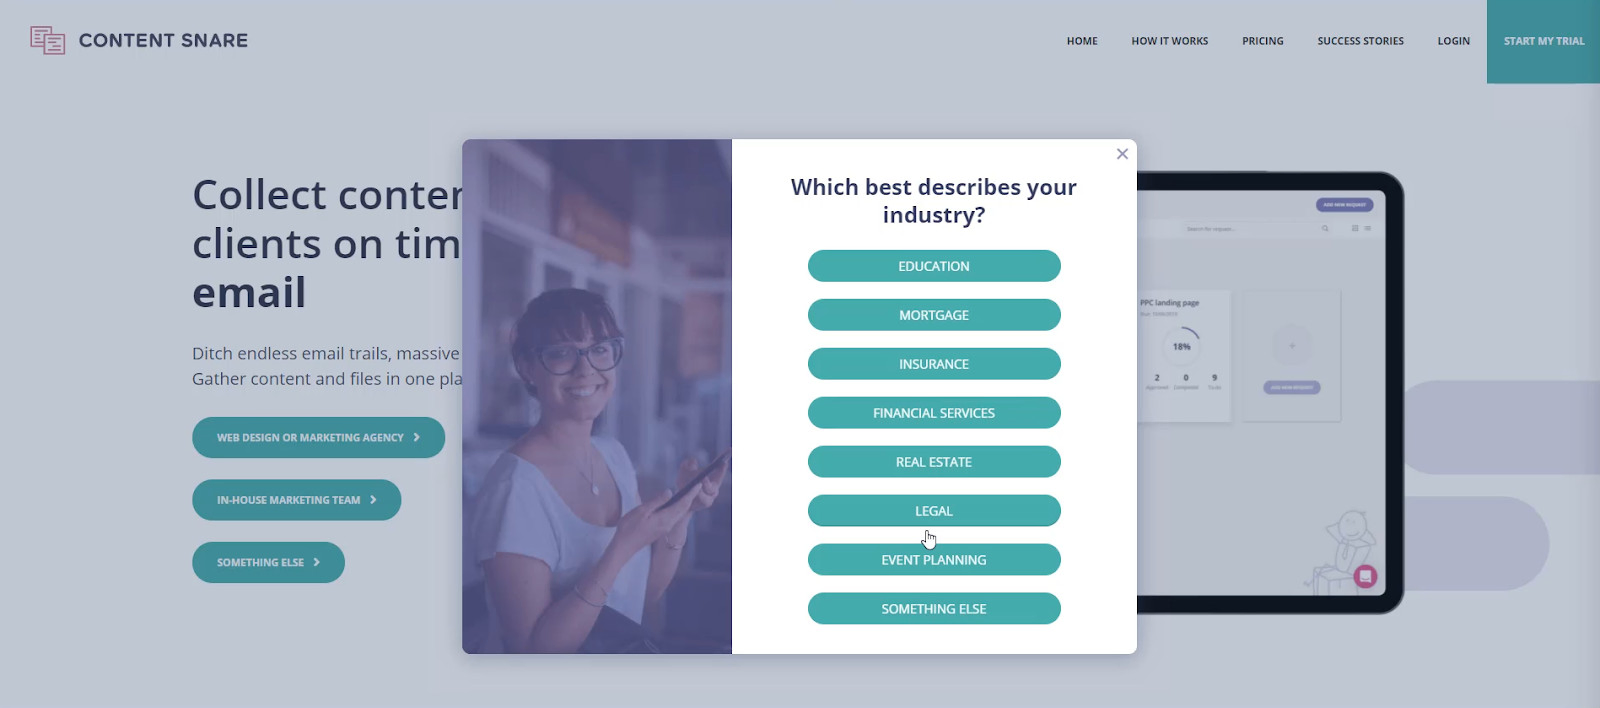
Visitors select their industry, then we ask some other questions and finally they end up here.
For every button they click, you can:
- Navigate to a different step of the form
- This might display a video, a form or more questions
- Tag them in your CRM* (epic for segmentation)
- Fire tracking scripts (for Facebook remarketing or Google Analytics events)
- Open a page on your site
- Track which buttons get clicked the most often
* When tagging people in your CRM, you can have the email form before OR after the button. Let’s say the first step is the form. That adds them to the CRM. Subsequent steps ask a few questions. Each one of these could tag the person with their response.
You could also ask the questions first. ConvertBox can remember which buttons they choose. Then if your form is at the end, it’ll add them to the CRM and tag them as necessary.
This feature is HUGE.
Creating steps
Steps are all created under the Steps tab on the left hand side.
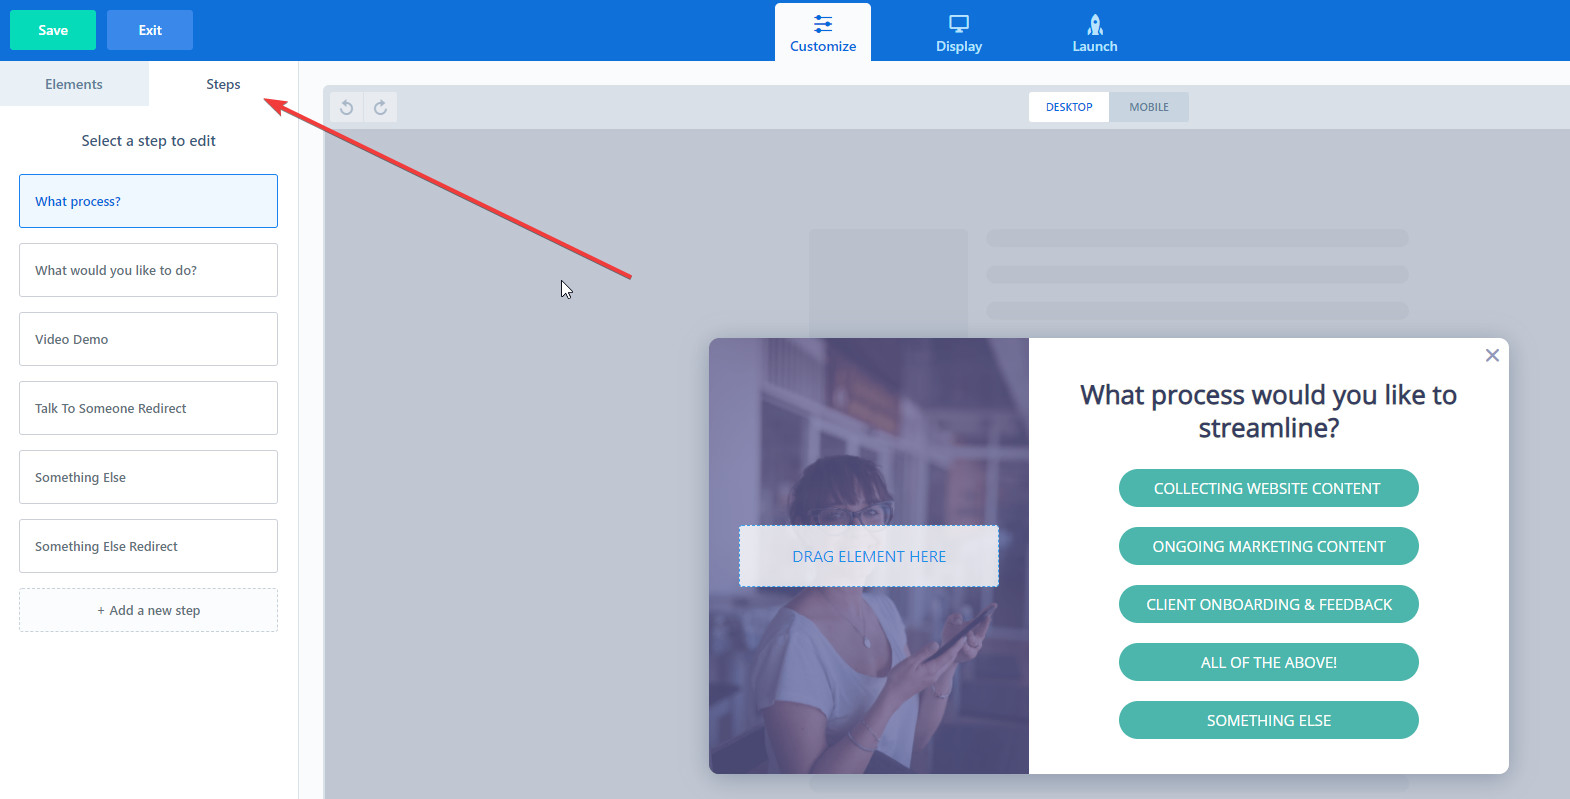
Here you can see a list of a few steps. In our case they all look pretty much the same and just have buttons on them that visitors use to navigate through.
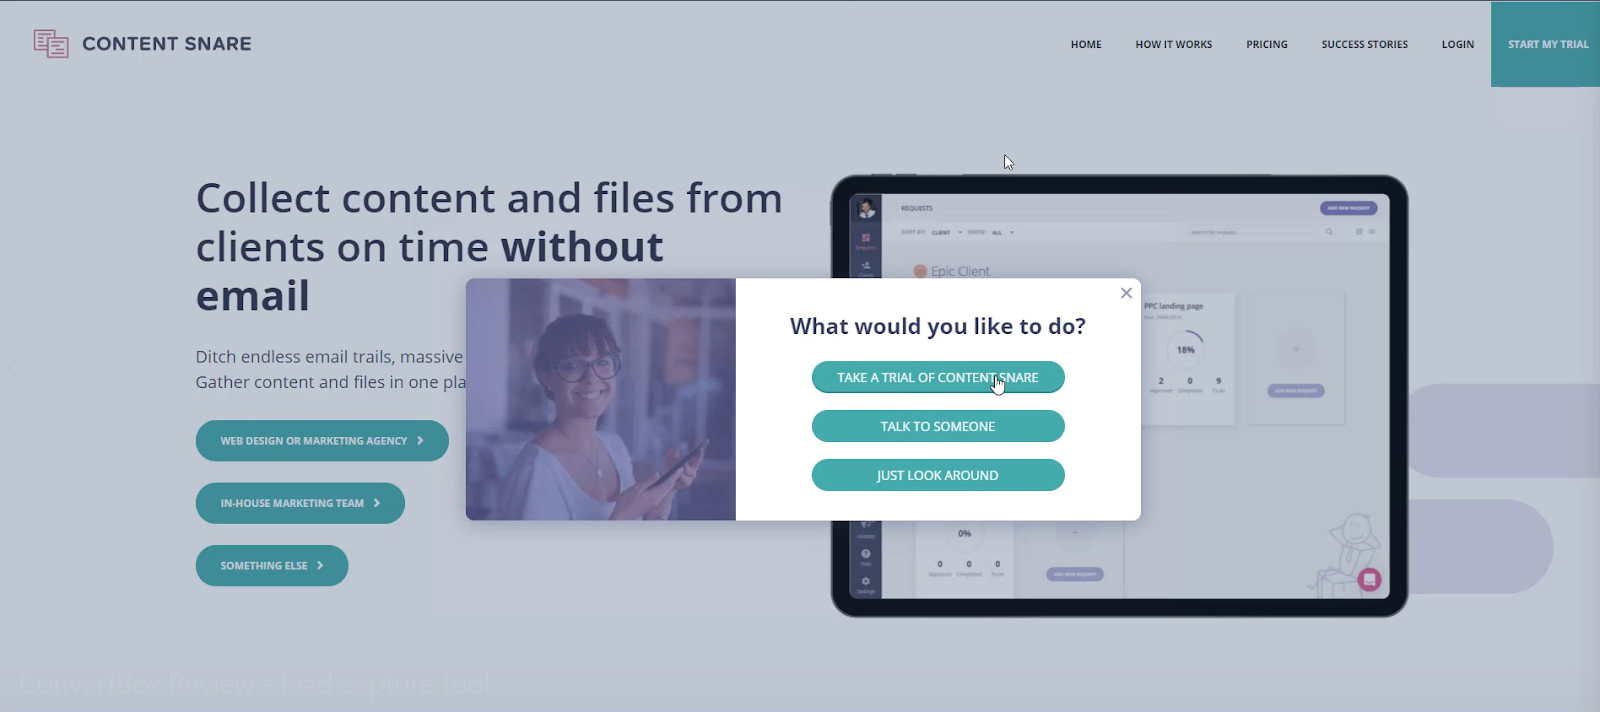
If they say they want a video demo, you could either send them to a page on your site, or just show it in another step like this
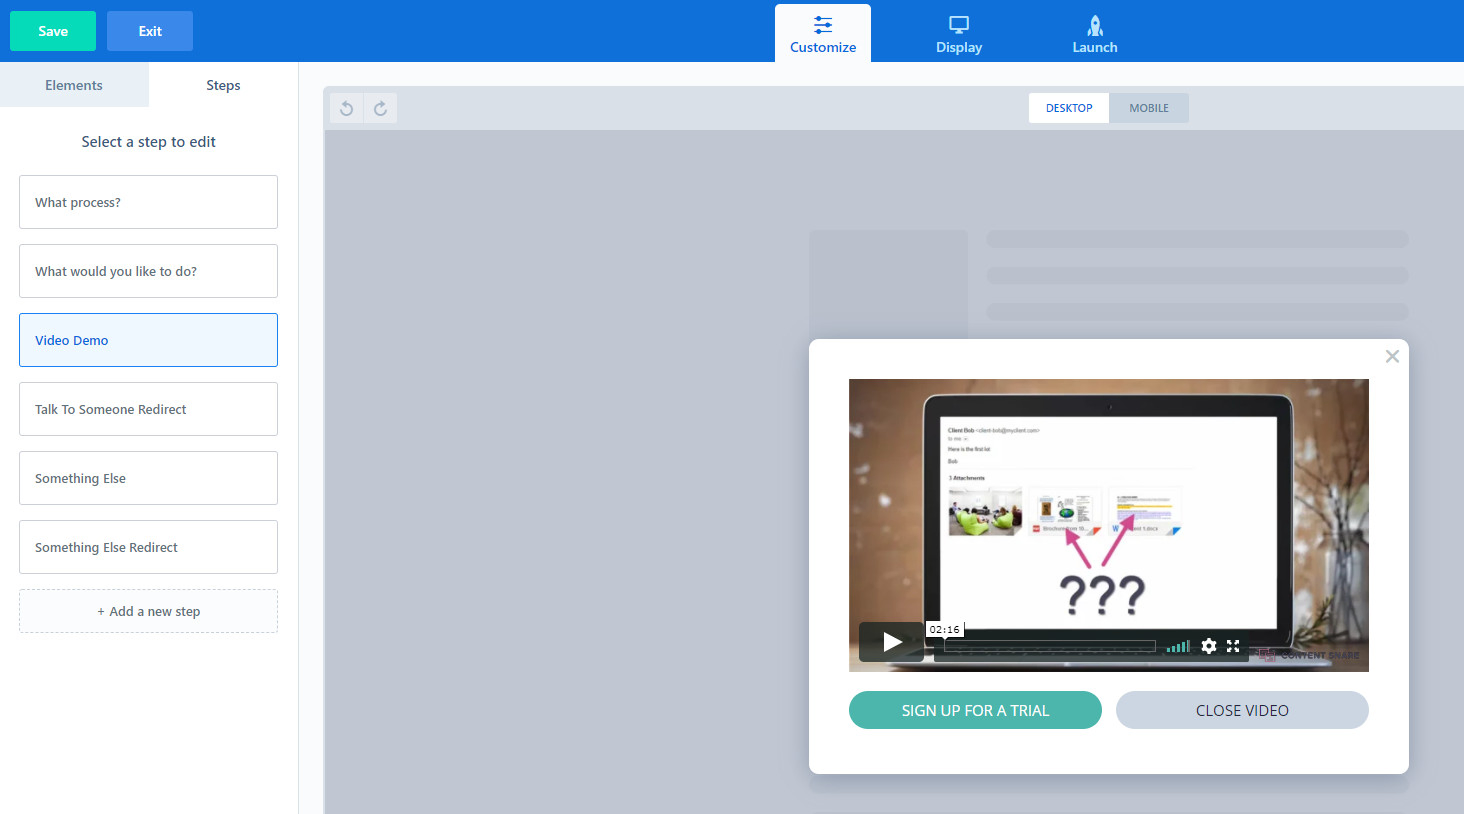
In this case we’re not even capturing leads. It’s just a way for visitors to tell us what industry they are in, and what they’d like to see.
We weren’t sure what industries were visiting our site the most, so asking this question in a ConvertBox allowed us to get a better idea. That’s because ConvertBox keeps statistics on every button clicked on every step. It looks like this:
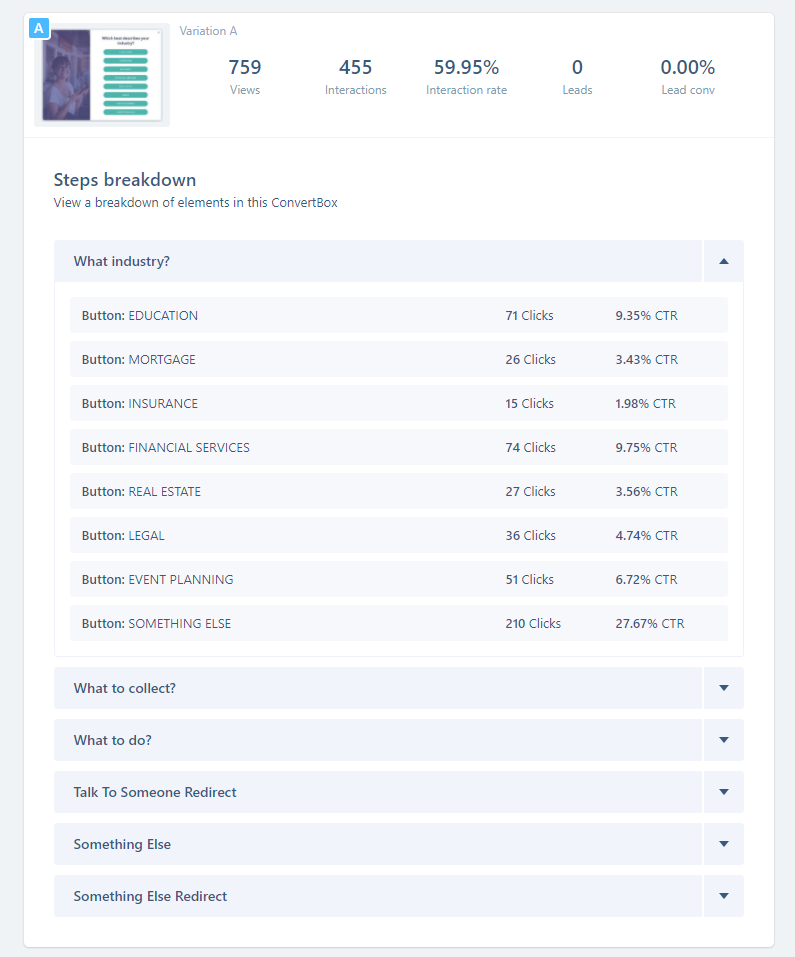
This steps feature, and how it allows you to tag and segment based on what buttons they click is INSANELY powerful and allows you to learn a lot about your leads so you can send them the right information. It’s a better experience for them AND you.
One thing I haven’t dug into here is A/B testing, which of course ConvertBox supports. It’s super simple to create multiple variations of a form and rotate them between visitors to see which one converts best.
ConvertBox reports all of this in the statistics for each form on your dashboard.
Summary
ConvertBox is straight up one of the best purchases I have made. We’ve stopped using all other opt in tools in favour of it, on our 3 major sites – JimmyRose.me, AgencyHighway.com & ContentSnare.com
It has a great feature set that allows you to effectively segment the people coming on to your list. It integrates with most popular platforms. Best of all, it is SIMPLE and so easy to get going.
To grab the lifetime deal for ConvertBox, click through here.
This is an affiliate link and I do get a bit of a reward for referring you. But everything you’ve just read is legit – click around the site and you’ll see I’m using ConvertBox in loads of places
