In this post you’ll learn how to integrate Zapier with Google sheets. You’ll see the 5 most common triggers and actions and how to use them.
It follows the example of adding contact form leads to a Google spreadsheet.
Using Google sheets with Zapier is super powerful if you know how to use it. I’d go as far to say that working in Google sheets is one of the most important skills you can have with Zapier.
This video does not go step by step into how Zapier works. If you’re brand new, watch my Zapier tutorial.
Check out the Zapier Google Sheets documentation
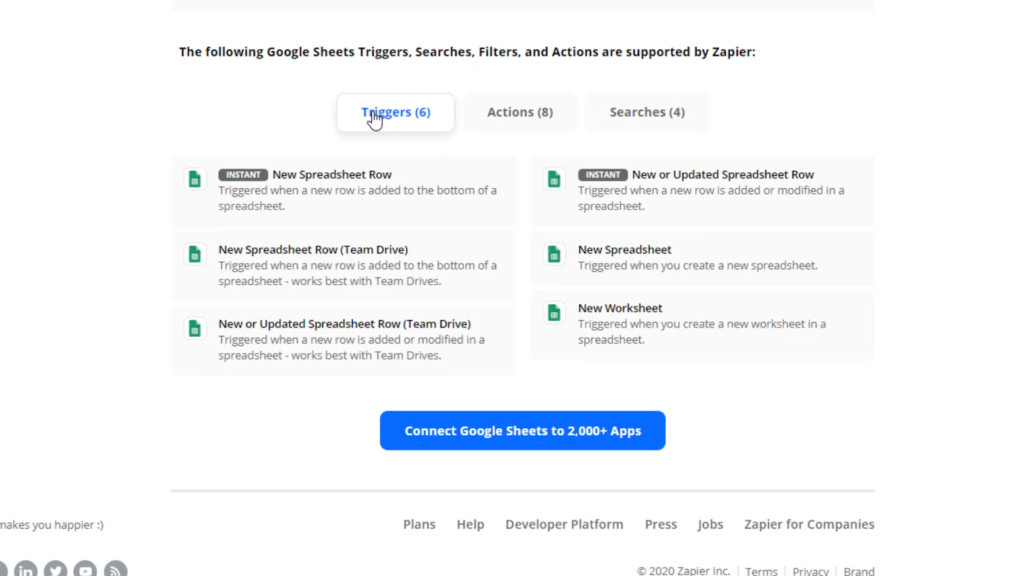
First up, open up the Google sheets documentation at Zapier. The most important part is right down the bottom, where you can see the triggers, actions and searches.
Google Sheets Zapier Triggers
First you’ll see the triggers that can be used. These are what you can use to start workflows in Zapier. The two most common triggers that you will learn about in this post are:
- New Spreadsheet Row – this of course fires when you add a new row to the bottom of a spreadsheet. Bottom is the key word here. Don’t add rows in the middle or you may encounter problems.
- New or Updated Spreadsheet Row – This trigger also fires when a row is updated
Google Sheets Zapier Actions
Moving on to actions, these are the actions that Zapier can take inside Google sheets.
The most common ones that we’ll cover are:
- Create Spreadsheet Row – This creates a new row in your sheet, and can add it at the top or bottom
- Update Spreadsheet Row – This updates an existing row, and should be paired with a lookup step, which you’ll see below

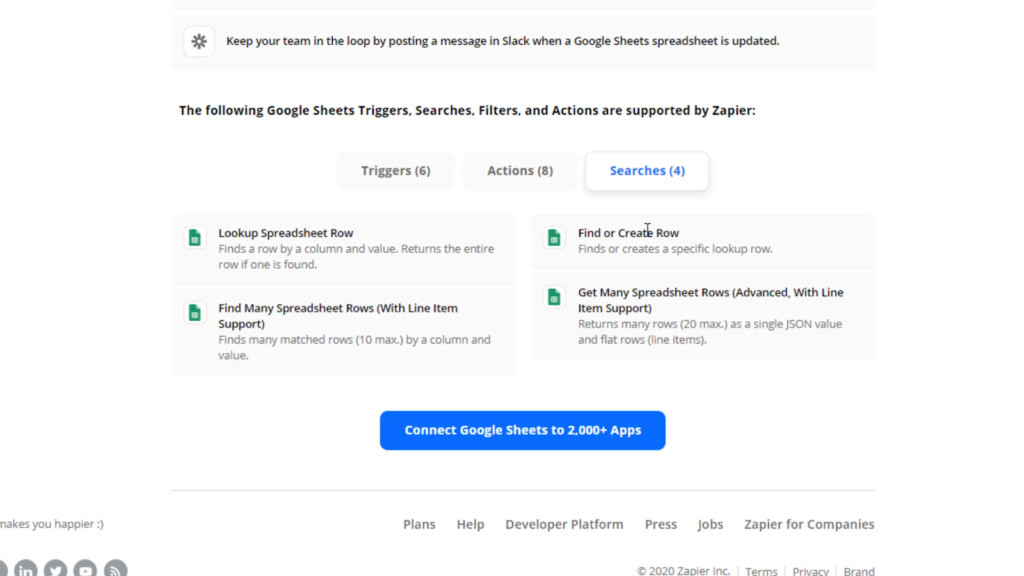
Google Sheets Zapier Searches
Searches are when Zapier looks for something in Google Sheets. The only one you really need to know at first is:
- Lookup Spreadsheet Row – with this you choose a column, and then a value to find in that column
With these 5 triggers, searches and actions you’ll cover 80-90% of workflows with Zaper & Google Sheets.
Example: Add new row to Google Sheets
First, go and create a simple spreadsheet with a header row that has:
- Name
- Message
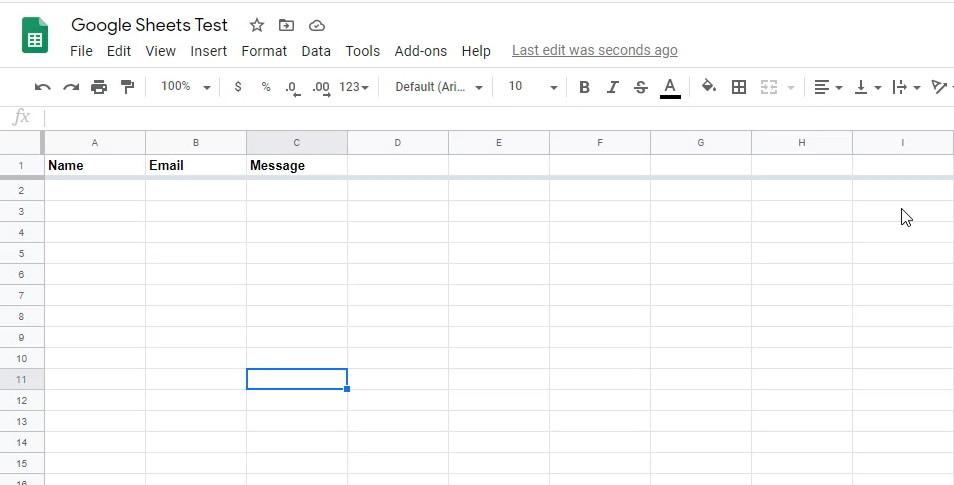
We will add to this sheet every time someone fills out a contact form on your website.
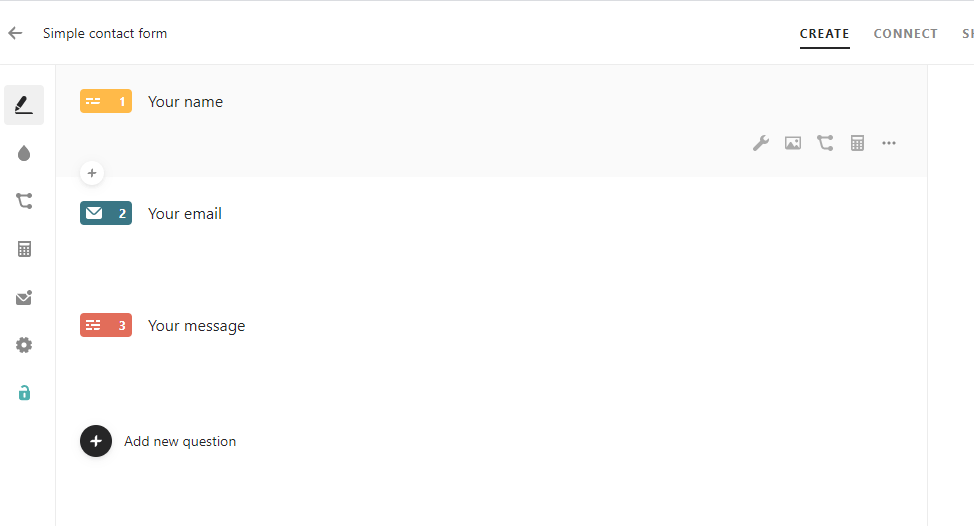
For this example I’m using a simple Typeform with Name, Email and Message as the fields.
So let’s set this up in Zapier.
Start by clicking the “Make a Zap” button in your account.
Then:
- Choose a trigger app of Typeform (or whatever forms tool you’re using)
- Set up your account
- Choose the form you want to get responses from
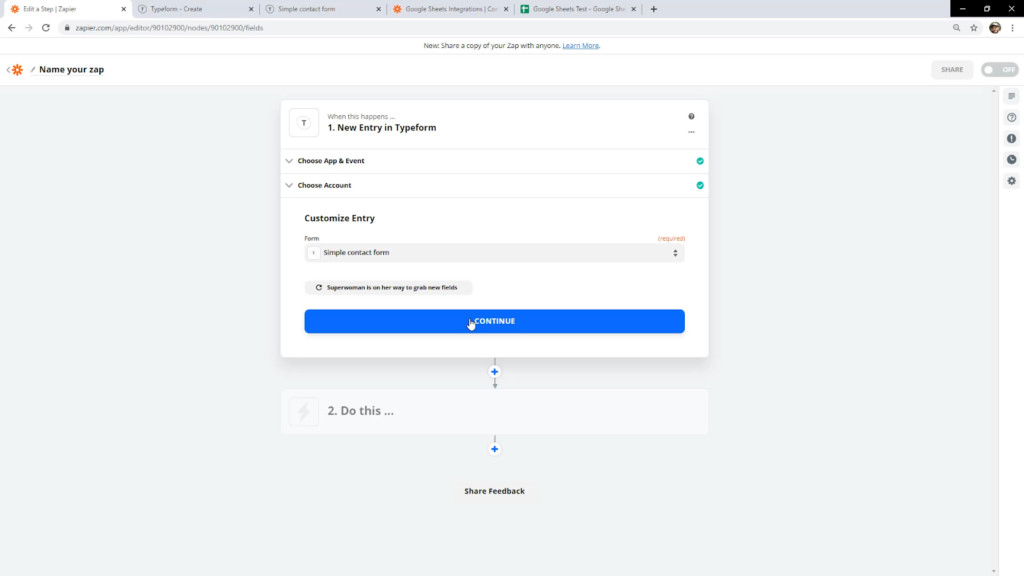
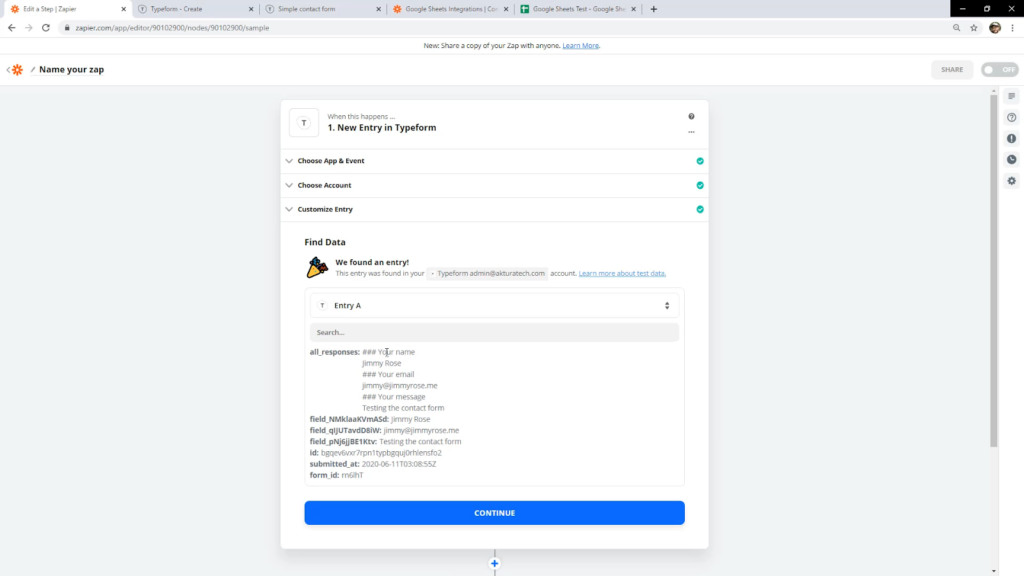
When you run a test, you should see some example data from your form. This depends on different tools, but the easiest way to test is just go to your form and submit it with your own data.
It should look something like this where you can see a name and email.
For an action:
- Choose Google Sheets
- Connect your account
- Select the spreadsheet you just created in Google sheets
- Select the worksheet where you want to store leads
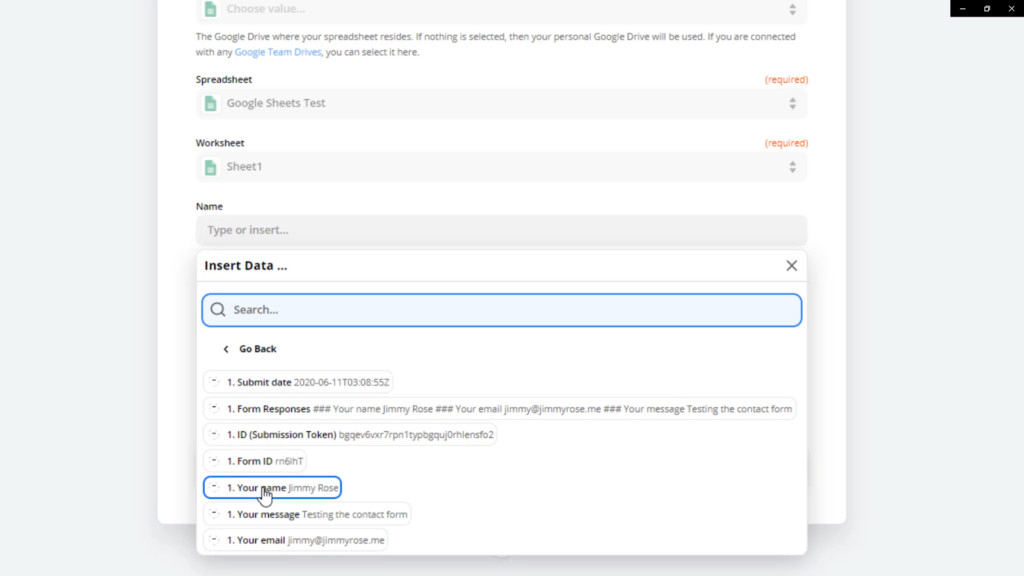
- Fill out the Name, Email & Message
To map in the fields for Name, Email & Message, simply click in the box and find the variable from Typeform.
Once you have done the same for email & message, click the button to test. Go back to your spreadsheet you’ll see the data has come across.

If you turn the Zap on now using the switch at the top right of Zapier, all leads will be automatically added to this sheet.
Example: Add new Google Sheets rows to a CRM
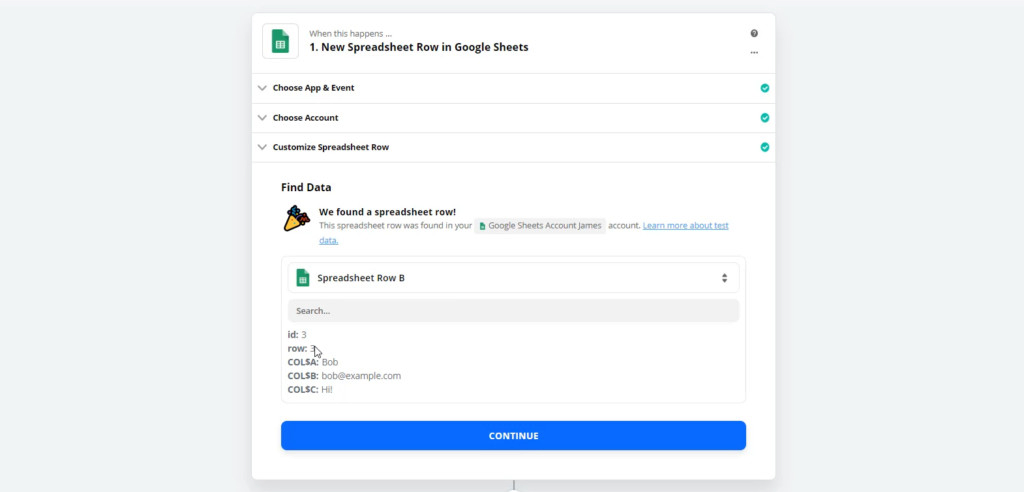
This is an example of the Trigger for “New Spreadsheet row”
Note that this will trigger when you add a row to the bottom of the sheet. If you add rows in the middle of the data it can cause problems.
Pretend you want to add anyone that gets added to this sheet to your CRM.
Create a new Zap and choose Google Sheets -> New spreadsheet row.
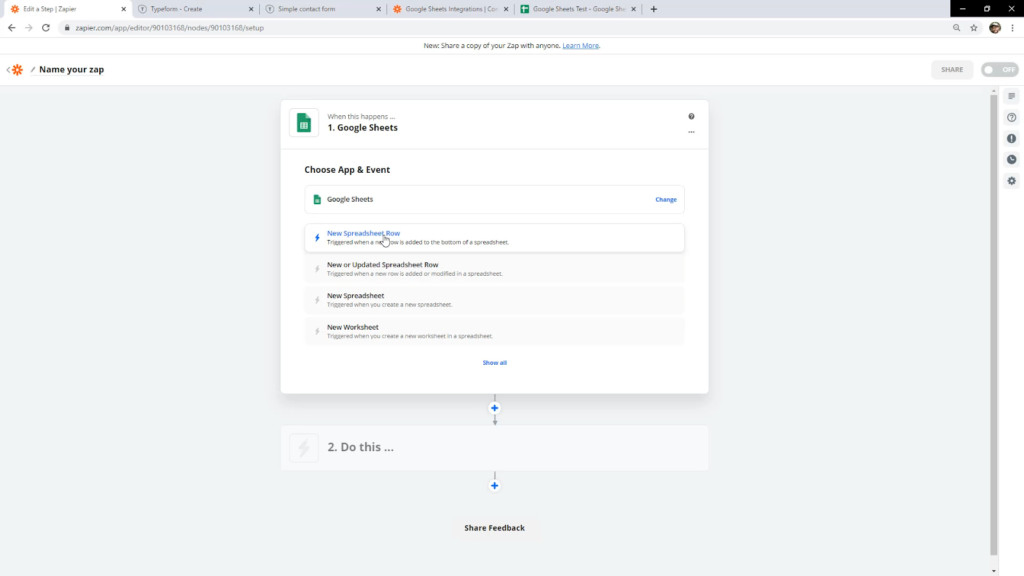
The trigger setup is very simple.
Just choose the spreadsheet and worksheet you want to trigger this workflow.
When you test, you may see column names like COL$A instead of the column name. Ignore this as in the next step you’ll see they display properly.
Then move on to create an action.
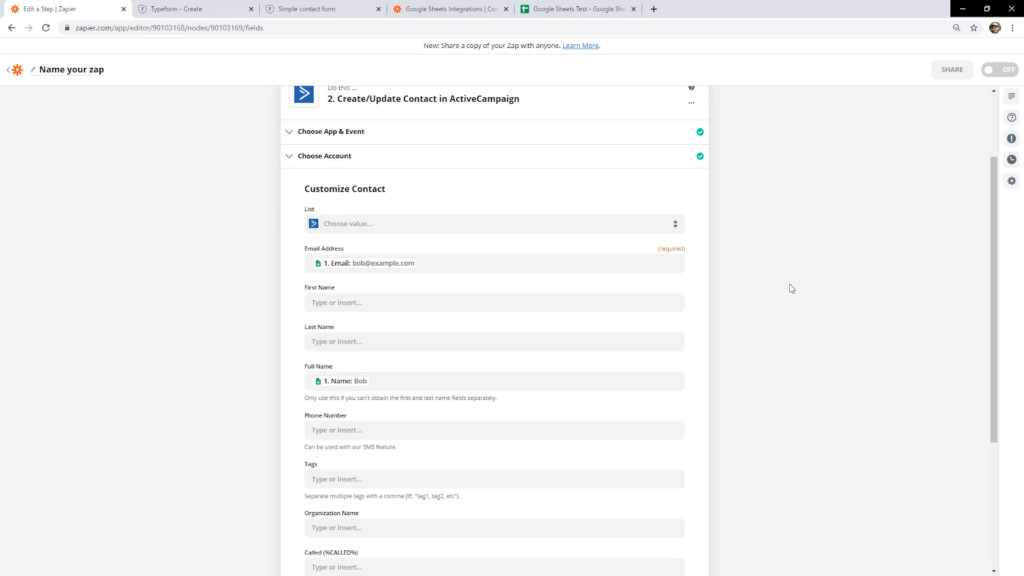
In my cause, I’m using Active Campaign as my CRM.
As usual:
- Select the app (Active Campaign)
- Choose the action “Create/Update contact in Active Campaign)
- Connect your account, following the instructions you are given
- Map the data from the spreadsheet to the CRM
In this case I’m just using Name & email.
If you test, that example contact will get added to your CRM.
Turn that Zap on and anyone that gets added to the sheet will go to the CRM. Even if we just add a row in manually in the Google sheet.
Example: Trigger on updated row
This is only a slight variation on the previous workflow.
Google sheets also has a trigger on “New or updated spreadsheet row”.
This means that if an existing row is updated, it will also fire the workflow.
Let’s say we want to manually check each person in the spreadsheet before we add them to the CRM. You could add a column called “Checked”. When it is set to “Y”, we trigger the workflow to add them to our CRM.
Modify that previous workflow to use the updated trigger.
Then:
- Click the + button in between the Trigger and Action in Zapier
- Choose Filter as the app
- Set it up like this
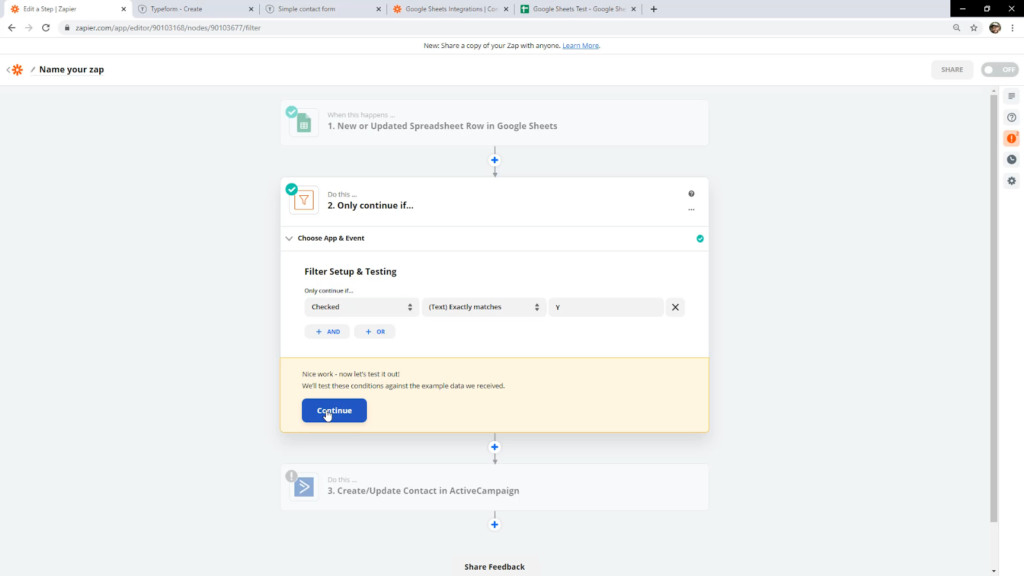
Now the workflow will only continue if the “Checked” column has a Y in it.
That’s it!
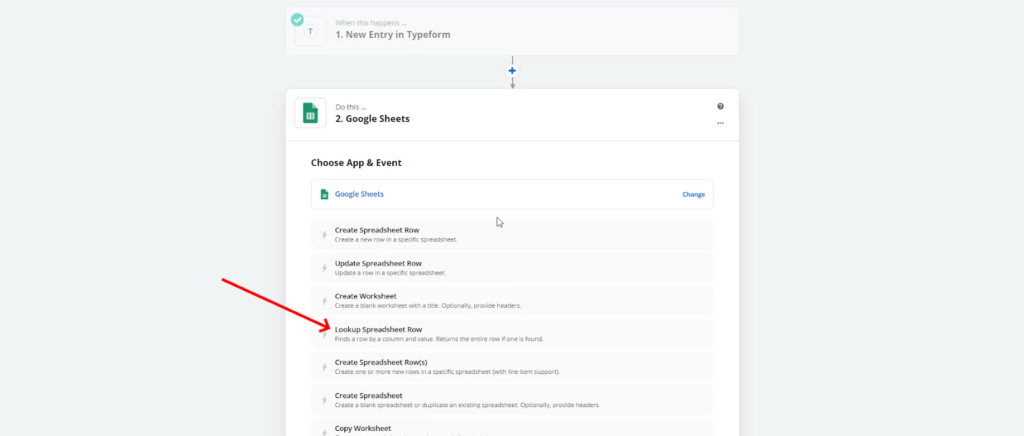
Example: Lookup & update row
‘Lookup row’ and ‘update row’ often work together in Google Sheets. You need to look up the row before you can update it.
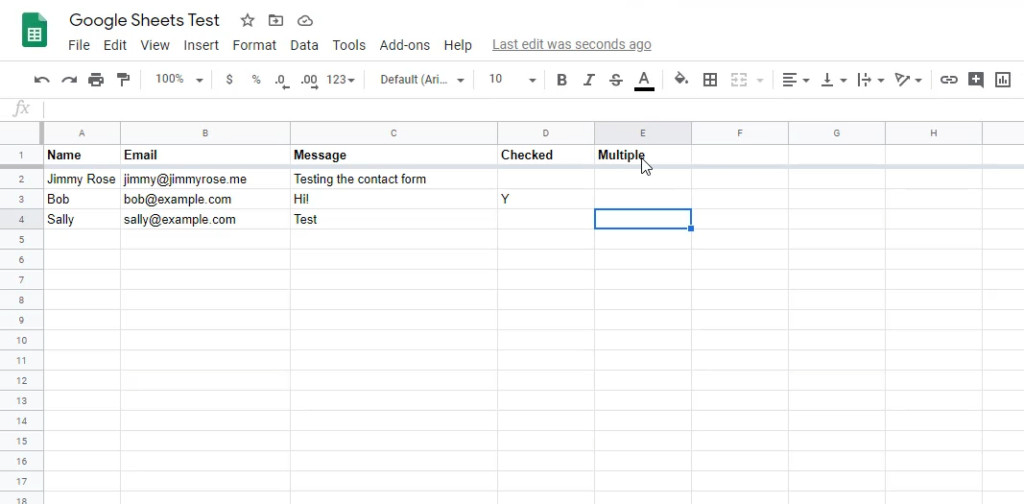
Say that if someone submits the contact form again, we don’t want to create another row. Instead we’ll add a column to say they have submitted the form multiple times.
So first, add a new column to the sheet called “Multiple”.
Back over at Zapier, go back to the contact form workflow. Delete the action that ads the lead to the spreadsheet.
Instead, add a lookup row step with Google sheets.
Choose the column “email” and map in the Typeform email. This means “lookup the column called email, and find this email address in it.”

But what if the lead doesn’t exist yet?
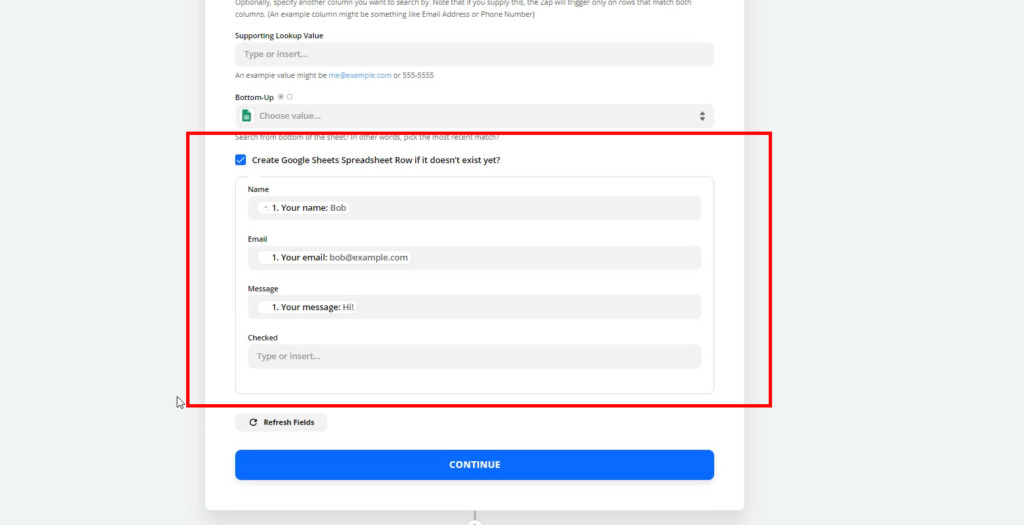
Well we can add them in the same step. There is a tick box at the bottom called “Create Google Sheets Spreadsheet Row if it doesn’t exist yet”
Tick that, and you’ll see some extra options. Fill in the data from Typeform.
Now, this will lookup the row if it finds the email address. If not, it will create the row.
If you test the trigger, you’ll see that it gives us back some extra data.
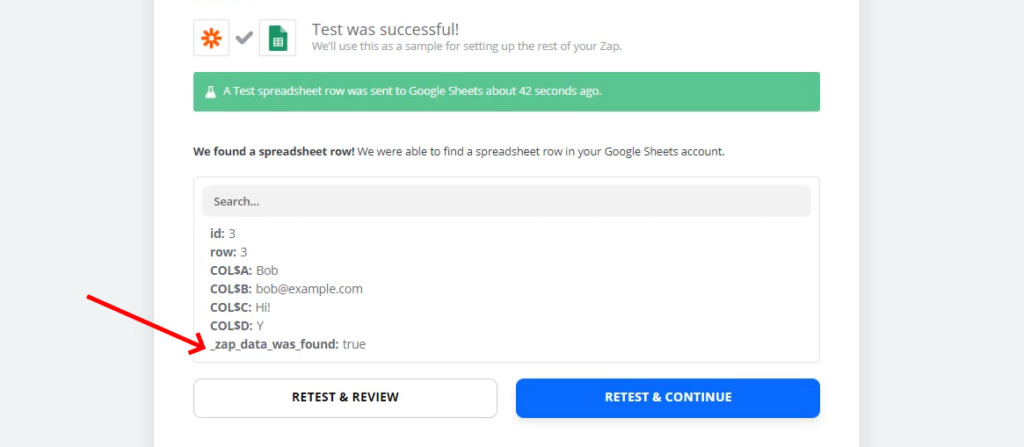
This is ‘true’ if it found an existing row. ‘False’ if not and it created the row.
That means we can then create a filter to stop this workflow if this row was created – meaning it is the first time a person filled out the form.
Set it up to check “Zap Data Was Found” is “(Boolean) is true”
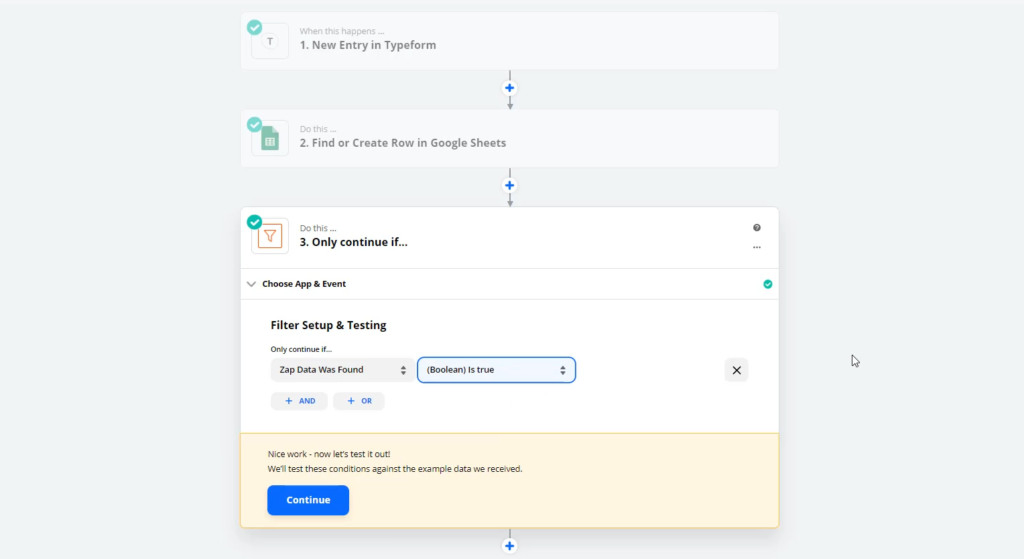
This will stop here if the row was created.
But if it found the row, we now want to update it to say that the person submitted the form multiple times.
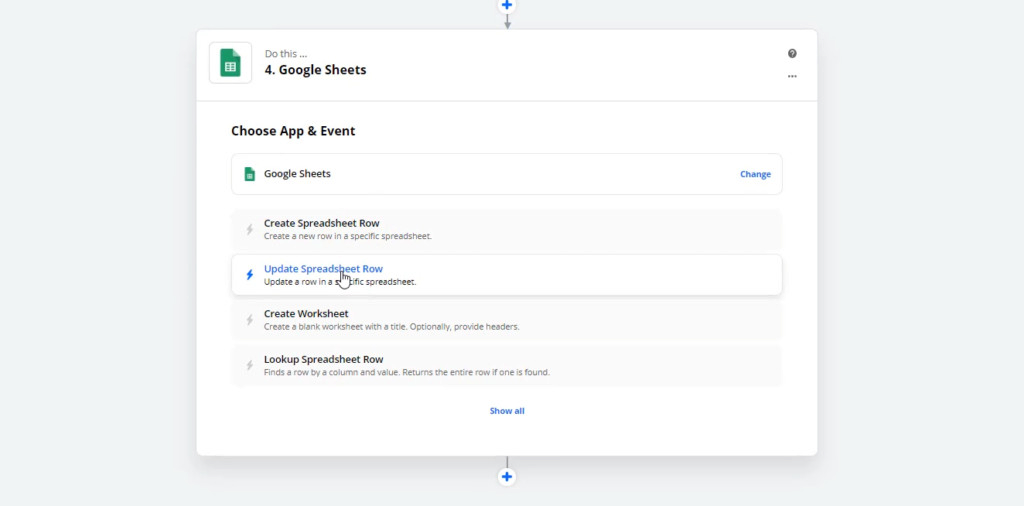
So go ahead and create an “Update spreadsheet row” action. This will now be the 4th step in the workflow.
It allows us to create the row if one wasn’t found, so we want that.
Choose the Spreadsheet & Worksheet as usual.
When you’re choosing the row, the default dropdown isn’t very helpful. You want to switch over to “Custom” and map in the Row “ID” from the lookup step.

This is an alternative method. If you hadn’t already created the lookup step, clicking the button that says “Add a search step” creates the lookup step and maps the ID to the update step. This is kind of creating the Zap in reverse though.
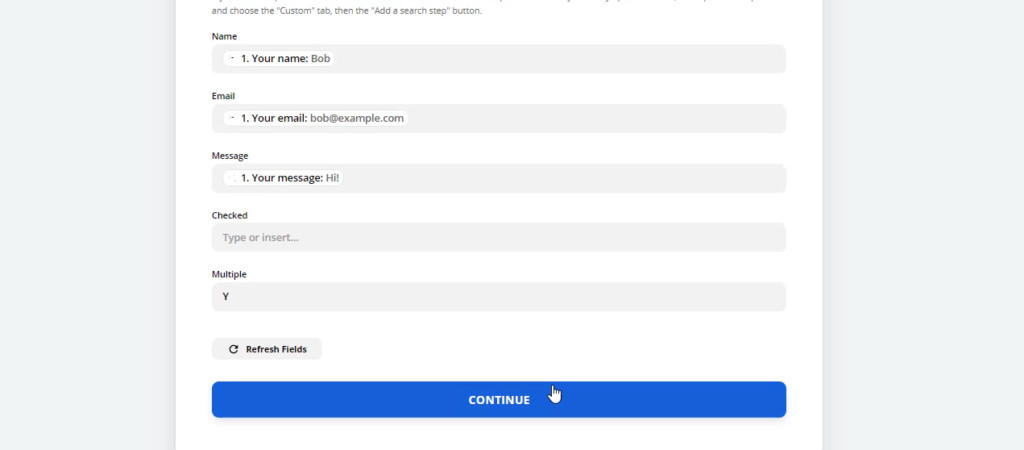
Finally, we have to tell Zapier how to update the row. Add the updated name, message and put a “Y” in the multiple column.
You can then continue and test the Zap is working, then turn it on.
This is only a basic example. If you wanted to count how many times the form was submitted, you would have to use a Formatter step to add 1 to the previous value and put the result into the update step. This is for a more advanced post though.
This combo of looking up and updating is very powerful. It means you can use Google Sheets as a way to store data and look it up from different workflows.
Wrap up
There you have it. That’s an intro to the 5 most common Zapier Google Sheets triggers and actions.
