If you have a contact form on your WordPress website and emails aren’t sending or landing in spam, this post & video is for you.
In fact, if you have a WordPress site you should still watch this, as almost every website should use this setup. I’ll show you step by step what you need to do.
You’ll learn how to use WordPress to send emails through an SMTP service like SendGrid.
Why WordPress emails aren’t sending
First, let’s look at what’s happening here and why your emails might not send at all, or end up in spam.
I’ll keep this part as short as possible, and a basic explanation instead of getting into the really techy stuff.
Your website has some kind of web hosting. Web hosting is just a computer that lives somewhere on the internet. So it’s actually this computer that is trying to send the email from your WordPress site – like when you try to test the contact form – it tells the computer to send an email.
On some web hosts, the computer isn’t actually set up for sending email. An example of this is Cloudways. In that case, WordPress tells it to send an email and nothing happens.
Some hosts are set up but still can’t send email, like shared hosting. These are things like GoDaddy, SiteGround or basically anything that costs $10 per month or under. In this case you’re actually sharing the same computer with often 100s of websites.
It’s really easy for spammers to sign up for a web hosting account and begin to send out loads of spam. So it kind of ruins it for everyone using the same computer. With email providers like Gmail, any of these shared accounts are going to end up in spam, or flat out blocked.
How to send emails from WordPress
The solution is actually really simple.
There are services that act purely as an email sender. So imagine there is a different computer that is set up to send email. We’ll set up WordPress to send a message over to that computer, instead of your host, to ask it to send the email instead.
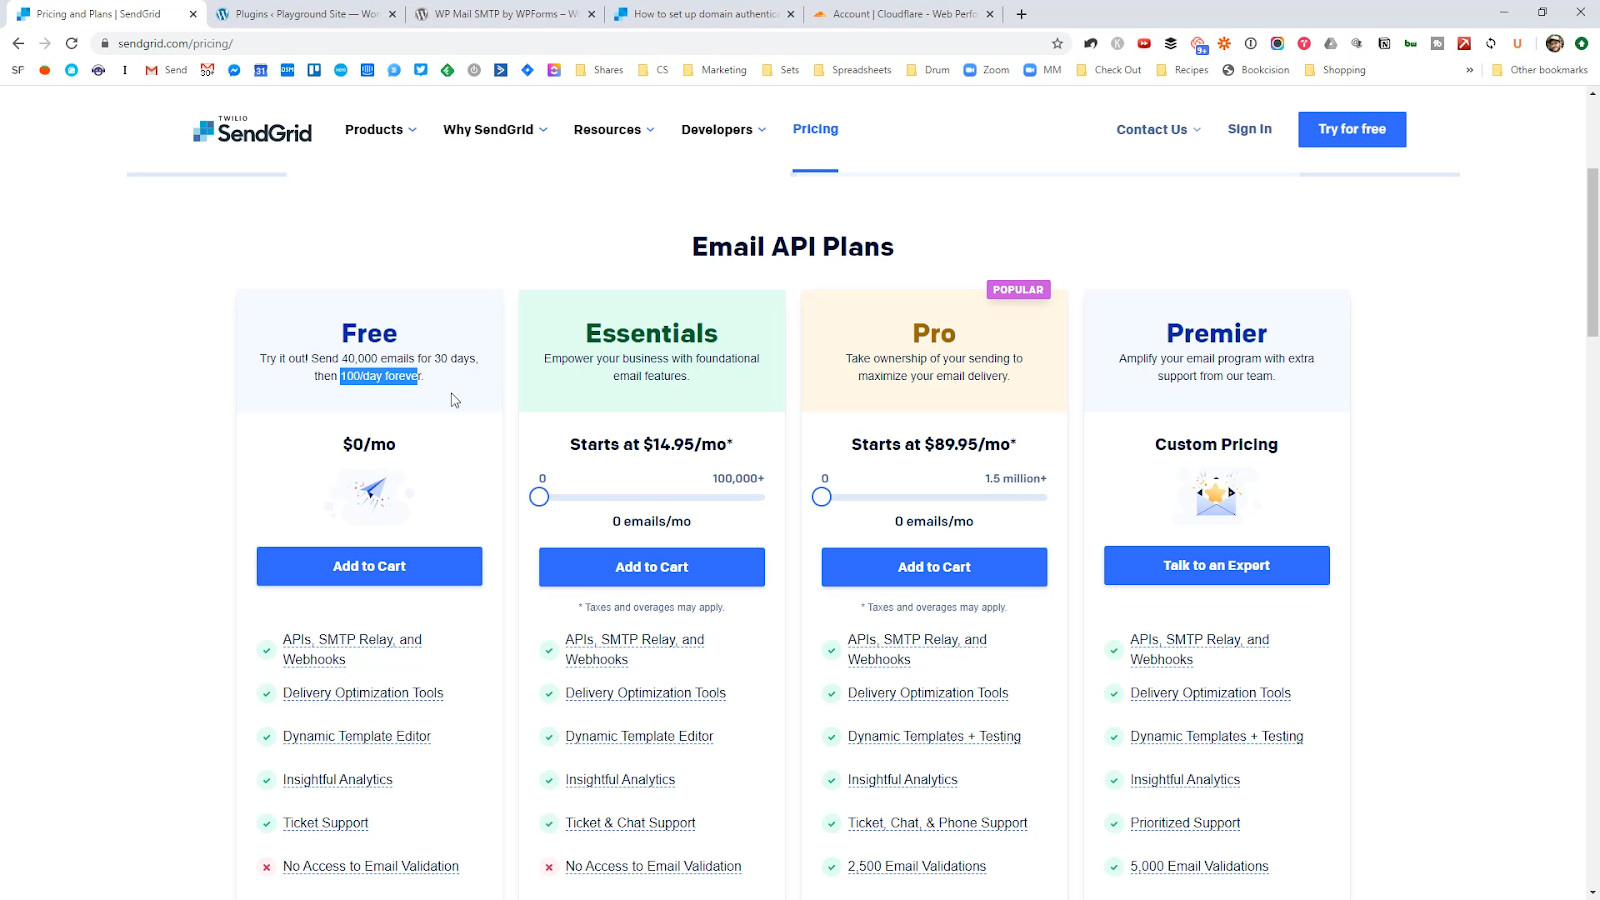
1. Sign up for an SMTP Service like SendGrid
I like SendGrid because of the free tier.
They allow up to 100 emails a day for free, and it’s unlikely your contact form is going to go above that. If it does, then you probably have enough business to handle the $14.95 a month on the next plan.
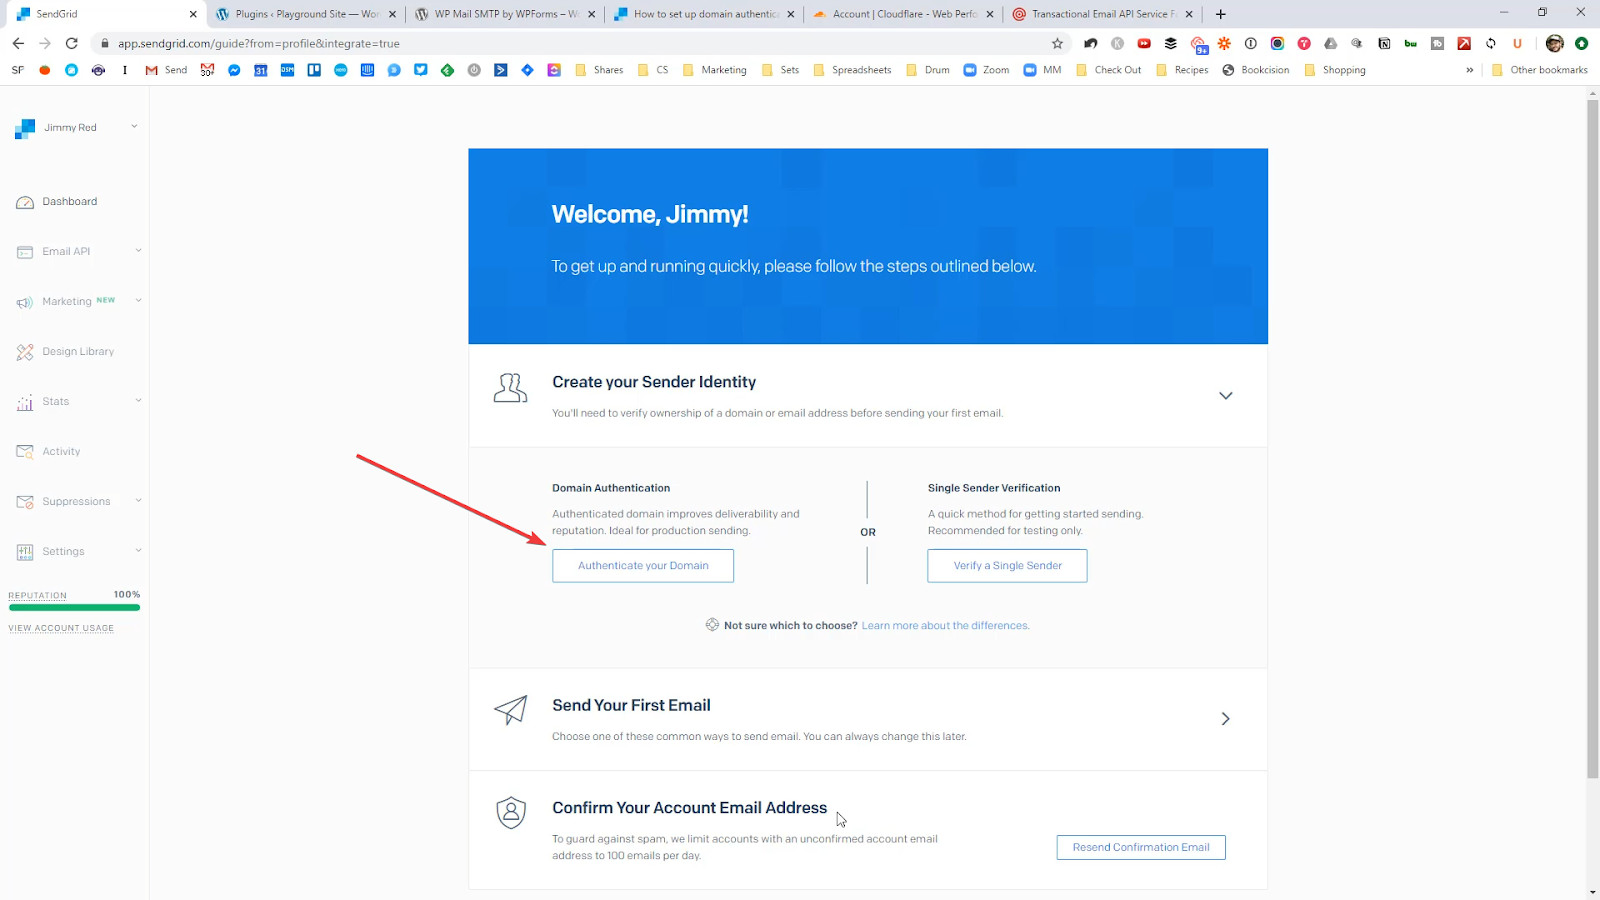
2. Set up authentication
In this step, you’re going to add some info to your DNS records to tell the world that SendGrid has permission to send emails on your behalf.
It’s the most complicated step. It varies depending on what DNS service you use. I use Cloudflare. It’s one of the best out there, and free, so worth a look.
If you have cpanel hosting, you should be able to do it there too. Here’s a link to a quick guide on creating DNS records in cpanel.
If you don’t use CloudFlare or cpanel, try running a search for the host you use plus “add DNS records”
First, go to Sender Authentication in SendGrid.
Choose your DNS host, and it will give you some instructions. Then click Next.
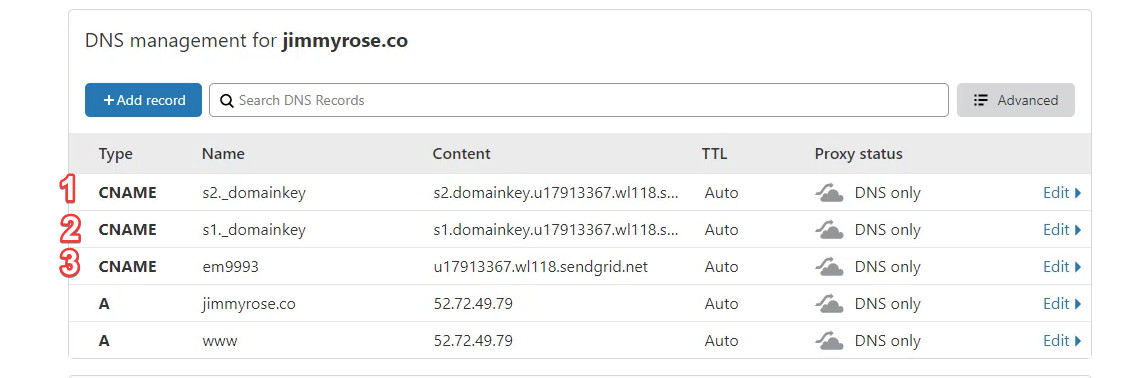
It will show you the CNAME records that you need to create.
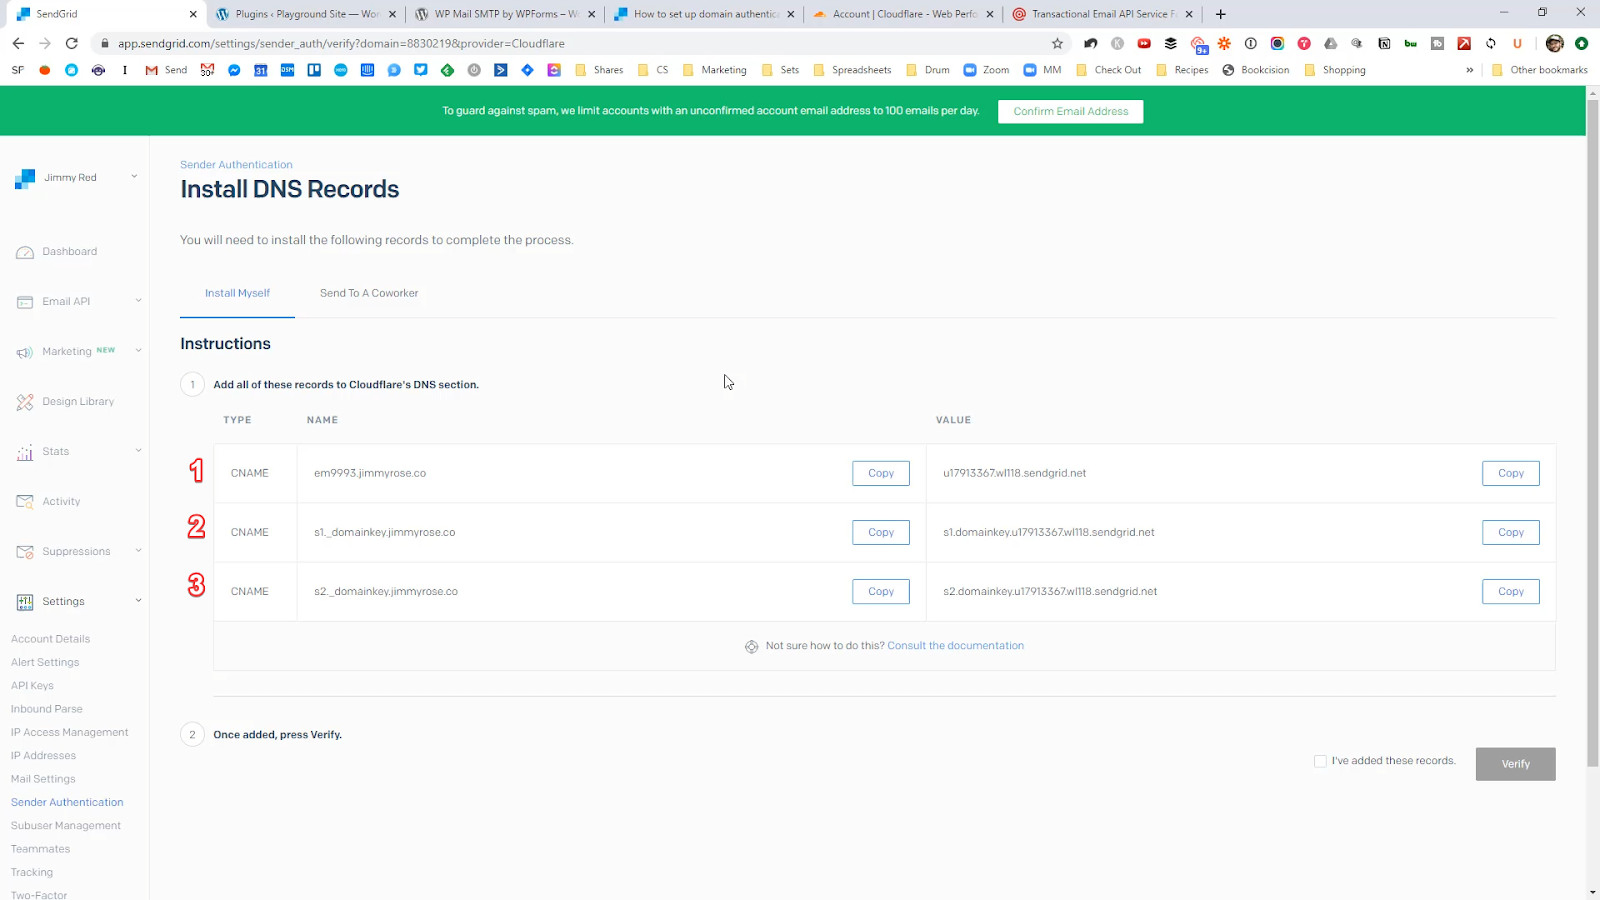
Head over to your DNS host (Cloudflare in this case) and create 3 new CNAME records that match the 3 that SendGrid gives you.
These are labelled 1, 2 & 3 in the image above.
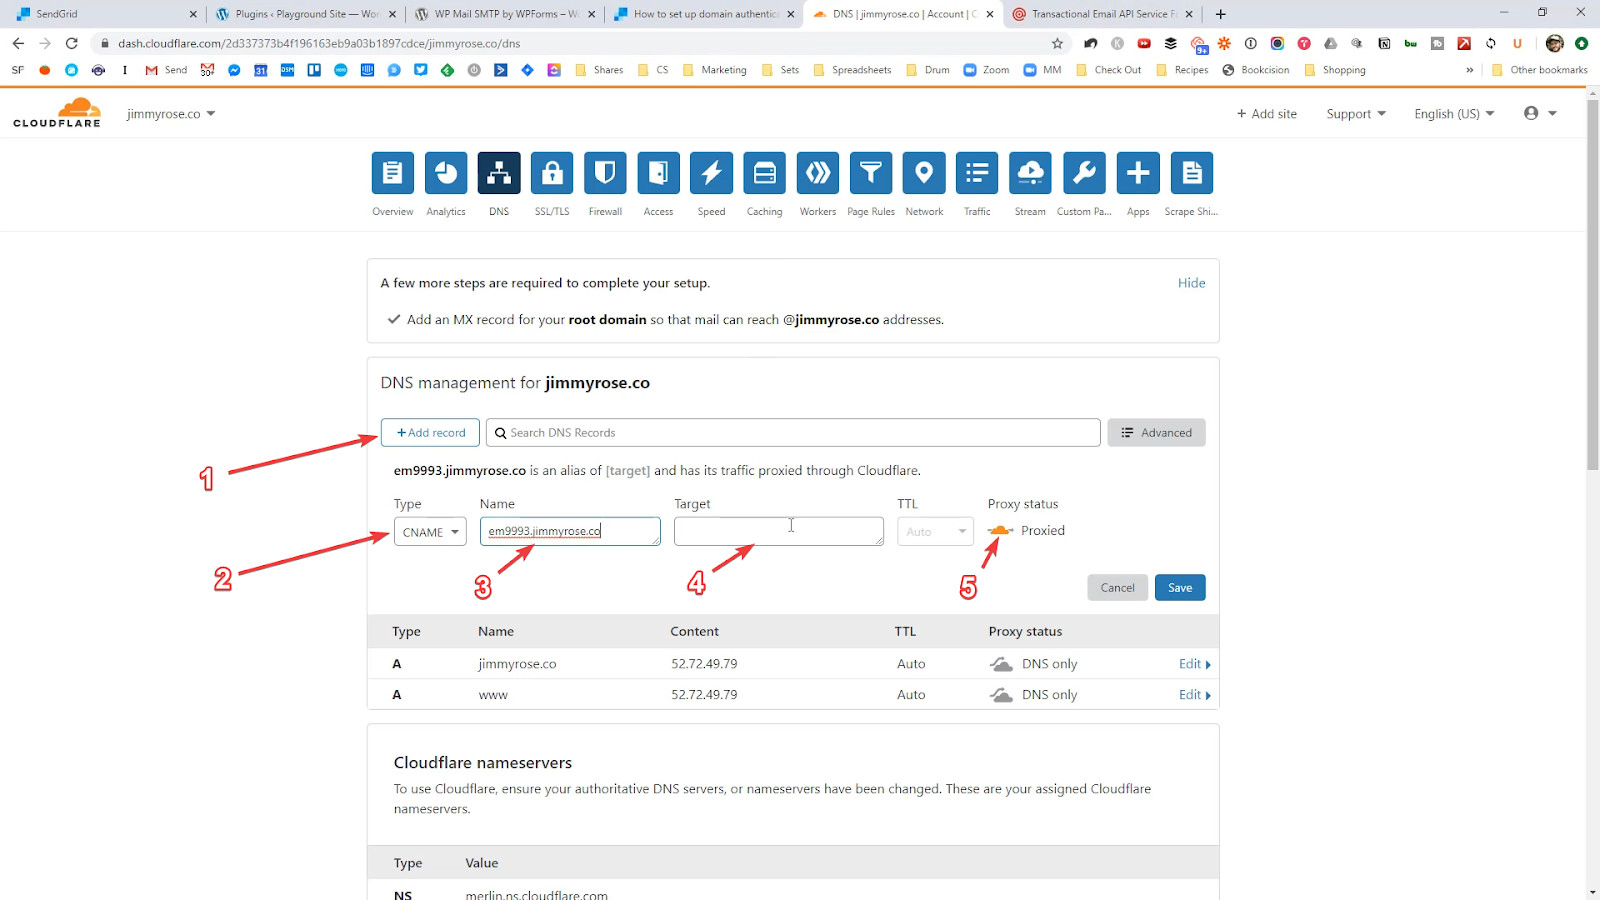
Cloudflare Steps
- Click Add Record
- Change the type to CNAME
- Copy the SendGrid “Name” to the “Name” in Cloudflare
- Copy the SendGrid “Value” to the “Target” in Cloudflare
- Change to Proxy Status to “DNS Only” (grey cloud)
- Click Save
Repeat this for the 3 different DNS records and it should look like this
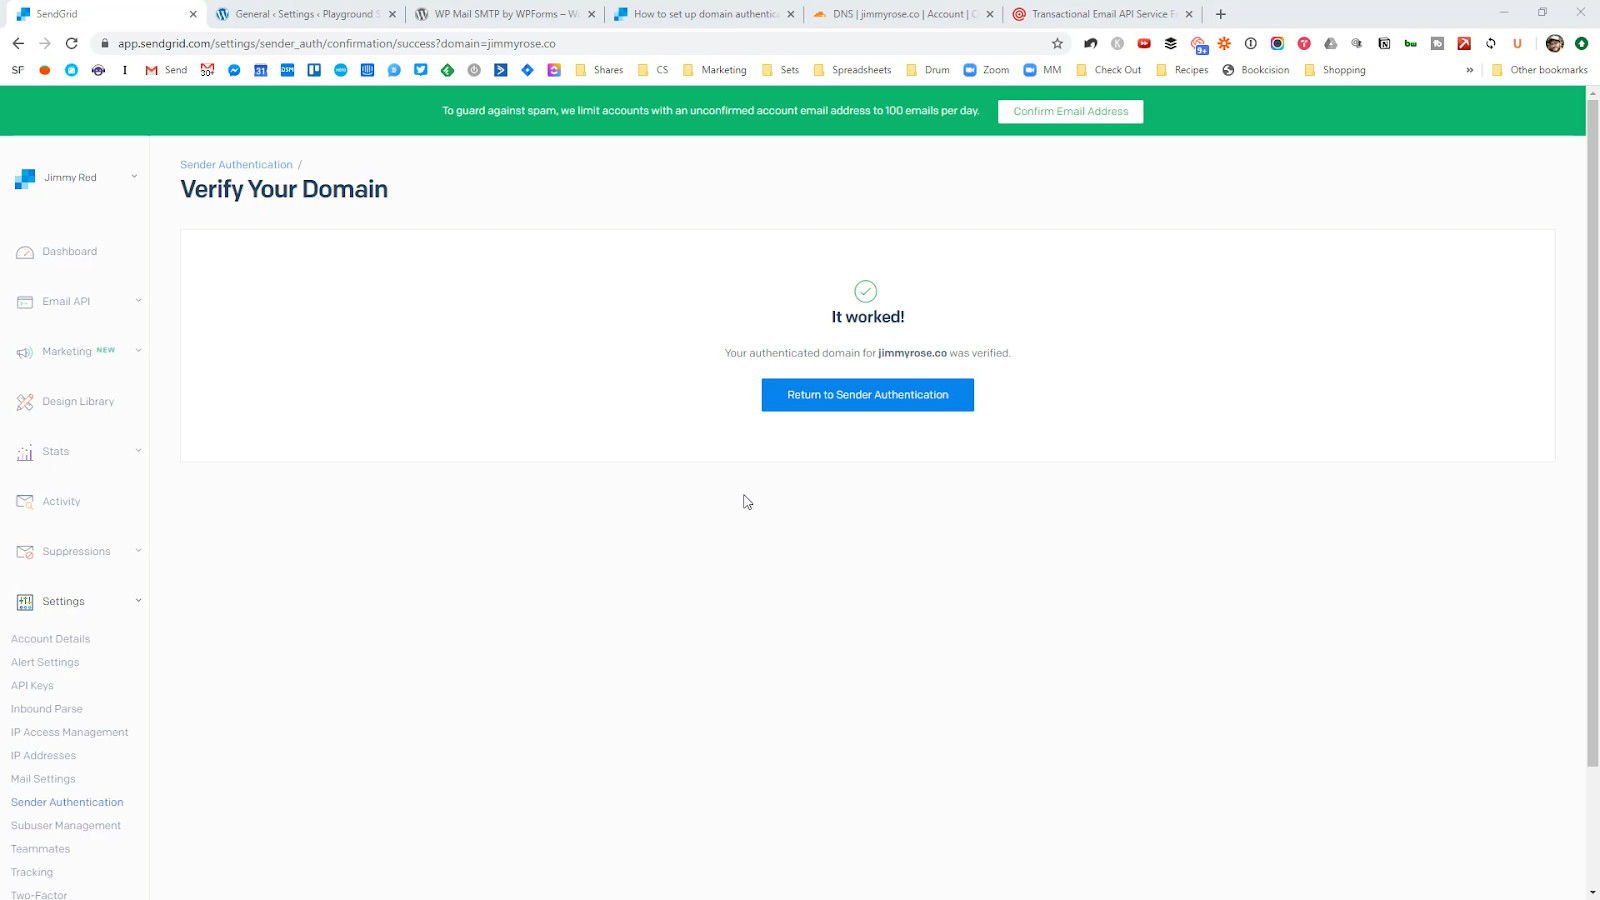
Finally, jump back to SendGrid and hit the “Verify” button to make sure your DNS records are live.
On CloudFlare this should be almost instant. On some hosts, this could take a couple of hours.
3. Create an API key
I always like to create a dedicated API key for each website. That way if something goes wrong on that site or it gets hacked, you can turn off JUST that website by deleting or disabling the API key.
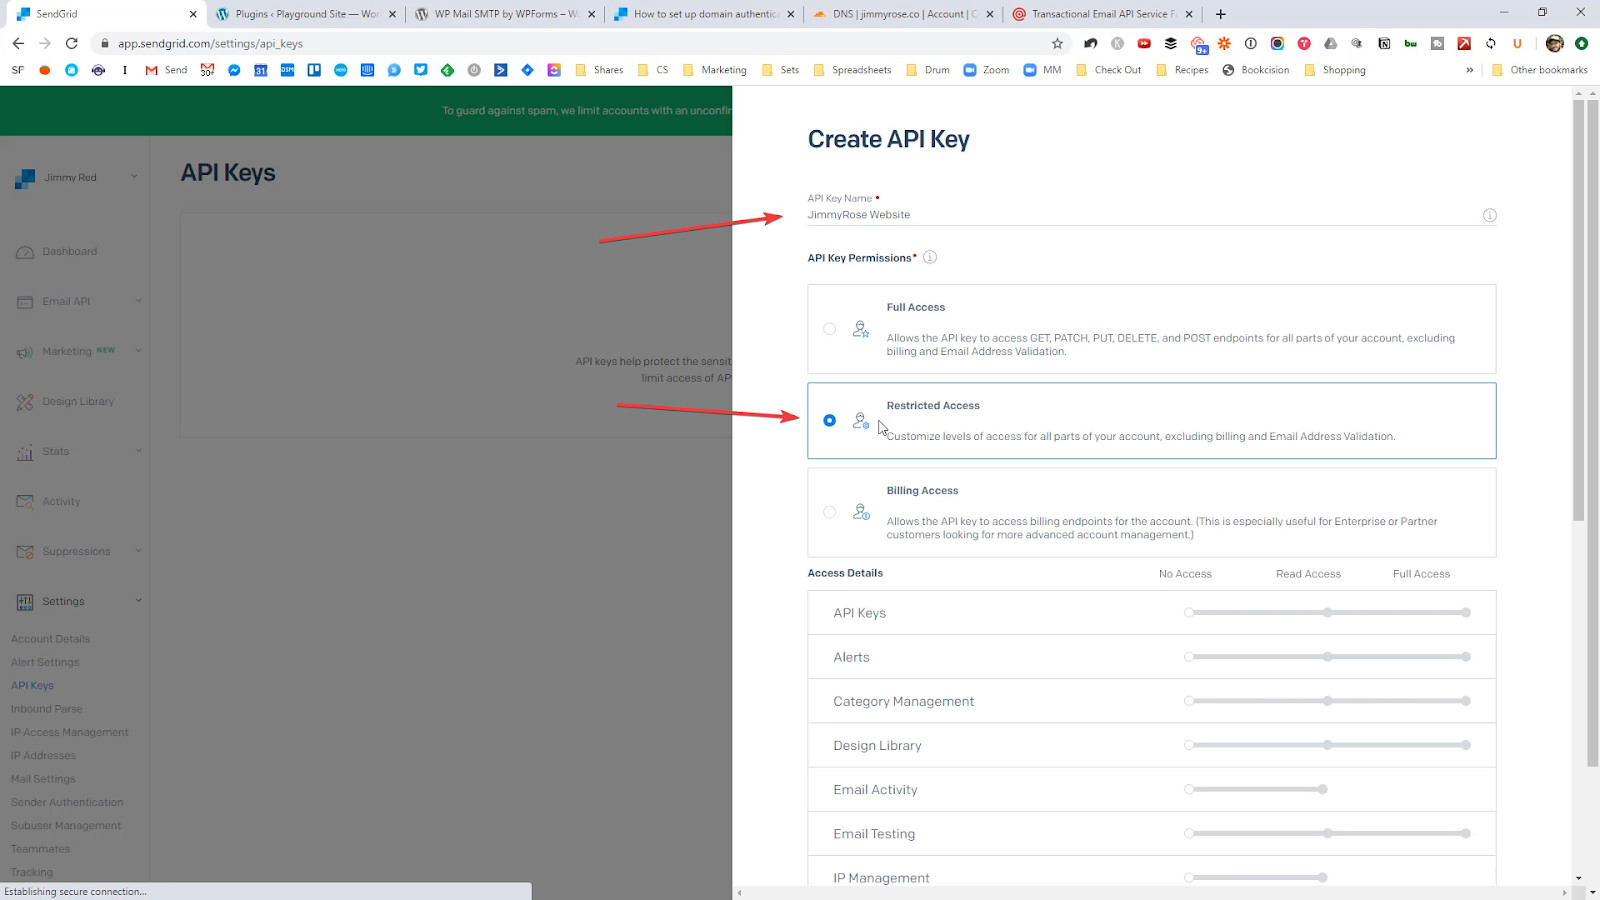
In SendGrid, navigate to API Keys. Then click the button to Create an API Key.
Give it a name, like “JimmyRose Website” and set it to Restricted Access.
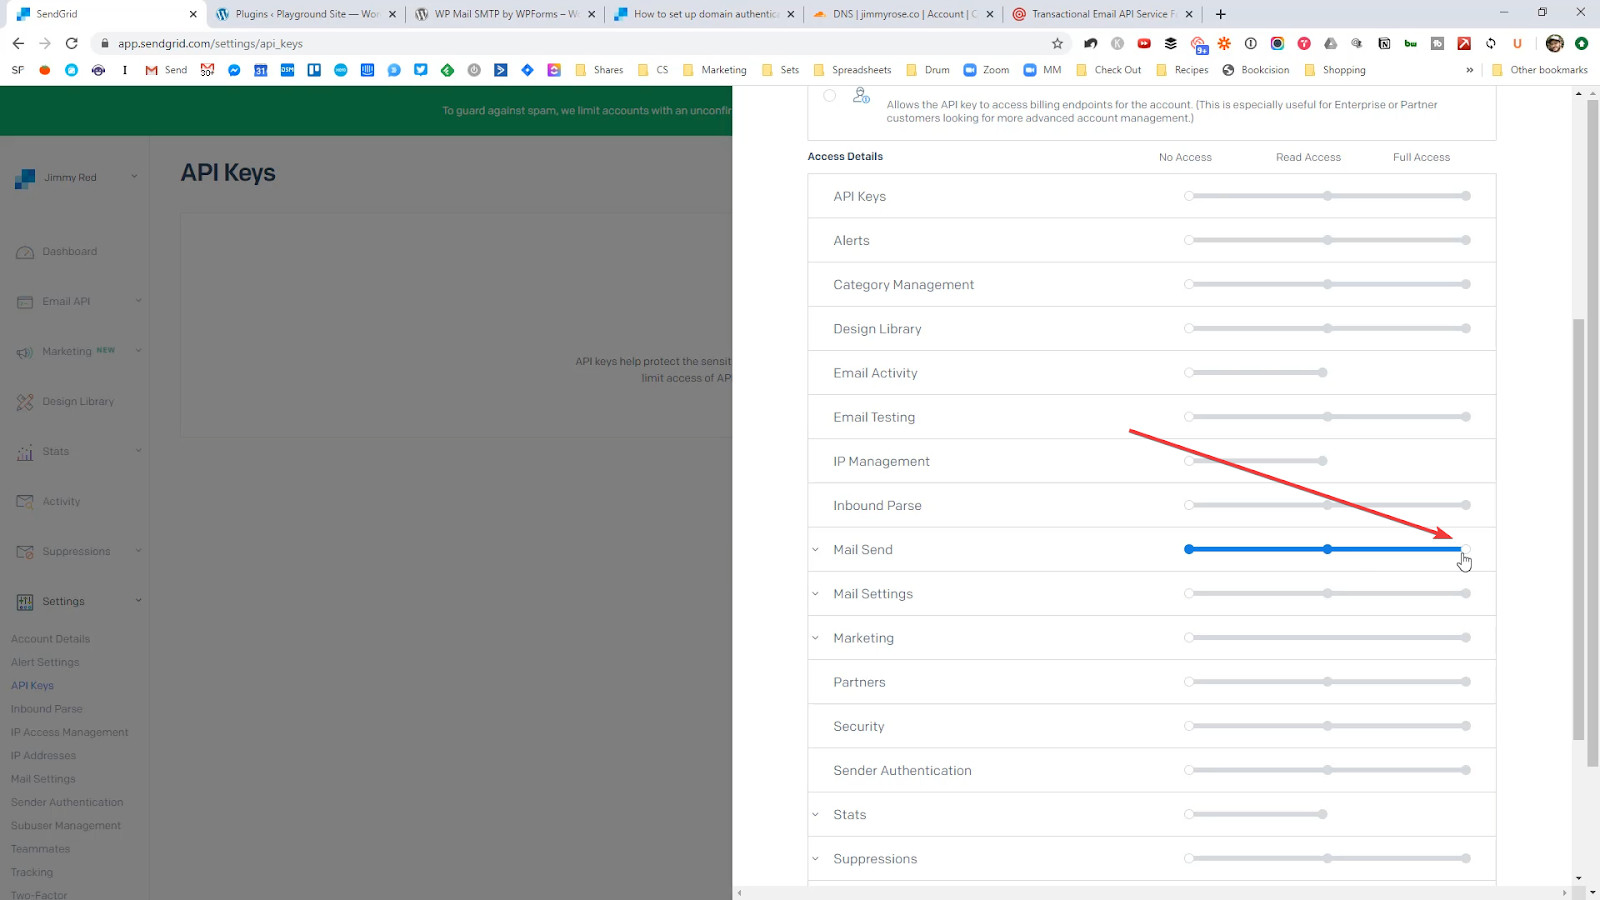
Scroll down and set “Mail Send” permission to full access.
Take your API key and store it somewhere.

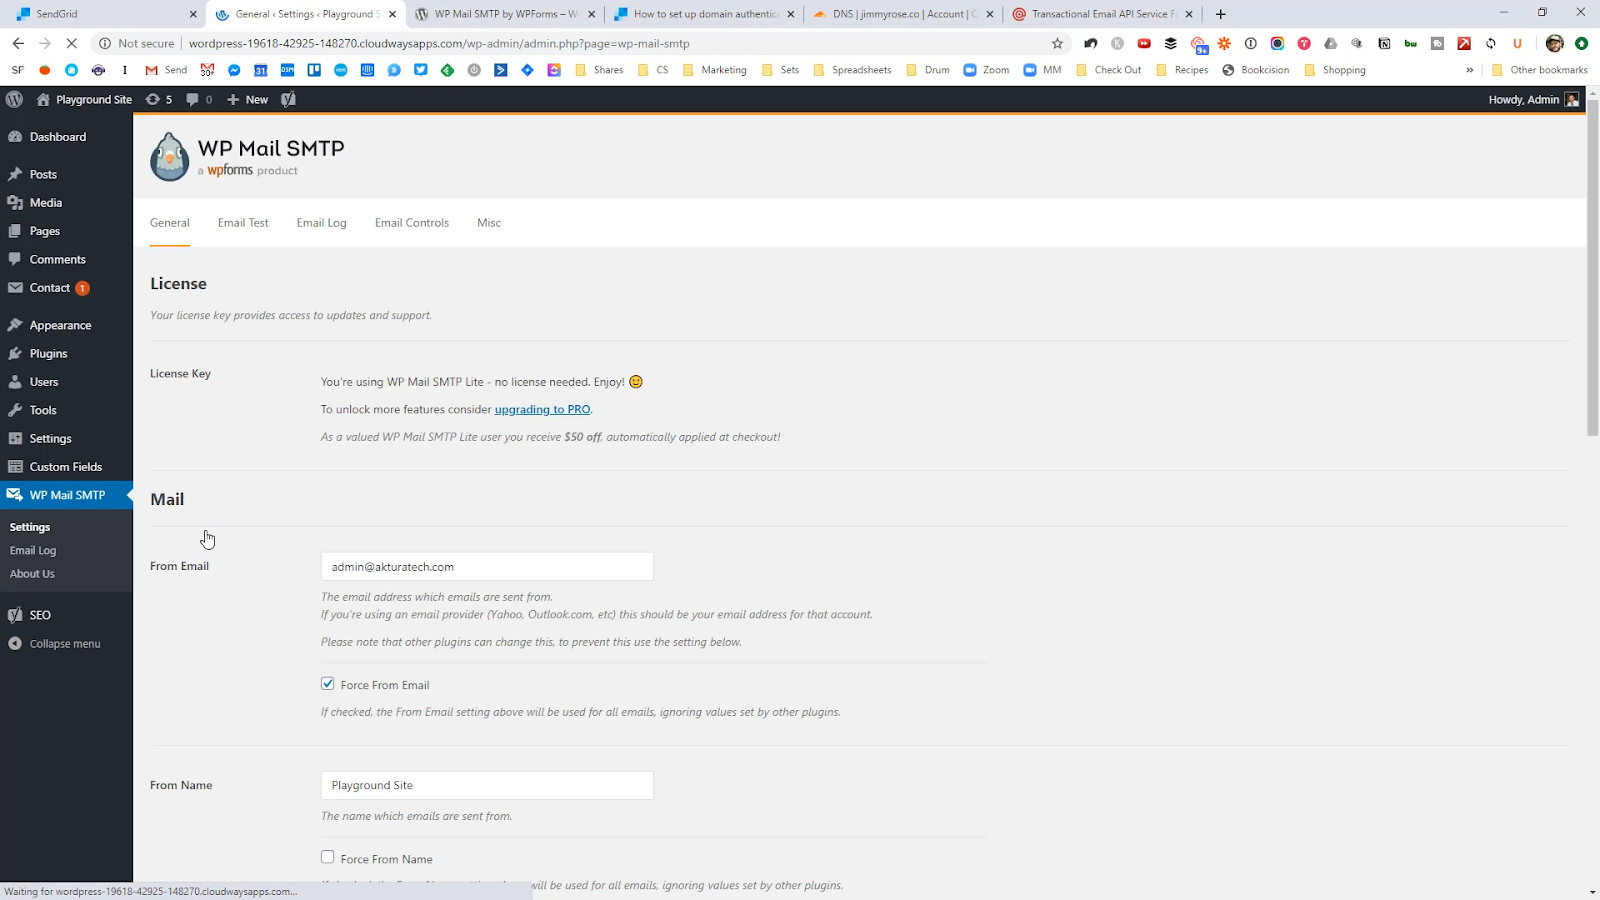
4. Install WP Mail SMTP
Next, we’ll install a plugin needed to make this work.
It’s called WP Mail SMTP.
It’s free, but there is a premium version if you need some extra features.
Search for it in WordPress plugins and install it. Then Activate and navigate to the settings.
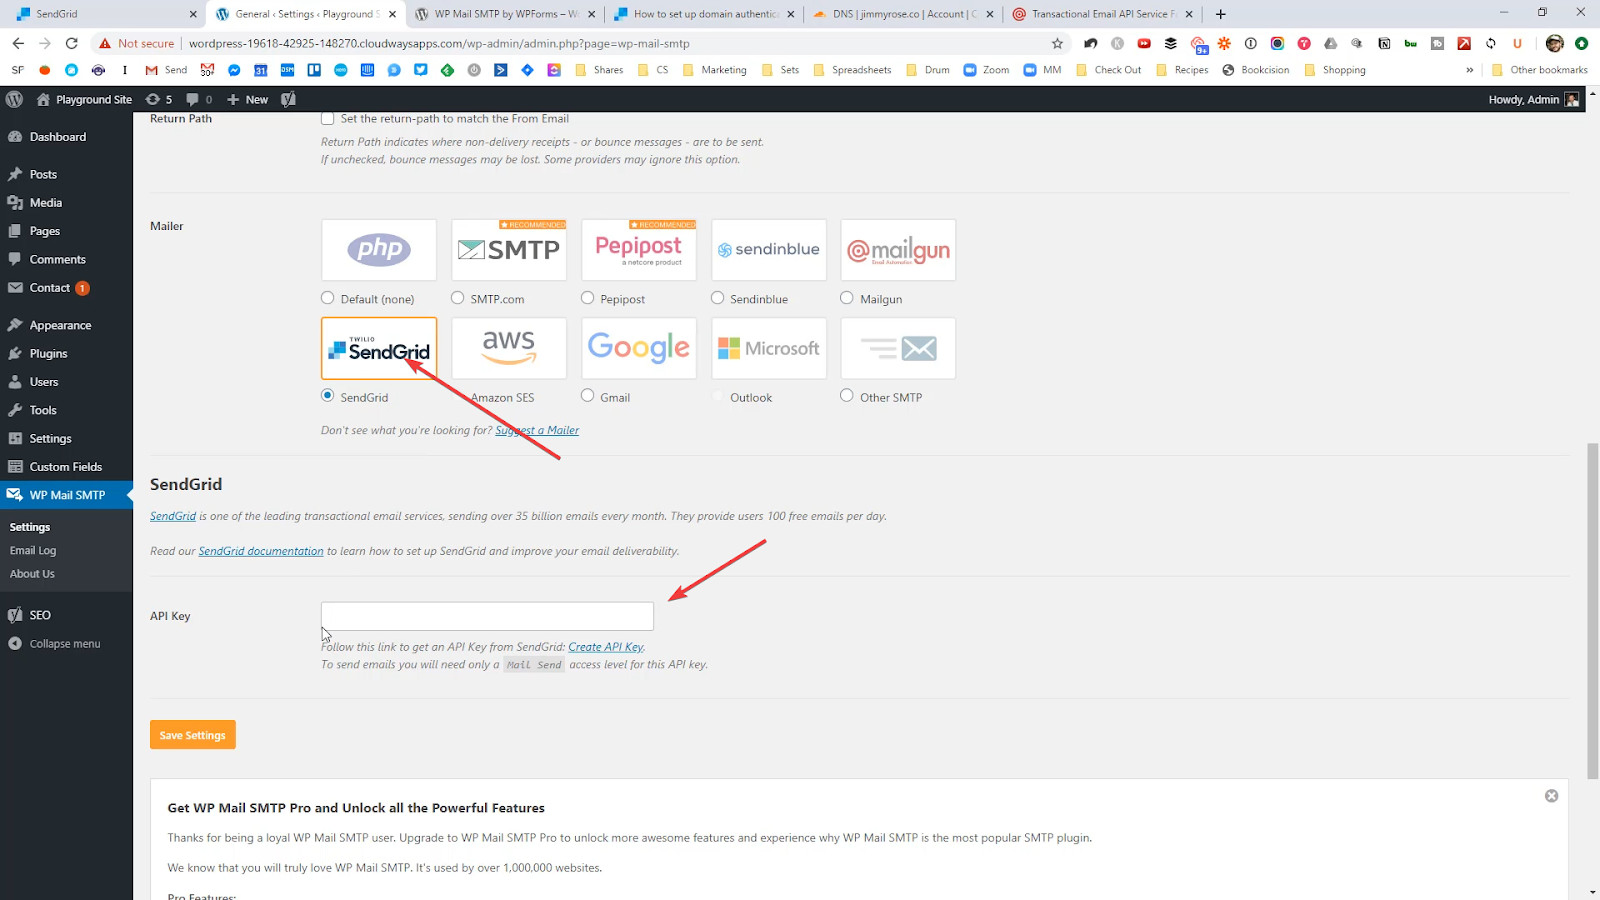
5. Add your API key
The final step is to add the API info from the step above. That’s really simple.
Change the settings so that the “from email” is on the same domain that you set up in Sendgrid. If you don’t, there is a much higher risk of emails going to spam.
You can name the site whatever you like. This is how it will show up in your inbox.
Then choose “SendGrid” and enter your API key
6. Test!
Navigate over to the Email Test tab.
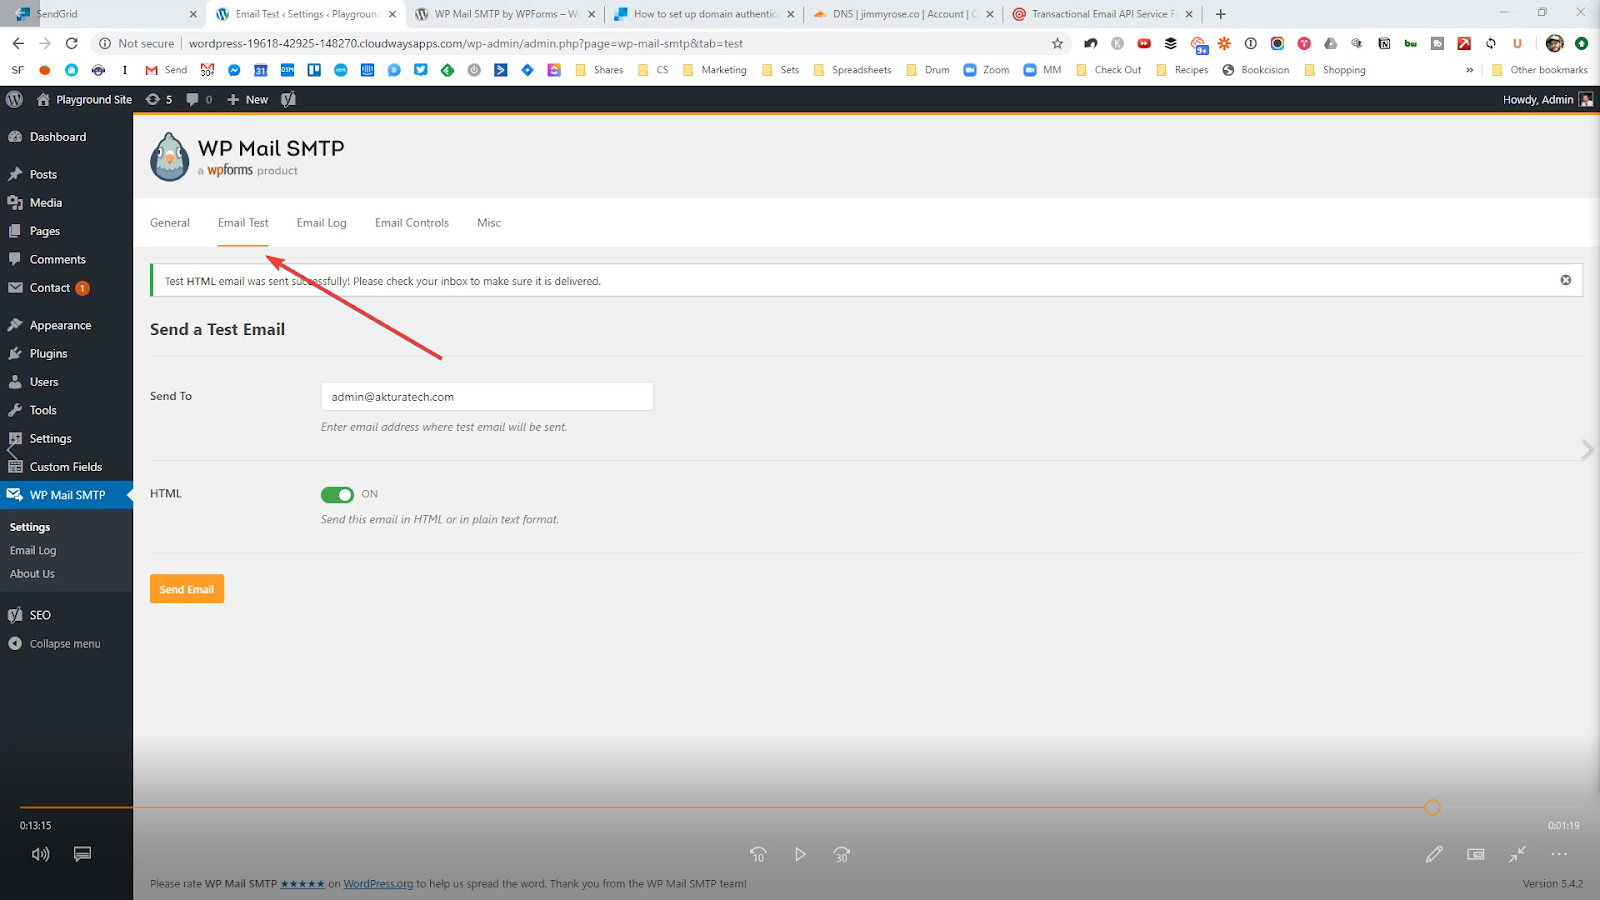
Now just click the button to send a test email and make sure it’s shown up in your inbox.
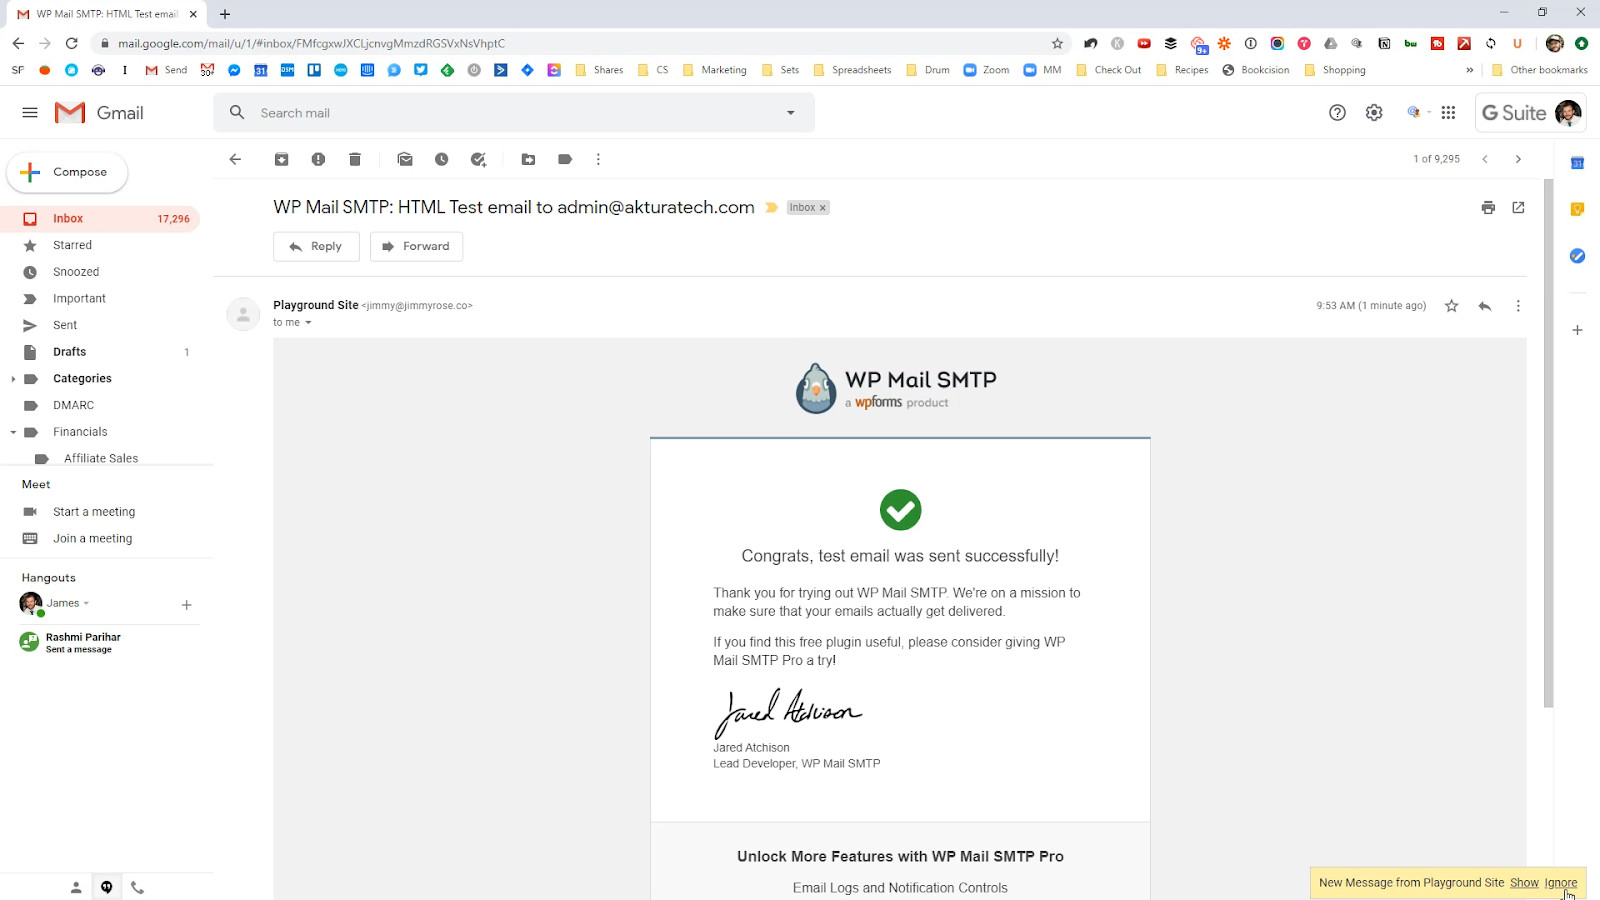
And you’re done!
