Almost everyone is using WordPress in their business, so it’s no surprise that I often get asked how to integrate WordPress with Zapier.
In this post, you’ll learn:
- How to integrate WordPress and Zapier
- Some possible problem you’ll run into
- An awesome plugin that expands the capability of what you can do
First up, please note that this is not a basic Zapier tutorial. If you’ve never used Zapier before, I’d recommend starting with this Zapier tutorial.
Otherwise, let’s dig in.
Learn what integrations are possible
The first place I always recommend going when learning how to integrate a tool with Zapier is the “Apps” page on Zapier. Then search for your app – in this case, WordPress.
On the “WordPress Integrations” page, scroll all the way down to the bottom to this section.

This shows you all of the WordPress triggers & actions you can use in Zapier. It’s the best way to start getting an idea of what is possible.
The screenshot above shows the triggers. The one below shows the actions.

WordPress Zapier automation ideas
For each action and trigger, here are some ideas about what automations you could create:
WordPress Triggers
New Comment
- Add the comment to your Slack your yourself or your team to see
- Add it to your task manager so you remember to reply
New Media
- Backup all WordPress media (images etc) to Dropbox, Google Drive, etc
New Post
- Automatically share new posts on social media
- Add it to Buffer or similar sharing app
- Add a task to your project management to promote the post
- Add it to AirTable or a spreadsheet to create a content archive
- Draft an email in your CRM ready for sending out an email about the new post
New User
- Add the person do your CRM
- Send the person an email
WordPress Actions
Create Post
- When you move a post in Trello to “Approved”, create a post or draft in WordPress
- Create a post from new YouTube videos
- Create a post from new Instagram posts
Create User
- Automatically create new WordPress users when they are tagged in your CRM
Connecting WordPress and Zapier
First, go and create a new Zap in Zapier.
Create any trigger you like. In this example, I have set it to trigger on “New Video In Channel” from my own YouTube channel.

Once you have done this, click the + icon to add an action.
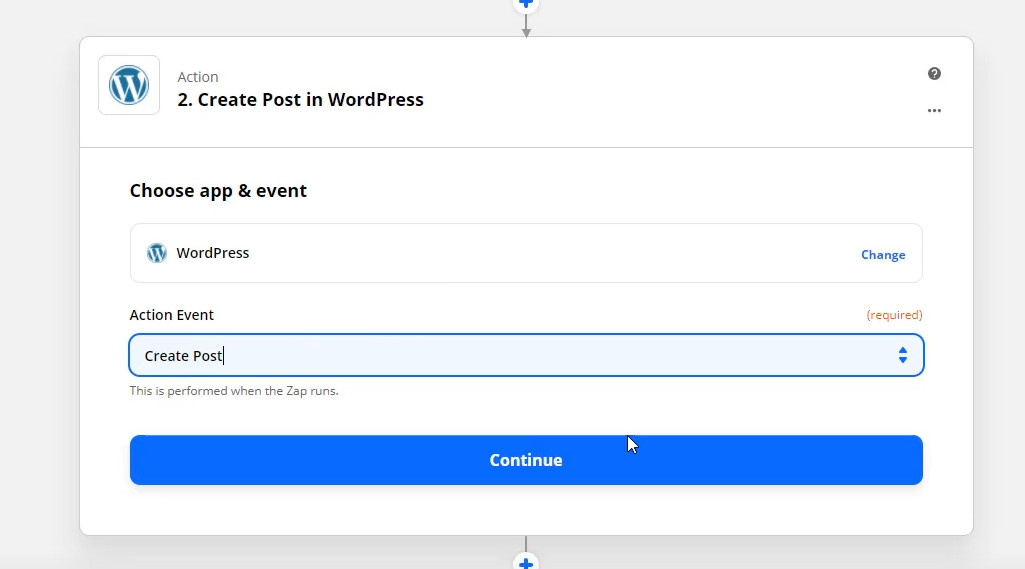
Search for WordPress and add it.

Choose the “Create Post” action.
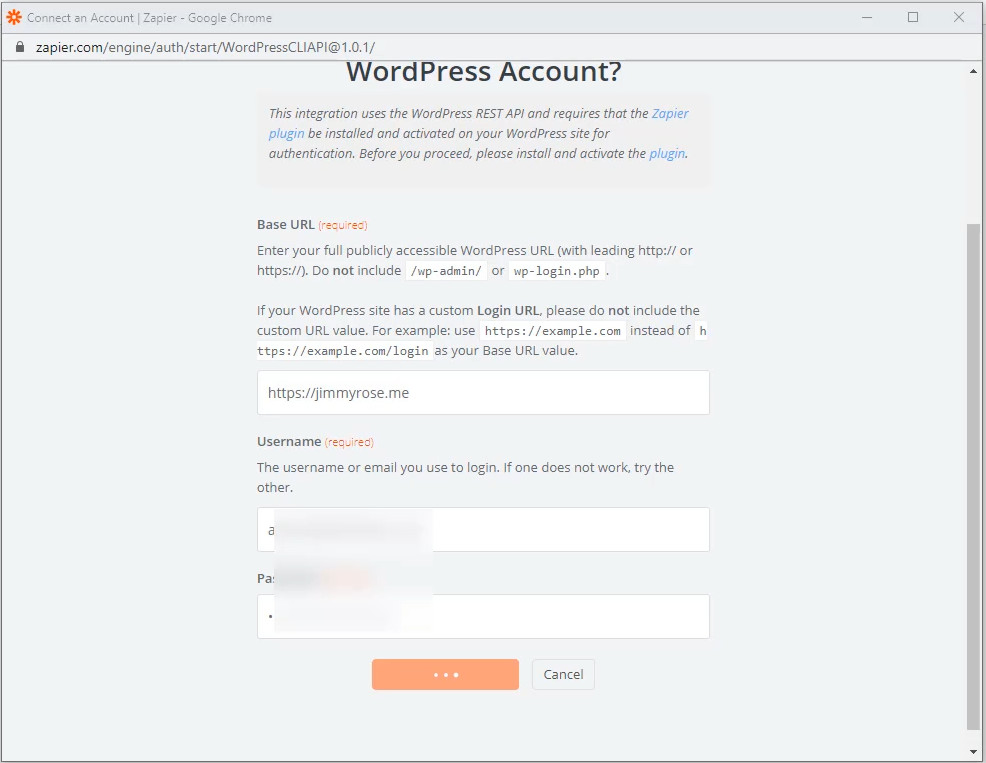
When prompted to connect your account, do that.
You’ll get a window that looks like this.

Install the Zapier for WordPress plugin
The first thing it says is to install the Zapier WordPress plugin.
So go over to your site and do that.

Create a user and set up Zapier
I’d recommend creating a new user just for Zapier on your WordPress install. You don’t have to, but it’s a better idea for security reasons.
Then just fill out the WordPress user info into Zapier and continue.
Do not include “wp-admin” or “wp-login” in the WordPress URL.
What to do if you get errors
Here is the most likely place you encounter an error.
You need to have XMLRPC enabled on your WordPress installation. Some web hosts disable this by default.
Try Googling “[YOUR WEB HOST NAME] enable xmlrpc”
You should find some documentation on how to enable it. Sometimes you will have to contact support.
For Cloudways (the host I use), there is a switch here.

Create a post in WordPress
Back at Zapier, continue to the next step and choose the “Create Post” action.
Then choose a Post Type of “Posts”

Note: Currently Zapier doesn’t work with custom fields created with plugins like ACF (Advanced Custom Fields). This means for most custom post types or anything beyond the standard WordPress fields. If you need this, you may wish to try Integromat – just note that the setup is much more involved.
Next, set up the post you want to go to WordPress. Use the information that comes from YouTube (indicated by the red arrow below) to map the YouTube title into the “Title” box, and the YouTube URL into the “content” box. See below for an example.

Continue onto the next step. Scroll down and click the “Test & Review” button.
You should see a message like this:
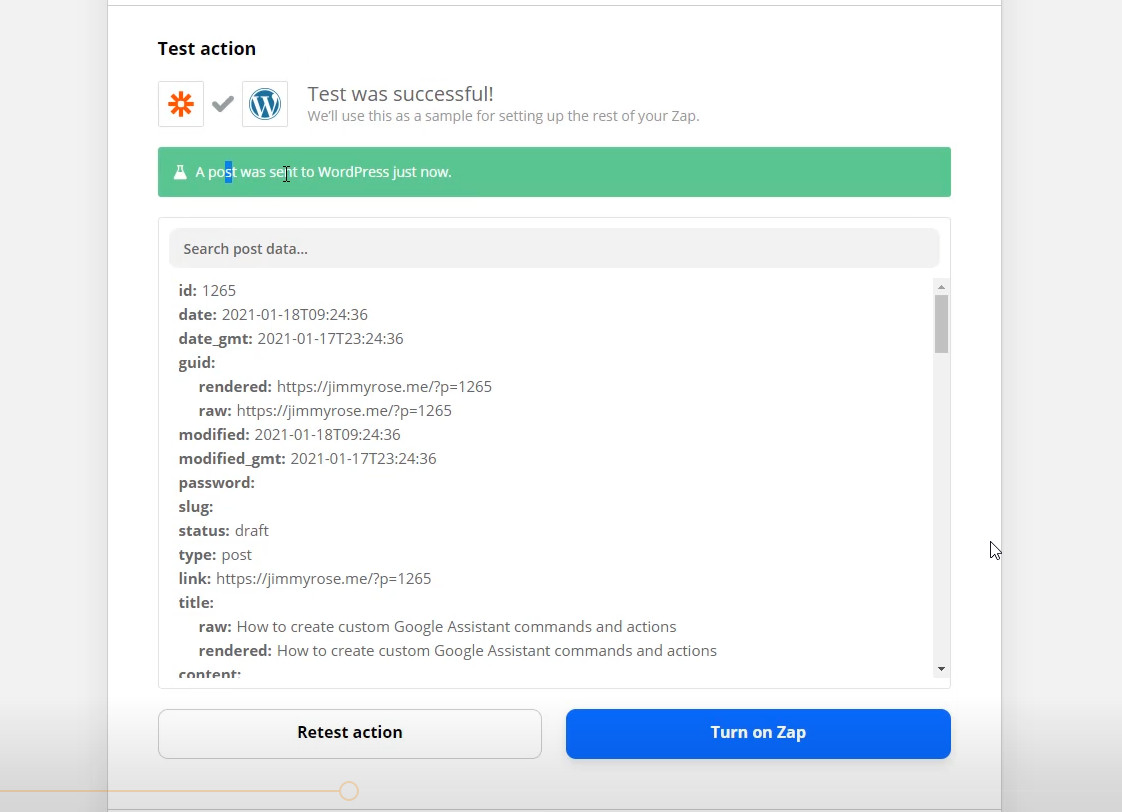
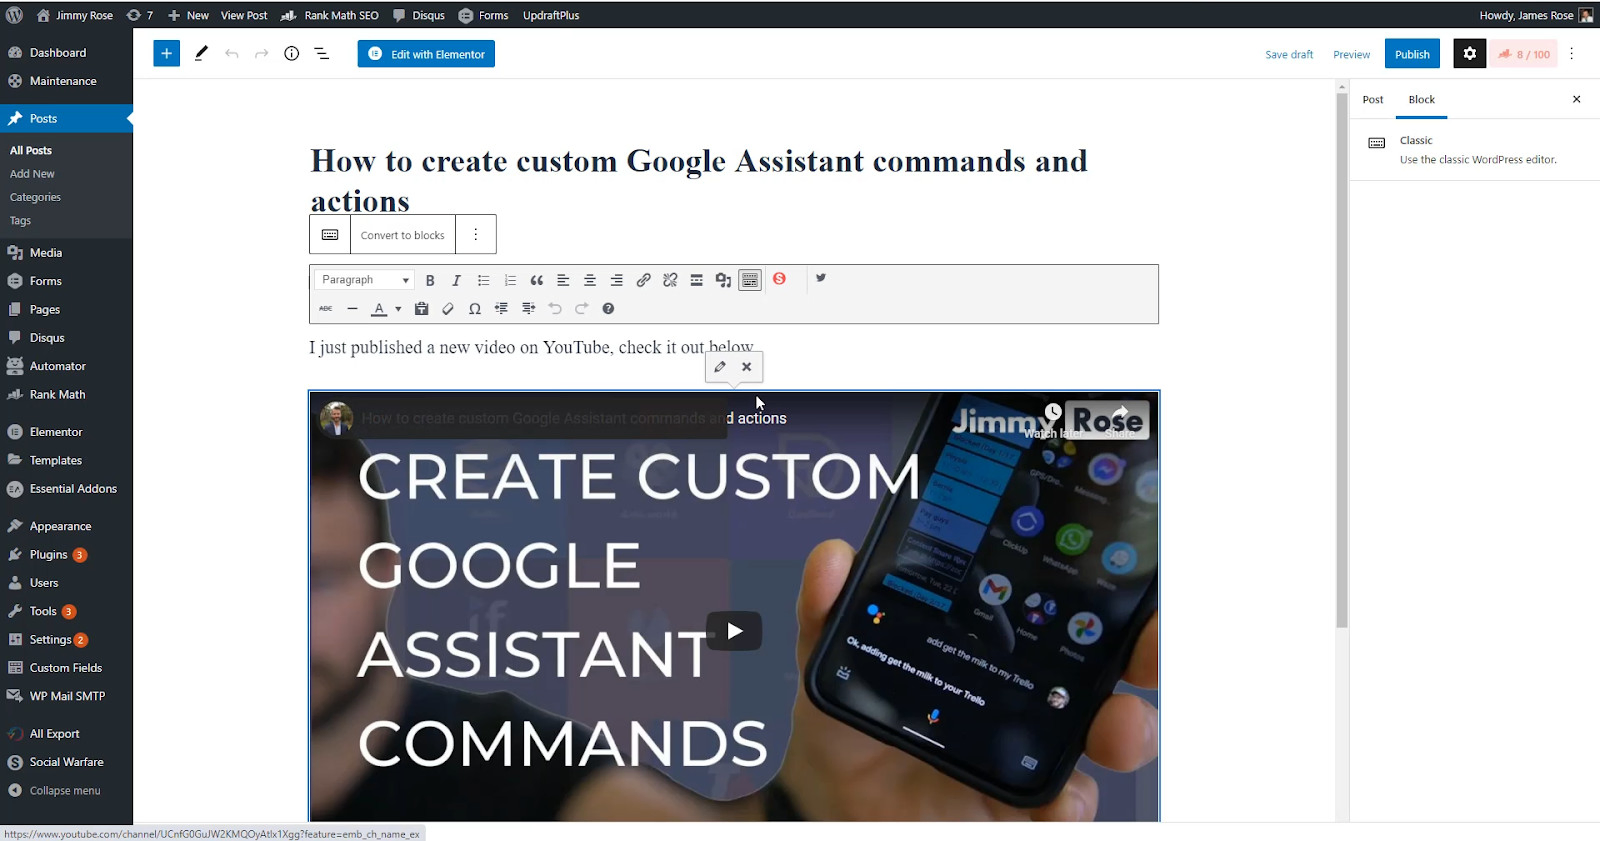
Then if you look at your WordPress site, the post should be live!
Share new WordPress posts on social media
Now let’s have a look at the other way around – when WordPress is the trigger for the workflow.
- Create a new Zap
- Choose WordPress for the trigger app
- Choose “New Post” as the Trigger Event
- Select the WordPress account you set up previously
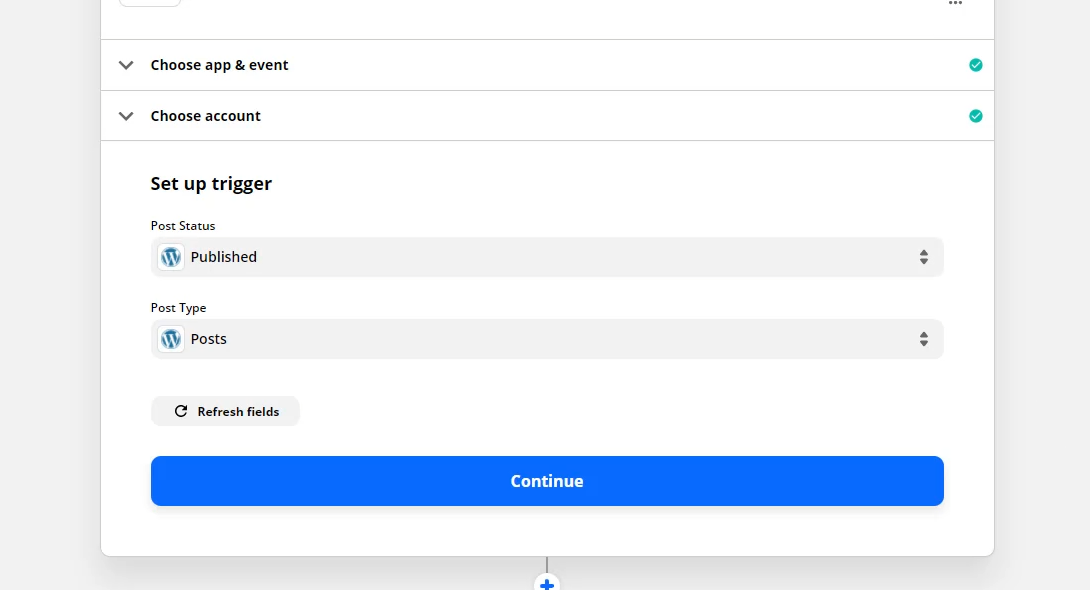
- Select a “Post Status” of “Published”
- Leave the post type as “Posts”
It should look like this
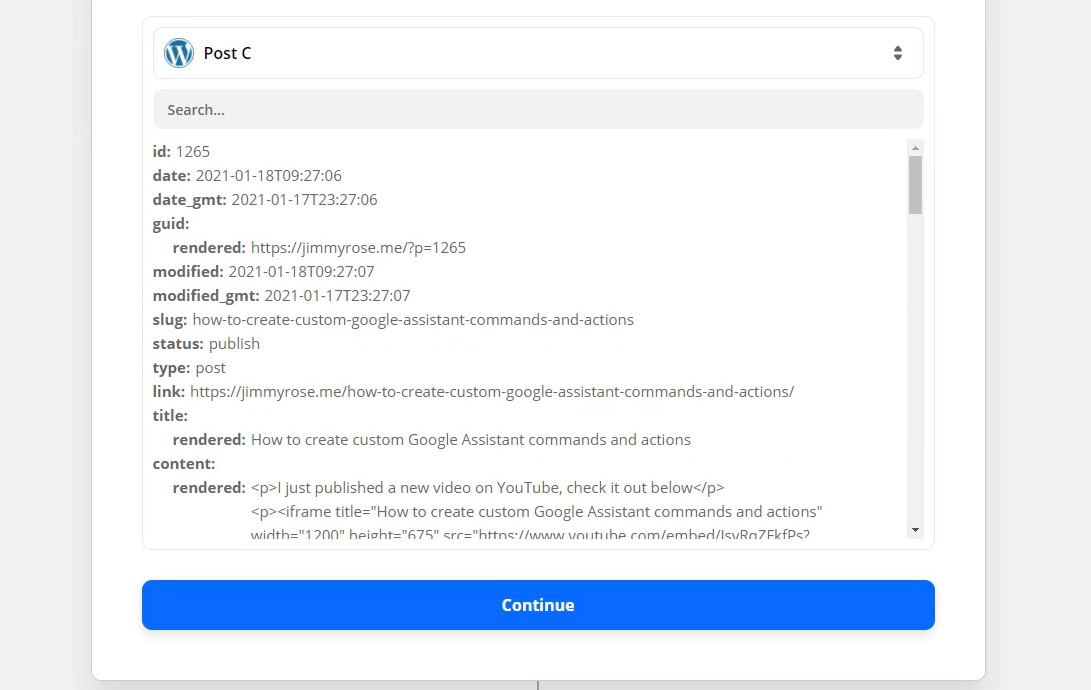
Then click Continue and “Test Trigger”.
It should go and find the last post you published on your site, like this:
Once you’re finished with the trigger, it’s time to share on social.
Create an action and search for whatever social media sharing tool you use. I use Buffer.

You could also search for Twitter to post directly to Twitter.
The rest of the setup depends on the social sharing tool you use. It should look something like this though:
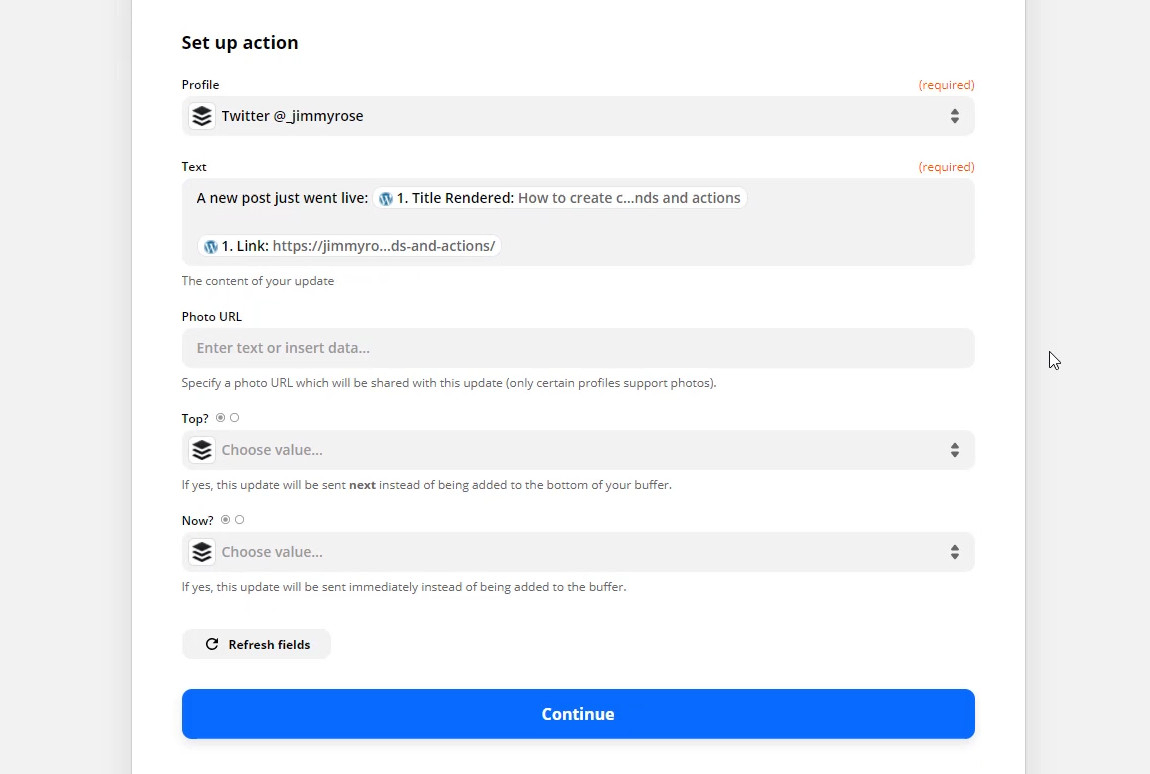
Here you can see it’s going to share on my _jimmyrose Twitter handle and say “A new post just went live” followed by the title and link to the post.
Turning your integrations up a notch with Uncanny Automator
Now we get to move on to one of my favourite plugins ever.
It’s called Uncanny Automator.
It drastically improves what you’re able to do with WordPress and Zapier. It goes WAY beyond that though.
It’s like a mini-Zapier inside of WordPress, that integrates with lots of different plugins. See them all here

That means if you’re using LearnDash, you can use any of the following triggers and actions in your workflows:

Because Uncanny works with Zapier, you could say “when a user completes a course”, send the user to Zapier which will then “send them an email”.
On the flip side, Zapier can be the trigger. You can say “when a person is tagged in my CRM”, push them into Uncanny, to “enroll the user in a course”
It’s amazing.
The setup is best shown by video, so check out the video below, and start around the 16 minute mark. The video below should do that automatically.
Don’t forget to grab your copy of Uncanny here. You’ll need the Pro version to access the Zapier integration, but it’s DEFINITELY worth it.
