Sometimes you might need to send the same email to a bunch of people. This is where this Gmail mail merge tutorial comes in.
Today you’ll learn how to send bulk email from Gmail using Google Sheets. You’ll learn 3 different, very simple tools to do that and the exact process to using both.
Two methods use a Chrome extension, and one uses a script. All are available for free, but the extensions are limited in volume. All work with attachments.
If you’re watching this and want to spam people, you suck. But there are a lot of other situations when this is perfectly legitimate.
For my business, I’ve used this when I am working with several partners and I don’t want to add them to my email list just to send them a message. If it comes from my email list and there is an unsubscribe in the footer and all that, it will clearly look like I’ve added them to an email list. That’s not something I want them to think.
I’ve also used this in my personal life to send out wedding invitations. Because who still uses paper and cardboard?
One thing to note is that if you over-do this, your emails are going to end up in spam. There’s no hard rule for when this happens. It’s going to depend on the emails you are sending, your previous reputation and how many people you’re sending to.
There are also sending limits for Gmail which you view here.
Option 1 – GMass (Recommended!)
Gmass is a paid tool, but you can send up to 50 emails per day for free. It’s the easiest of all the tools in this post.
It’s highly recommended, and if you need to send more than 50 a day, I’ve organized a special deal with the founder.
To get Gmass Pro for only $16 per month, click here.
1. Get your Gmass account
Head over to Gmass. Click here to get your free account.
Click the “Add to Gmail” in the top right hand corner.
Follow the prompts to install the Extension. Then visit your Gmail.
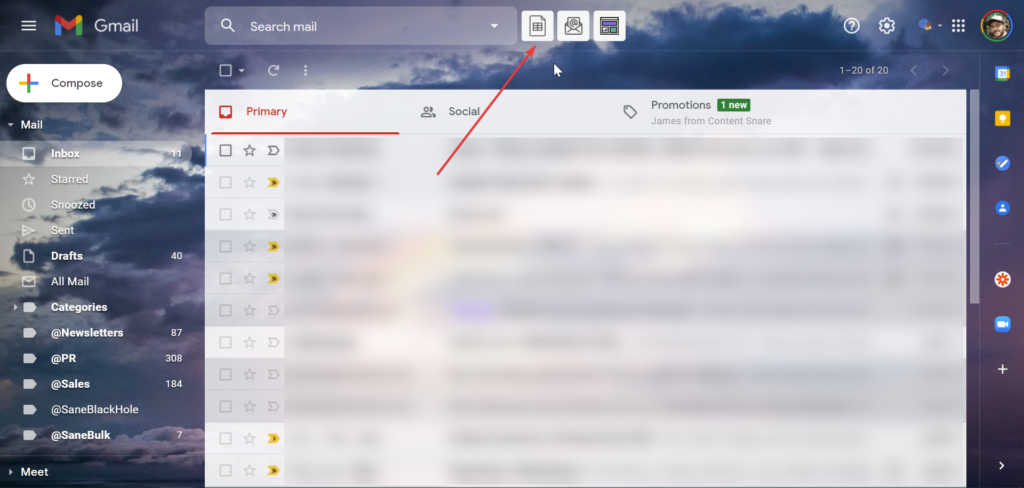
If you don’t automatically get prompted to create your account, click any of the Gmass buttons that appear near your search bar.
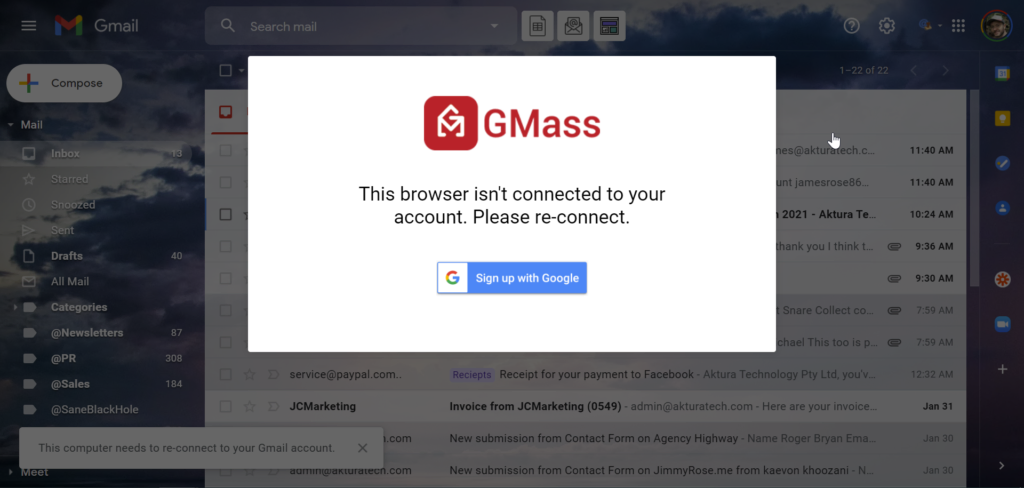
You’ll see a box like this. Follow the process to connect your Google account.
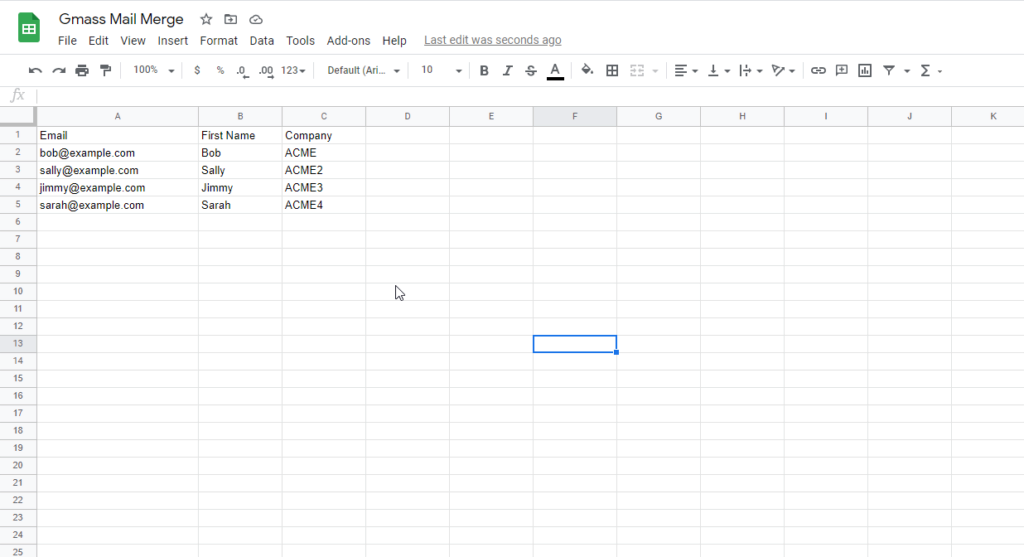
2. Set up your Google sheet
Create columns for the email address, and then any columns you want to use in the mail merge.
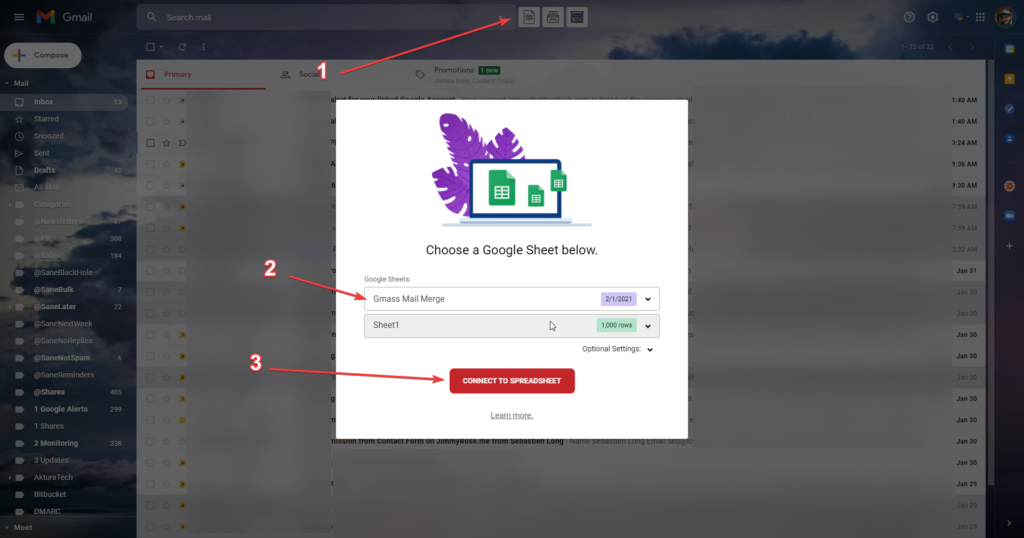
3. Connect Gmass to your spreadsheet
Back in Gmail, click the spreadsheet icon next to your search bar. Choose your spreadsheet from the list and click “Connect”
4. Write your email
Gmass automatically opens the composer and adds a speacial email address in the “to” field.
Now you just write your email.
Whenever you want to insert a column from the spreadsheet, click on the arrow next to the “Gmass” button, click the “Personalize” dropdown and then choose the column.
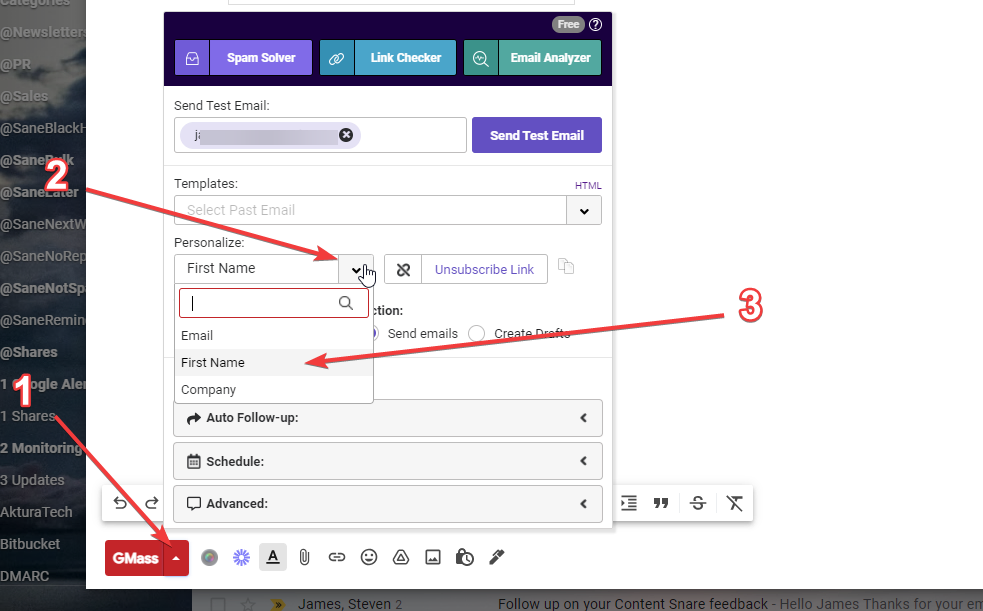
The placeholder will be copied to your clipboard ready for you to paste right into the email.
This is what makes Gmass so simple. In the other methods you have to make sure your columns match your placeholders in the email. Gmass makes sure you get it right.
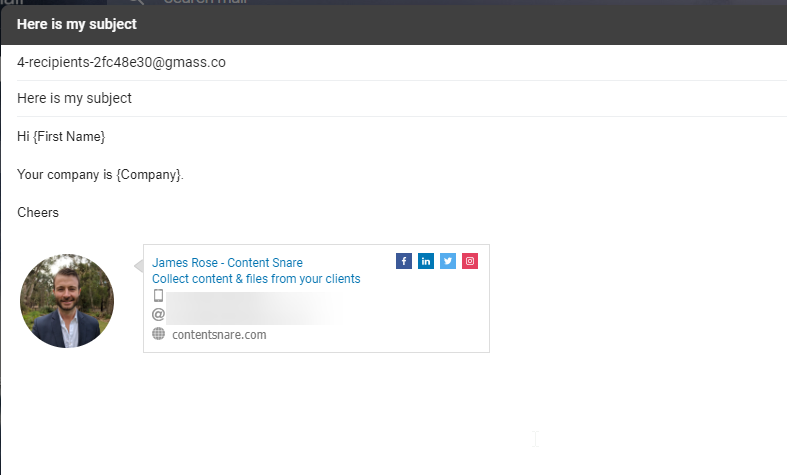
When you’re done, the email might look like this:
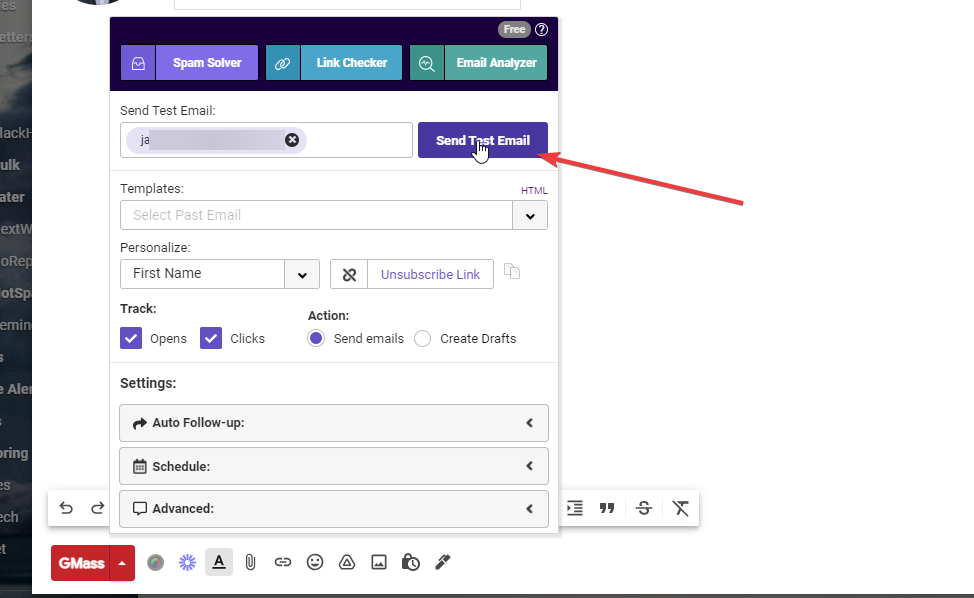
5. Send a test email
If you open the Gmass arrow again, you get the opportunity to send a test email.
6. Send the mail merge
Then all you have to do is hit the Gmass button!
You’ll see a message like this.

That is all there is to it.
Bonus: Send follow ups, track opens and more
Gmass does way more than just a one-off mail merge. It can also help you
- Send automatic follow ups
- Schedule emails
- Track opens & clicks
- Much much more.
To reach about everything it can do, click here.
And remember, if you need to go over the 50/day limit get your Premium account at a discount here.
Option 2 – Yet Another Mail Merge (Extension/Add-on)
This is also a super easy way to mail merge in Gmail. It’s also a paid tool, and the free tier allows 50 per day. I like this method the best if you’re sending less than 50. It’s just a bit easier than the the script below.
1. Install the tool
Visit the YAMM website and install the add-on
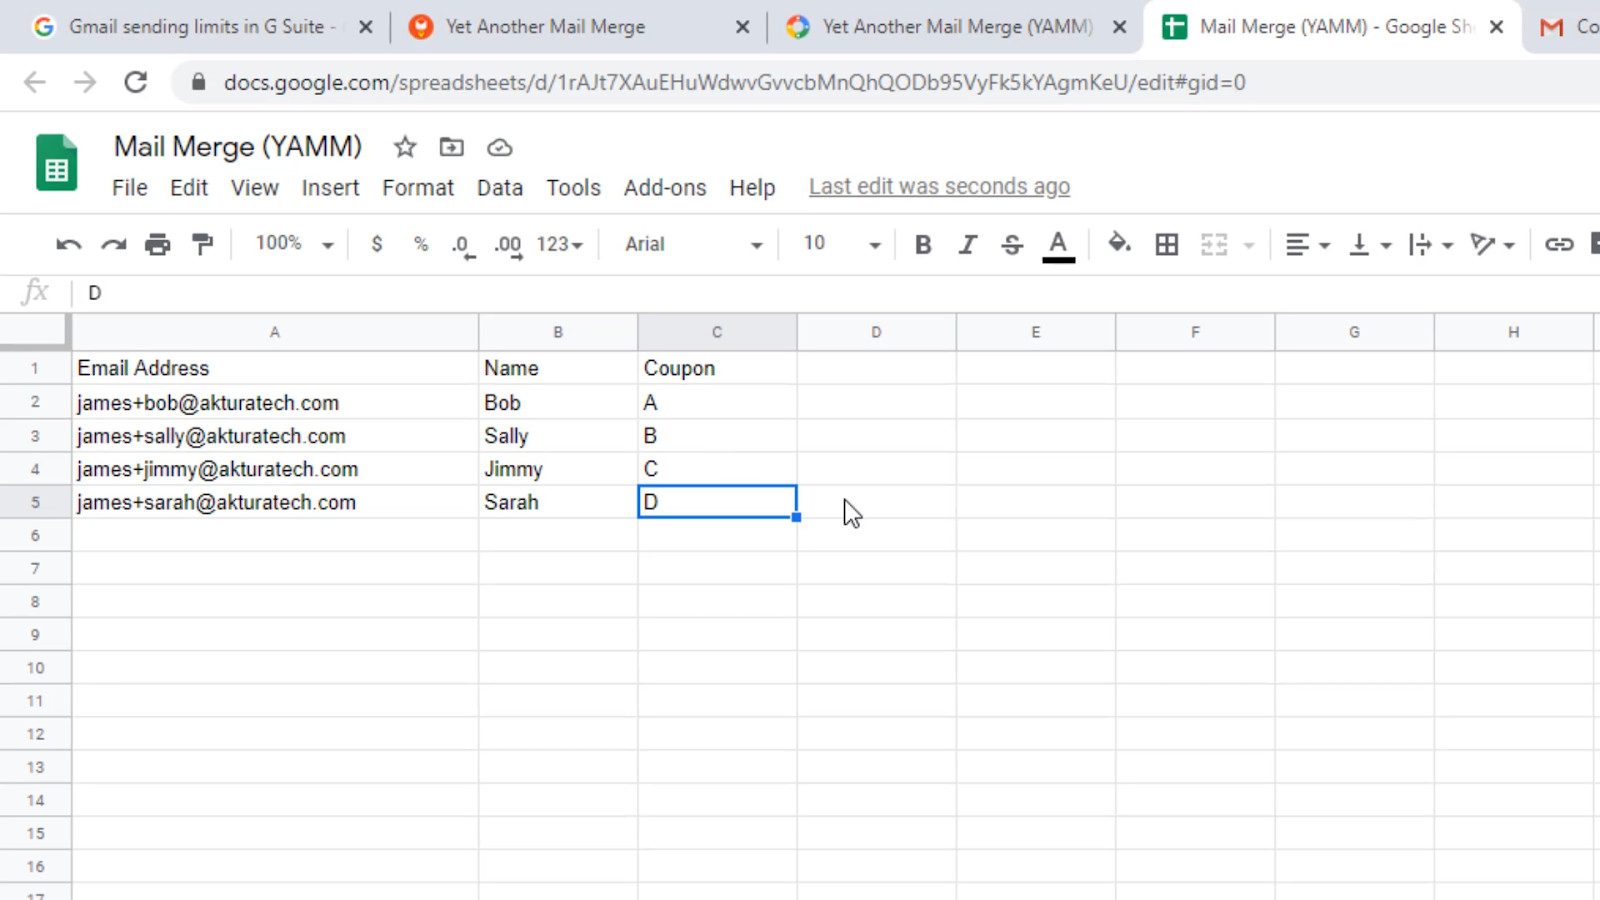
2. Create a Google Sheet
It should look like this. Start simple with columns “Email Address” and “Name”
Add your recipients.
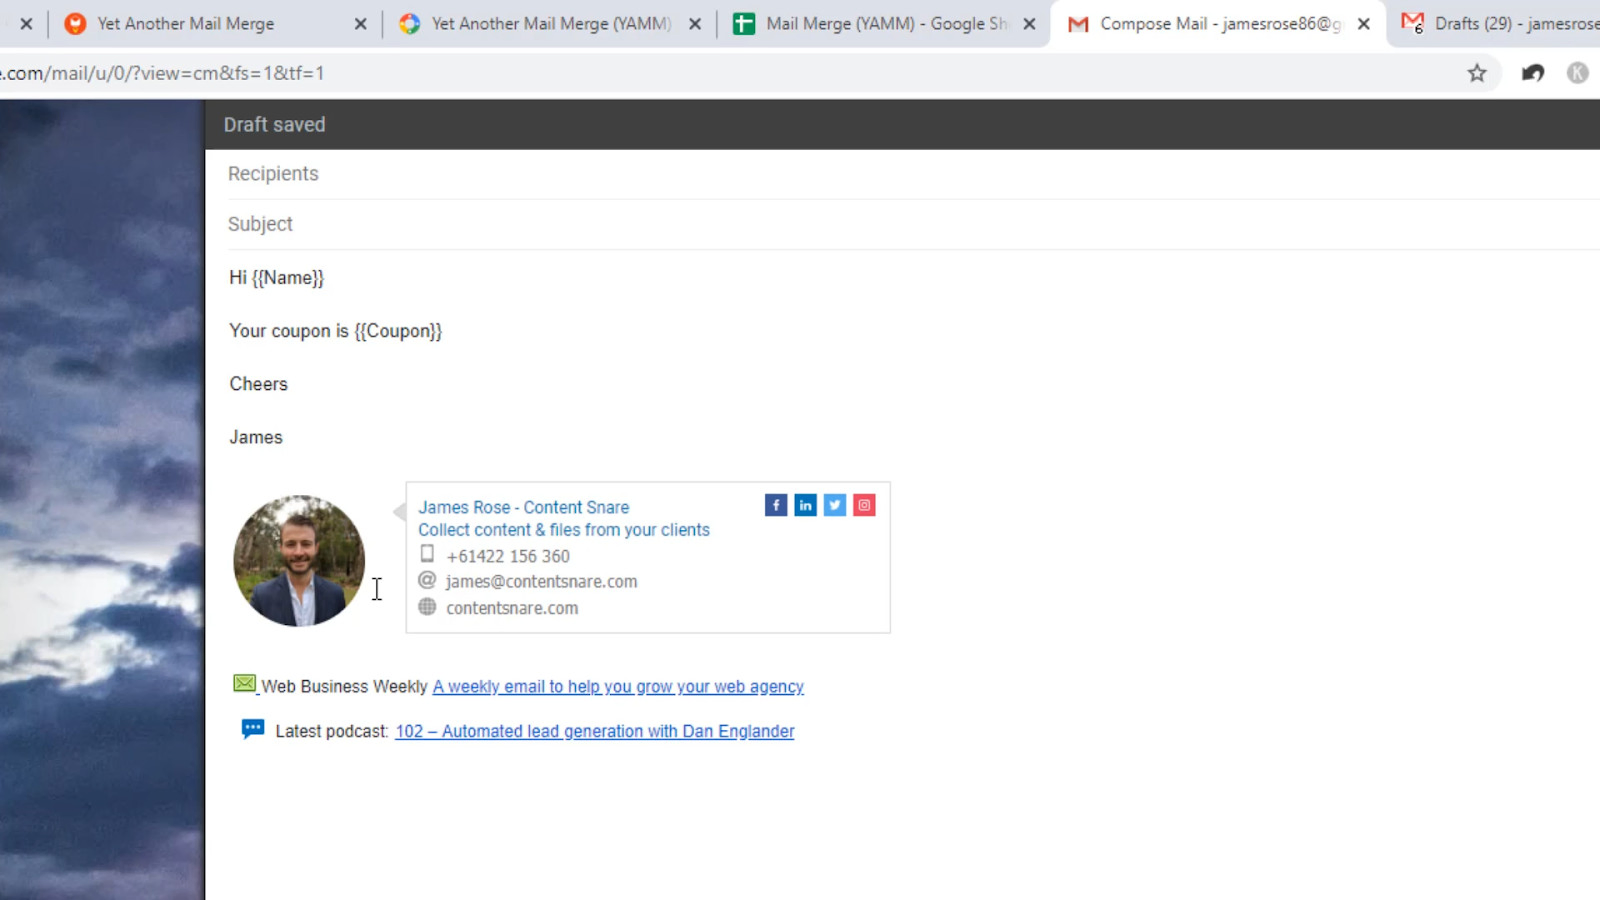
3. Create a draft email
Go into Gmail and start composing a new email. This draft will be copied by the tool and sent to all your recipients.
You can set any of the following:
- Subject
- Email body
- Cc/Bcc
- Attachments
- From address (Alias)
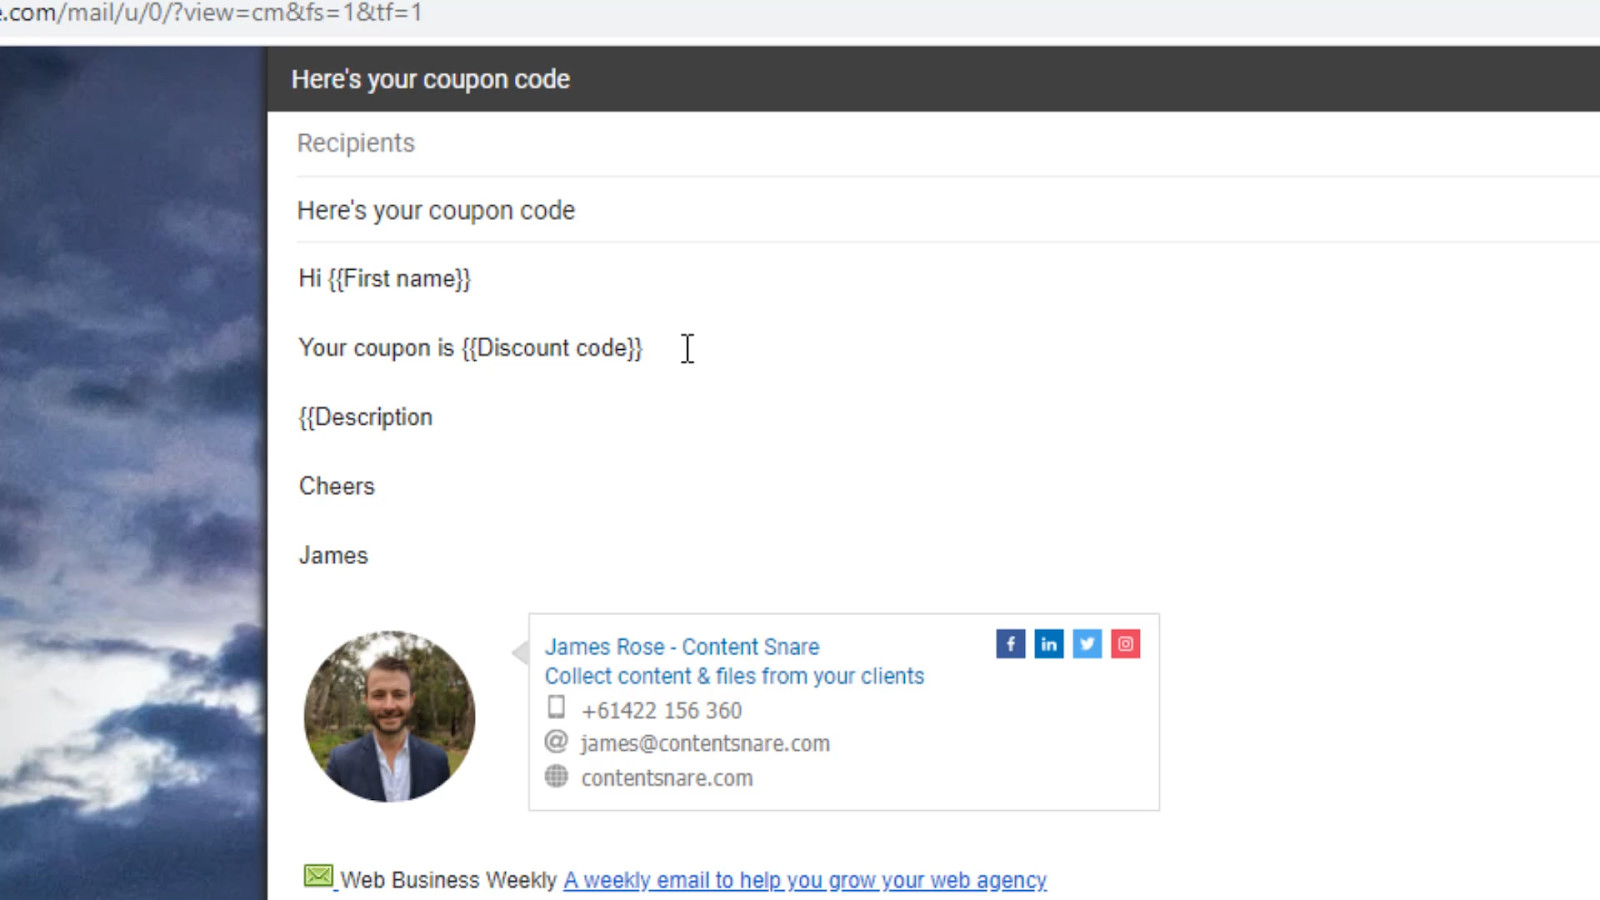
In your email, you can use placeholders that use curly brackets with the column name inside, like this. Make sure it exactly matches
{{Name}}
4. Send a test email
The first time you try to run it, you’ll need to give the app permission to access your account.
Choose the email template from your list of drafts, and enter your name in the first box.
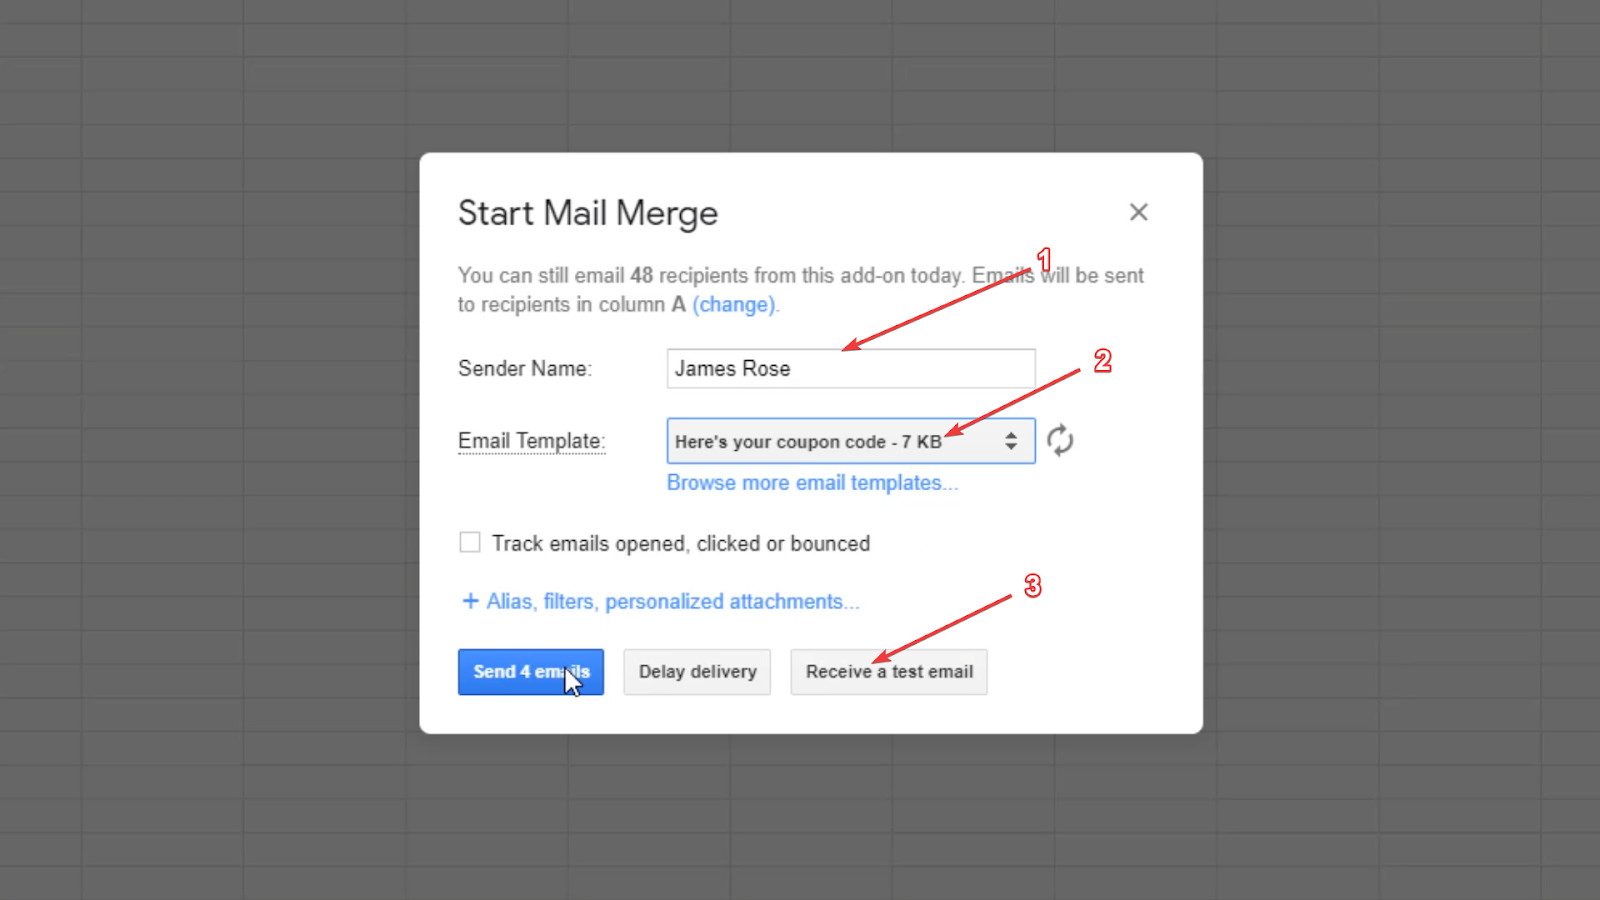
You should also test the email first using this button. Then just check it has arrived and that all the placeholders were filled out. If you see curly brackets in your email, then you know something is wrong.
5. Run the Gmail mail merge
This time just click the ‘send email’ button.
Yet Another Mail Merge will add a new column saying that the emails have been sent.

Easy!
Option 3 – Google Script
This method has no sending limits (other than the standard Gmail ones) and is totally free. The setup is a tiny bit more complicated though.
1. Copy the Google sheet & script
Go here, then scroll down to the special link that enables you to copy the spreadsheet.
Create a copy in your Google Drive.
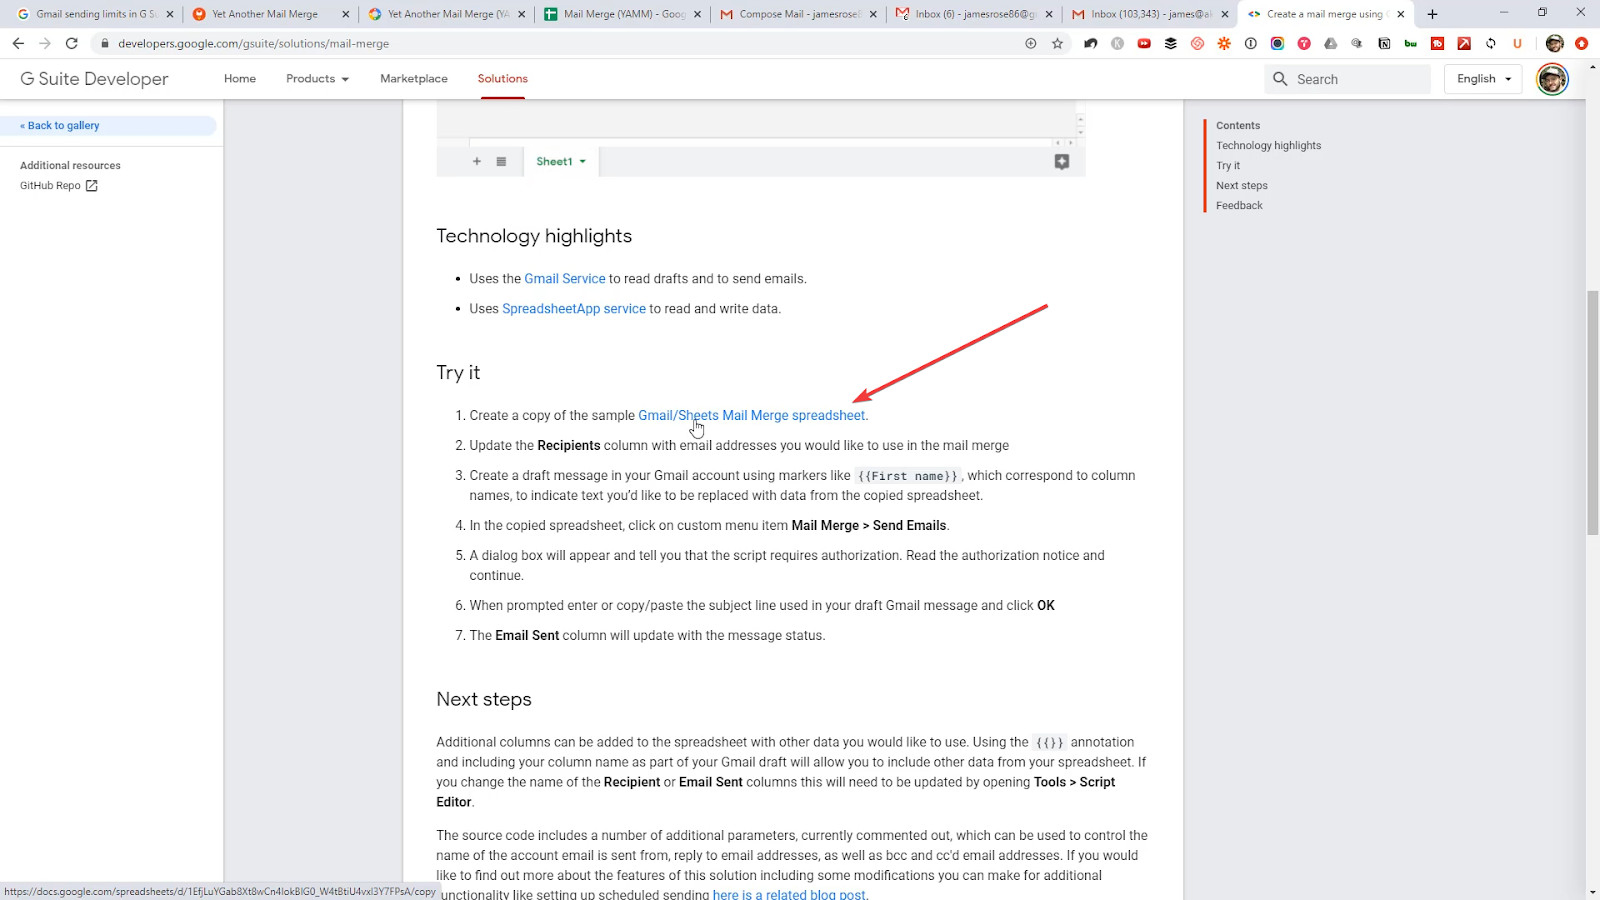
2. Create a draft email
This is almost exactly the same as the previous method. However with this tool you can’t set alias, cc or bcc. Attachments work though.
Again, be very sure that you match the column names exactly as they are, inside curly brackets. Notice this time we’re using “First Name” instead of “Name”.
3. Add recipients to the sheet
For your first run, just add your own email so that you can test it is working. You can copy the other ones later.
4. Edit the script
Open the script by going to Tools -> Script Editor. Find the line where it says “GmailApp.sendEmail”
Here, you can remove the comments (remove the two slashes) from the “name” line. This is where you set your name. You can do the same with bcc, cc, and your email alias if you need to.

5. Send the emails
In the Google Sheet, go to Mail Merge -> Send Emails
The first time it runs, you’ll have to grant permission. It may tell you that it is “unsafe” and that is because the script hasn’t been verified by Google. It’s up to you, but I am happy to grant permission.
This tool requires you to enter the email subject. So just paste it directly in from your draft email.
Then click send!
It will also update the last column to add the email sending status. Then just check it has worked.
Once you’re happy with the test, add the rest of your recipients and repeat steps 4 & 5.
Option 4 – Right Inbox
Right Inbox is not only a mail merge product, but has a whole bunch of other features like:
- Send later
- Email reminders
- Private notes
- Sequences
- And much more
One of their newer features is mail merge.
Check out the video below to see how it works.
