How to take full webpage screenshots with Chrome
If you’ve ever needed to take screenshots of an entire webpage, you know how much of a pain it is to have to manually scroll and take separate screenshots of the same page.
Good news! There are a couple of tools you can use to capture full webpages and make your life a whole lot easier.
One of these tools is actually built into Chrome and one is an extension.
1. Built-in Chrome option
The pros of using this method are that you don’t need to download an extension, and the tool is one of the better ones out there when it comes to ignoring any sticky bars (like th WordPress one in my video) as it scrolls the website.
Here’s how to use it:
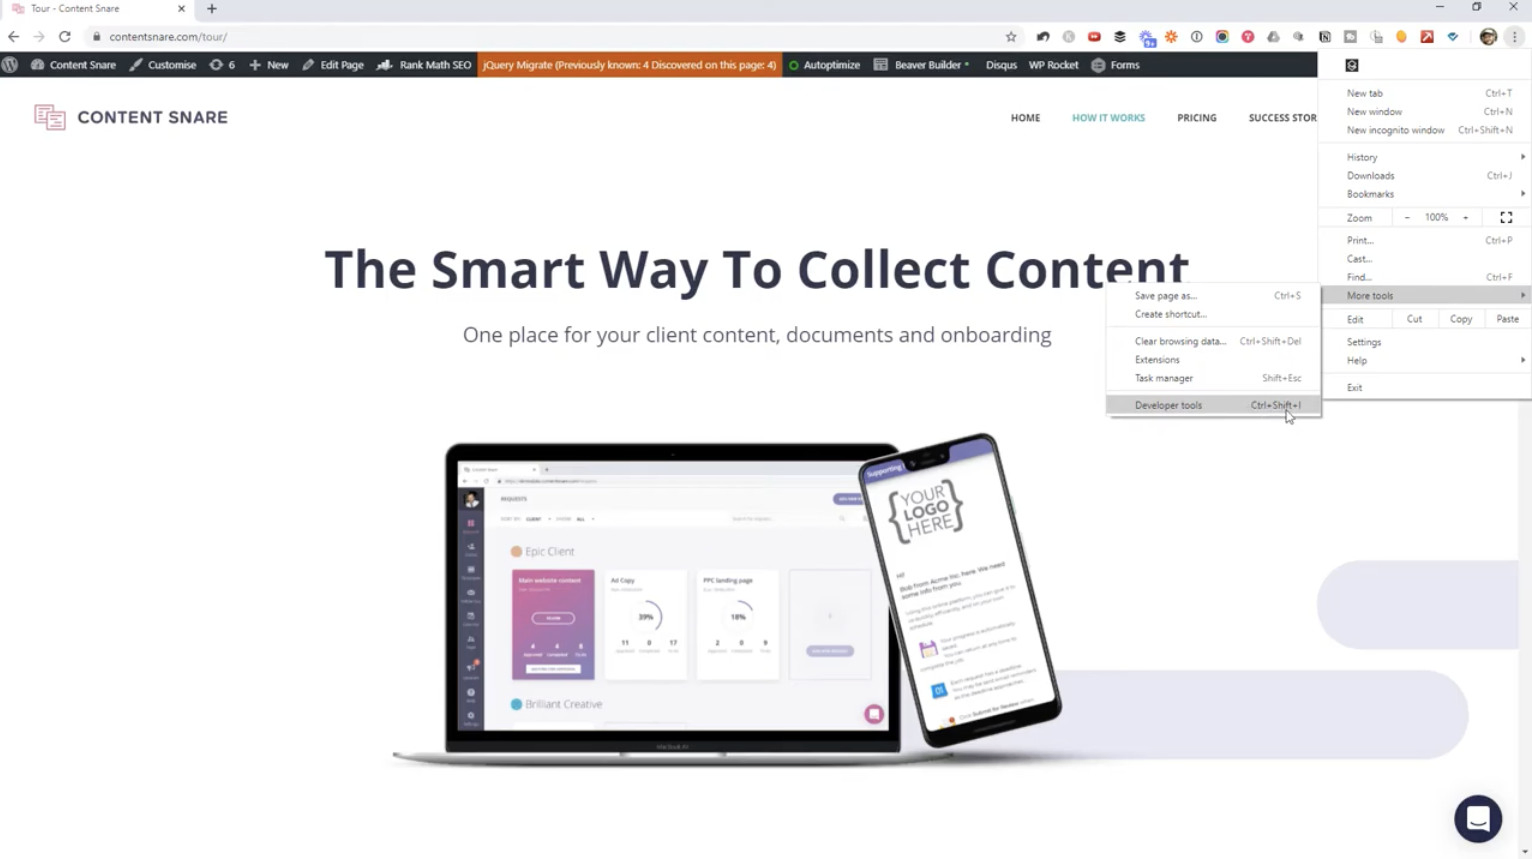
1. Go to the three “more” dots at the top right of your browser window.
2. A window will pop up. Go to “more tools”, and then to “developer tools.”
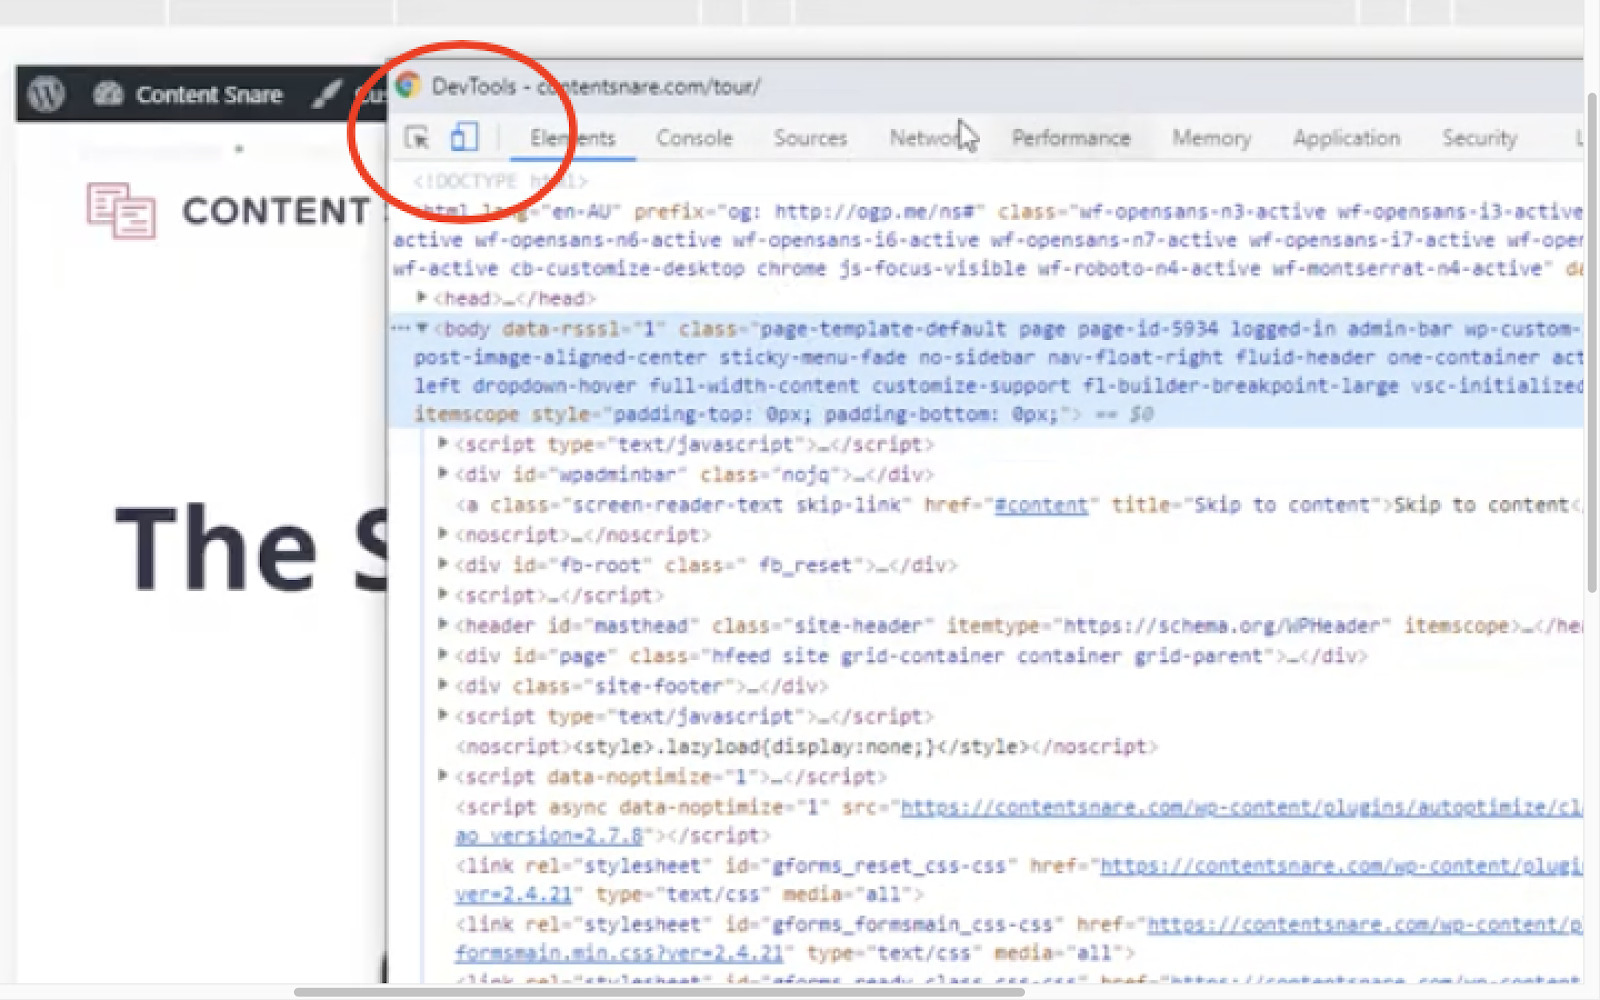
3. You’ll enter a slightly different view mode and will see a new window pop up filled with code.
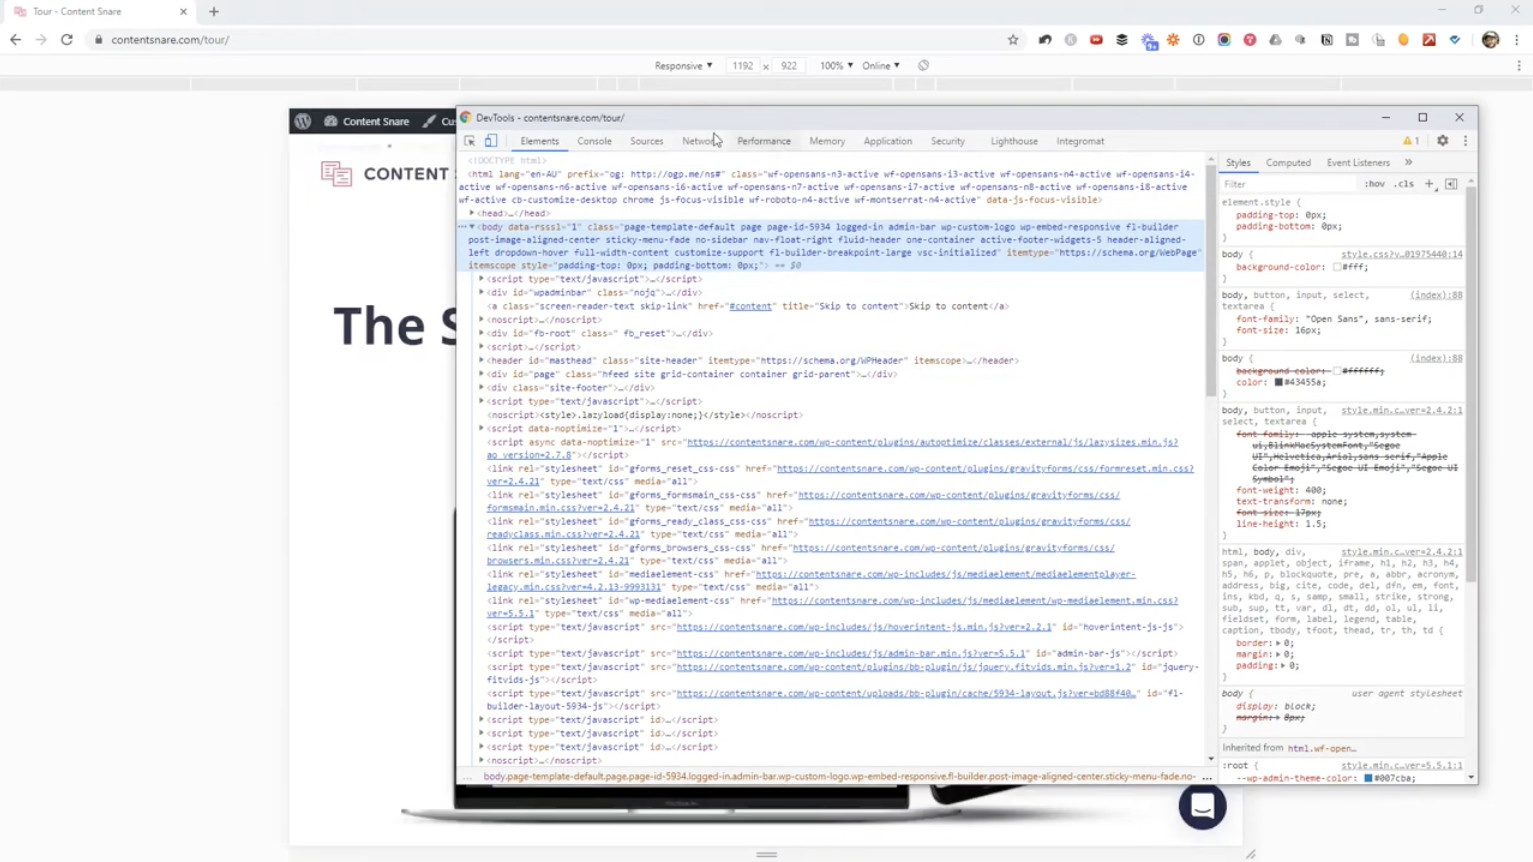
4. If the page doesn’t look any different, hit the “toggle device toolbar” icon at the top left of the developer window.
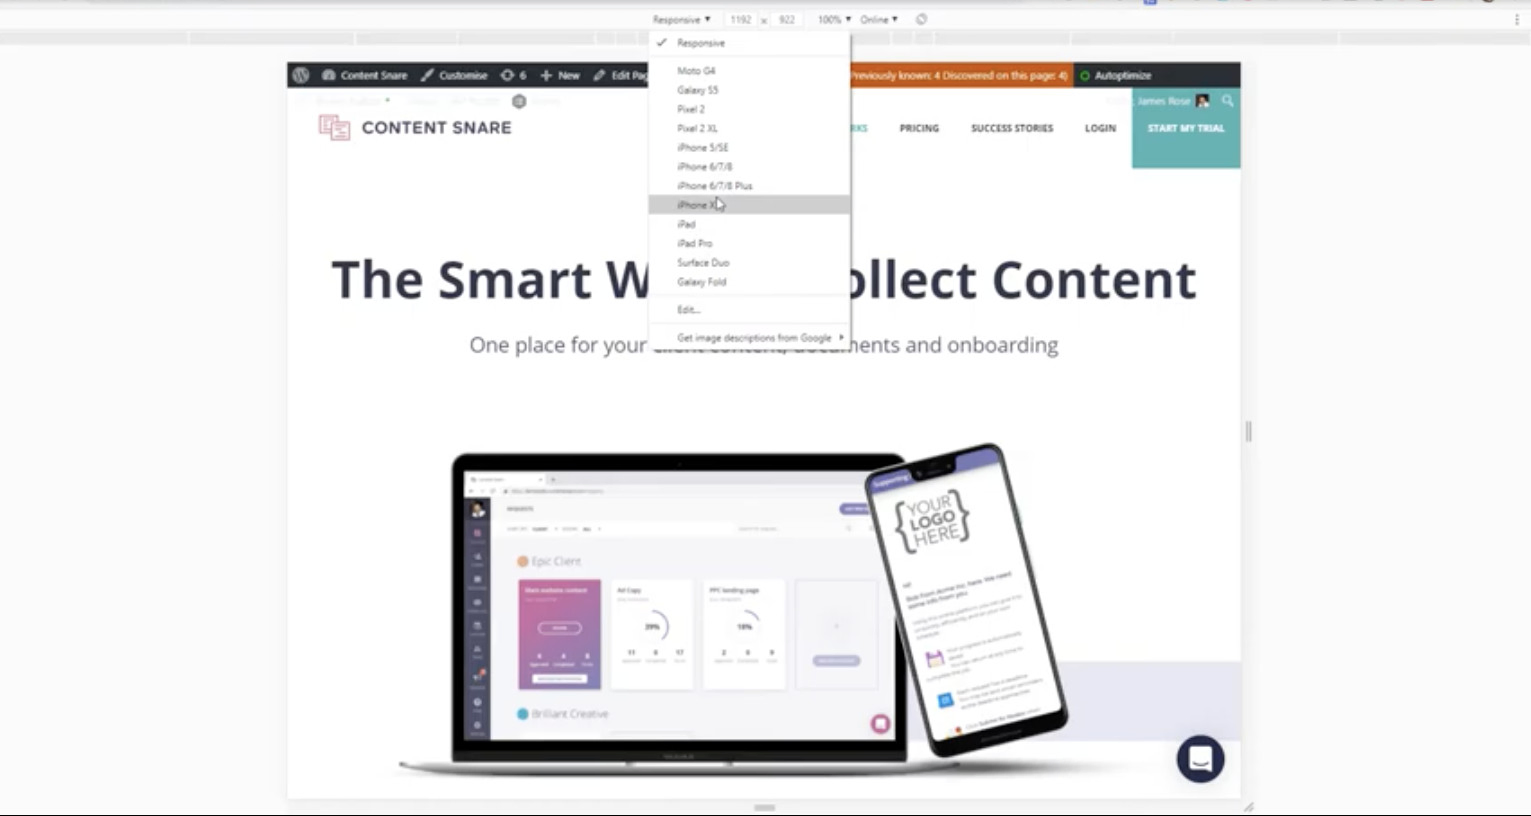
5. Use the “responsive mode” to select what device you’d like to see the screen shot on. To use default, just leave it on “responsive”.
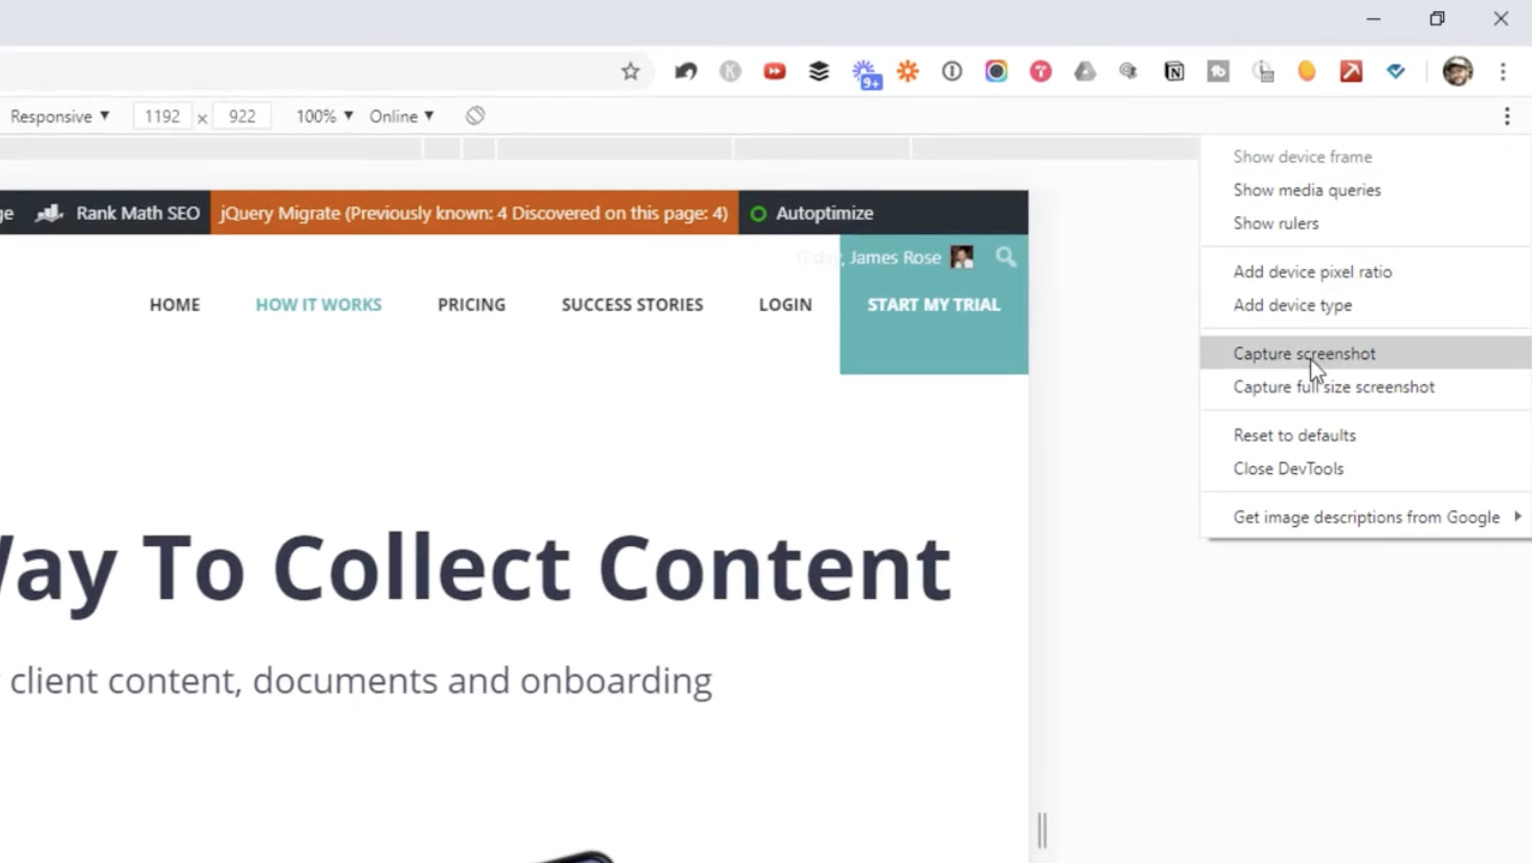
6. At the top right of this new row, you’ll see a new “more” button. Click this and go to “capture screen shot” in the menu, or “capture full size screenshot” to get it all.
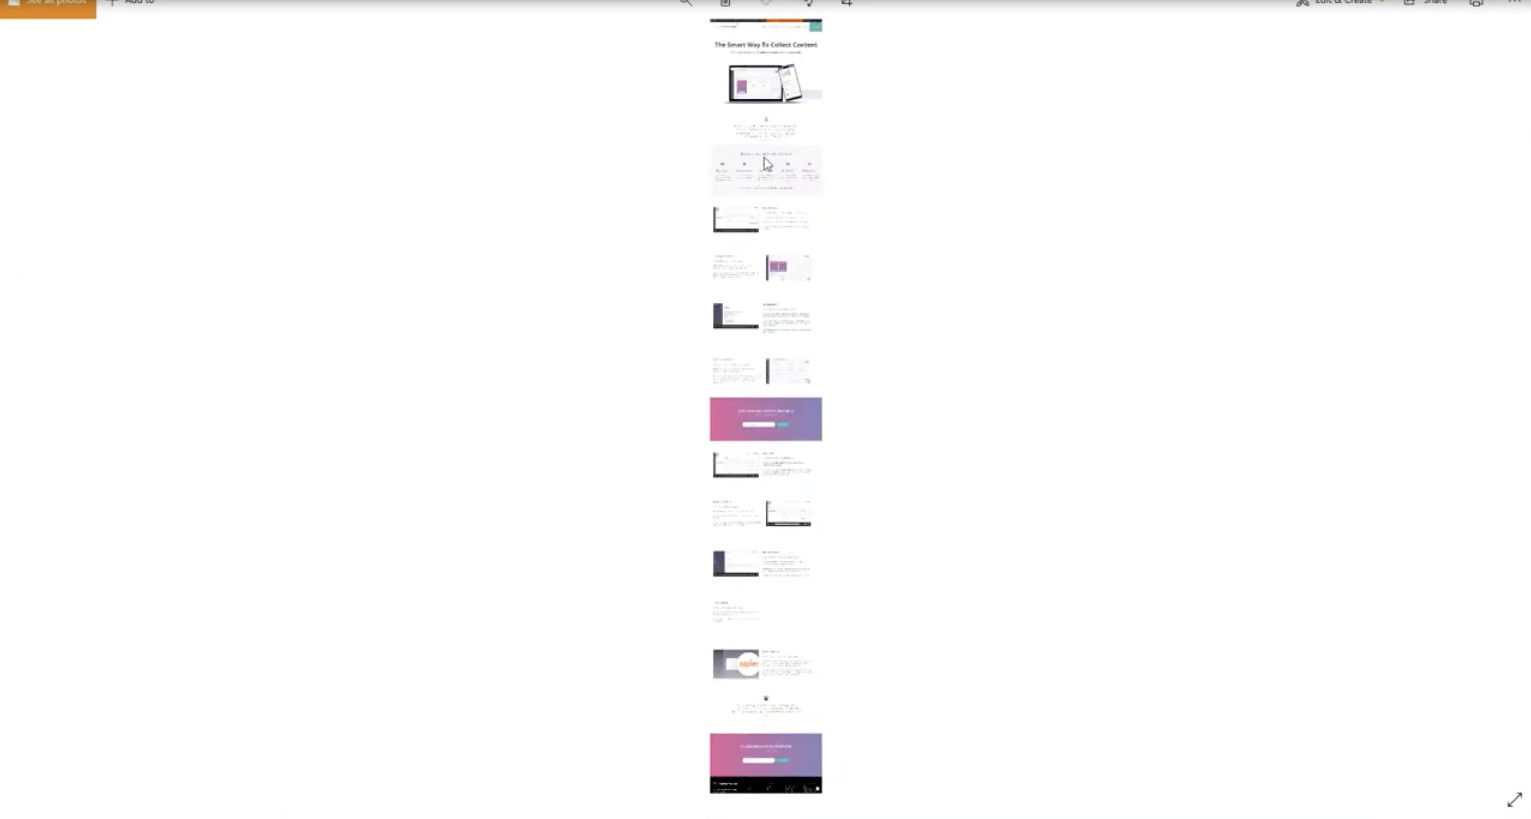
7. Wait a few seconds and you’ll see that the tool would have already downloaded a file and opened it up for you, as seen here.
In my example, the site’s footer got cut off, so be sure to keep that limitation in mind if you use this tool.
2. Awesome Screenshot & Screen Recorder Chrome Extension
1. Search for the extension “Awesome screenshot & screen recorder” in the Chrome web store or through a Google search.
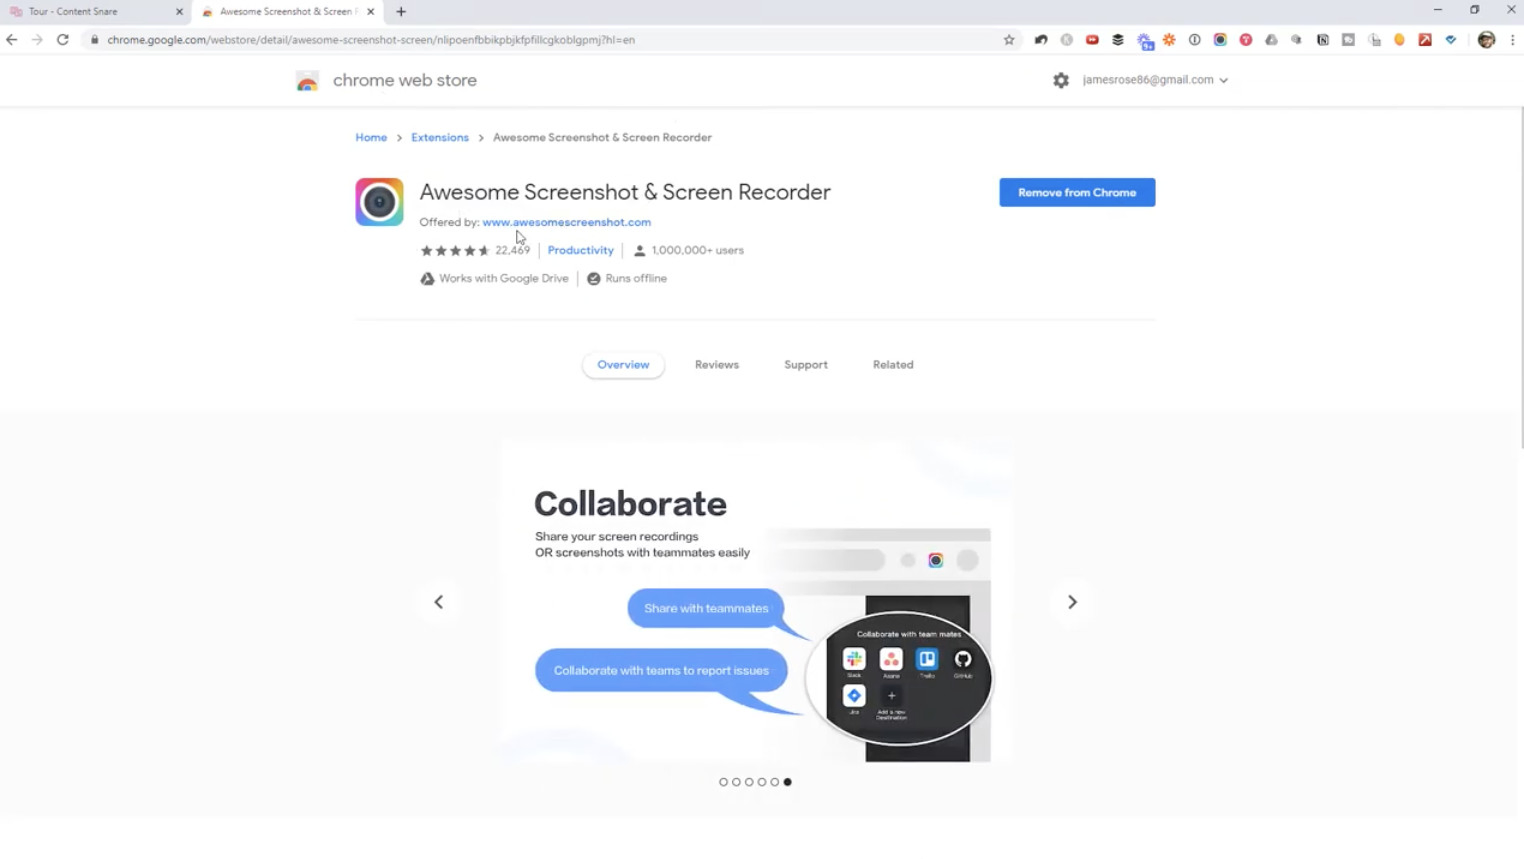
2. Install the extension and you’ll see its colourful icon at the top of your toolbar.
3. Click on the extension when you’re on the website you want to capture. You’ll get a list of options and their keyboard shortcuts if you hover over them.
You can screenshot a visible part of a page, a full page, or a selected area. The extension can even help you record screen captures if that’s what you’re looking for.
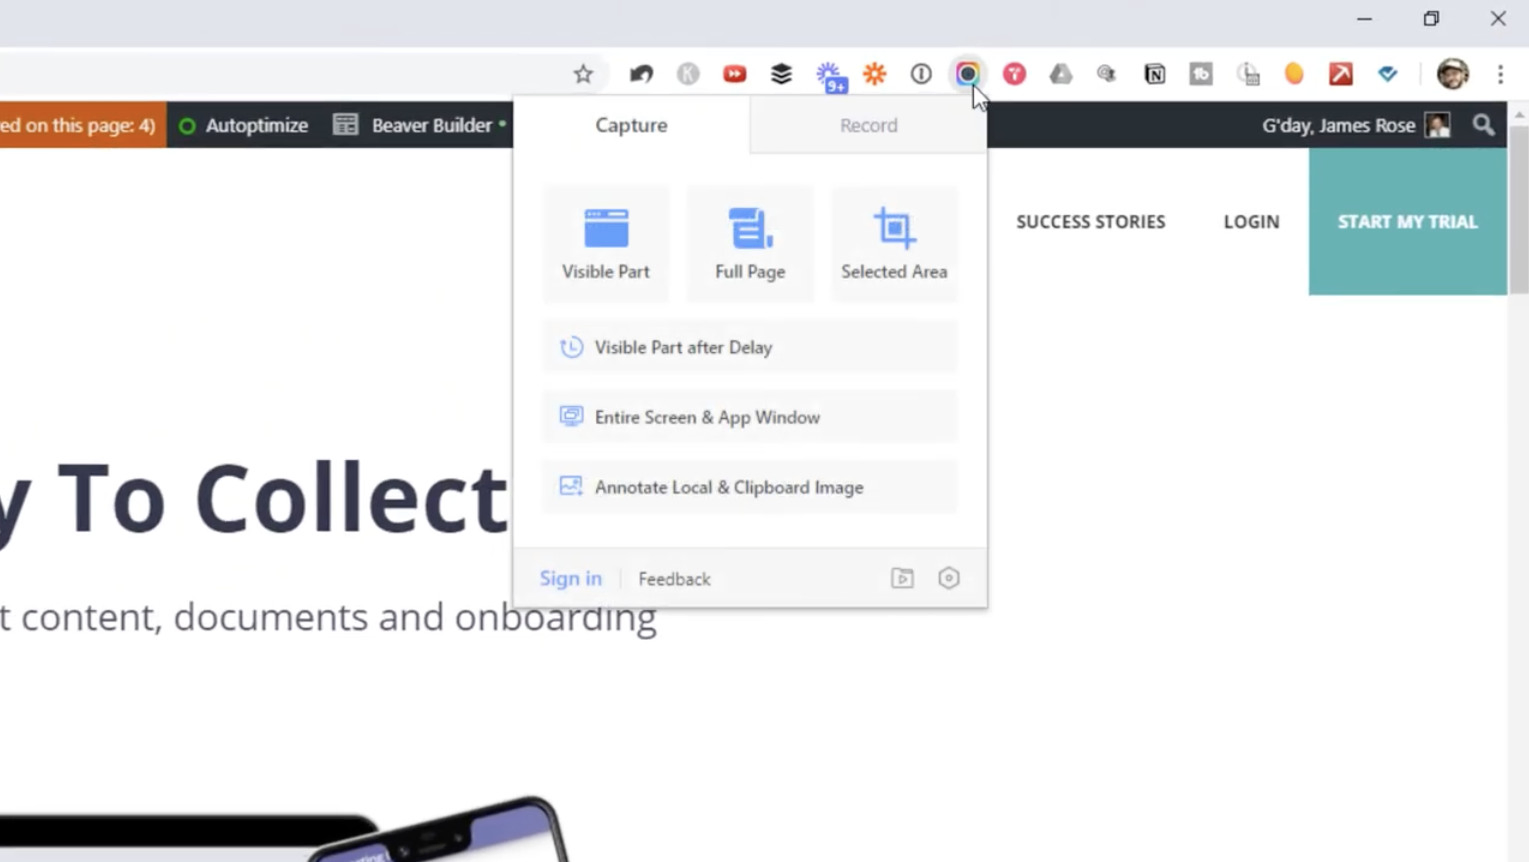
4. Select full page to capture a full webpage screenshot.
5. Wait a few seconds, and you’ll end up on a page displaying the screenshot.
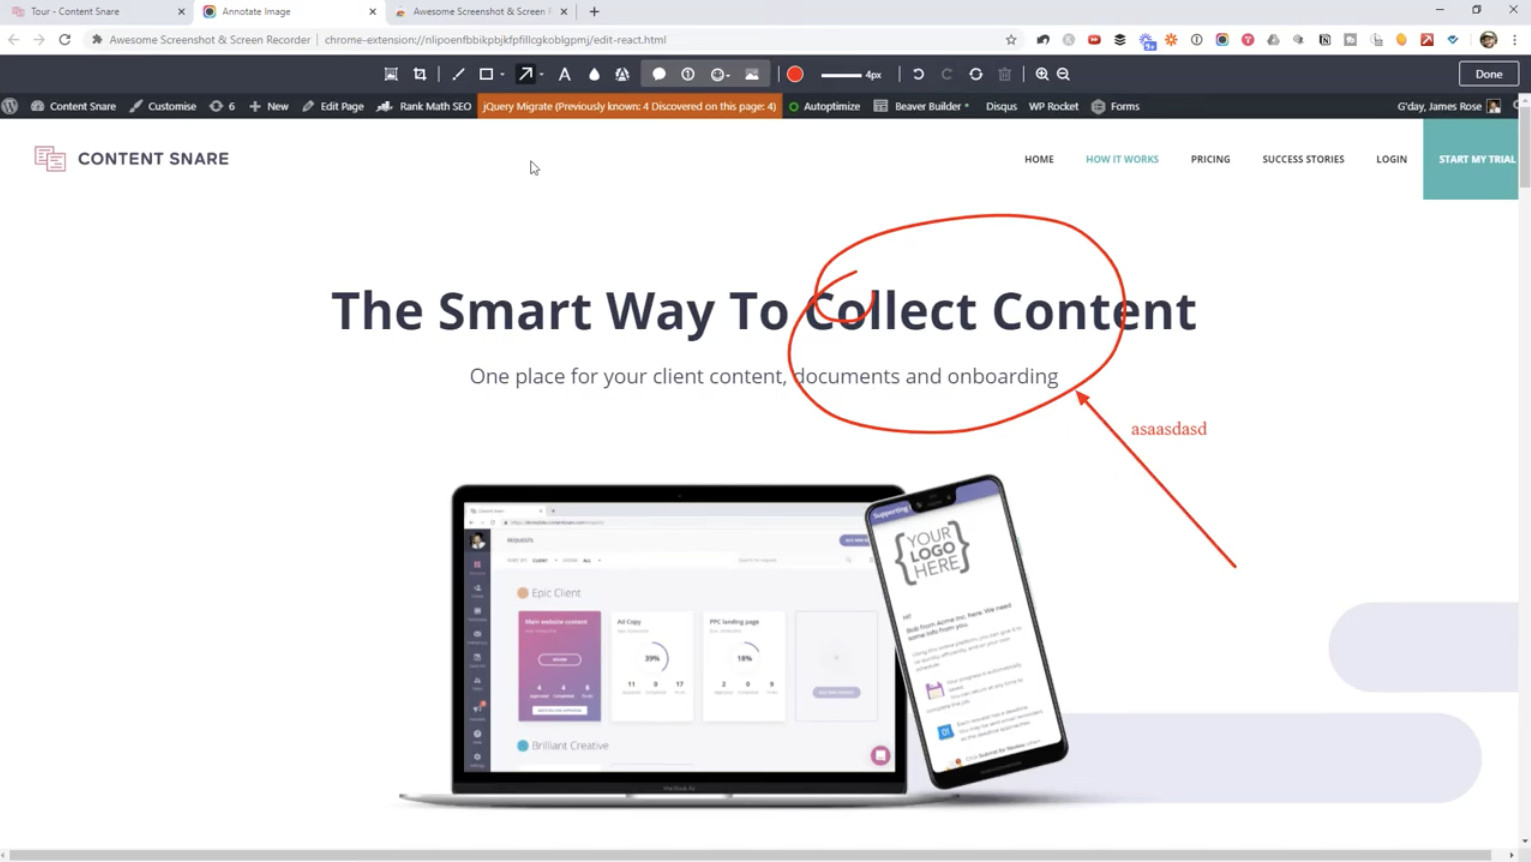
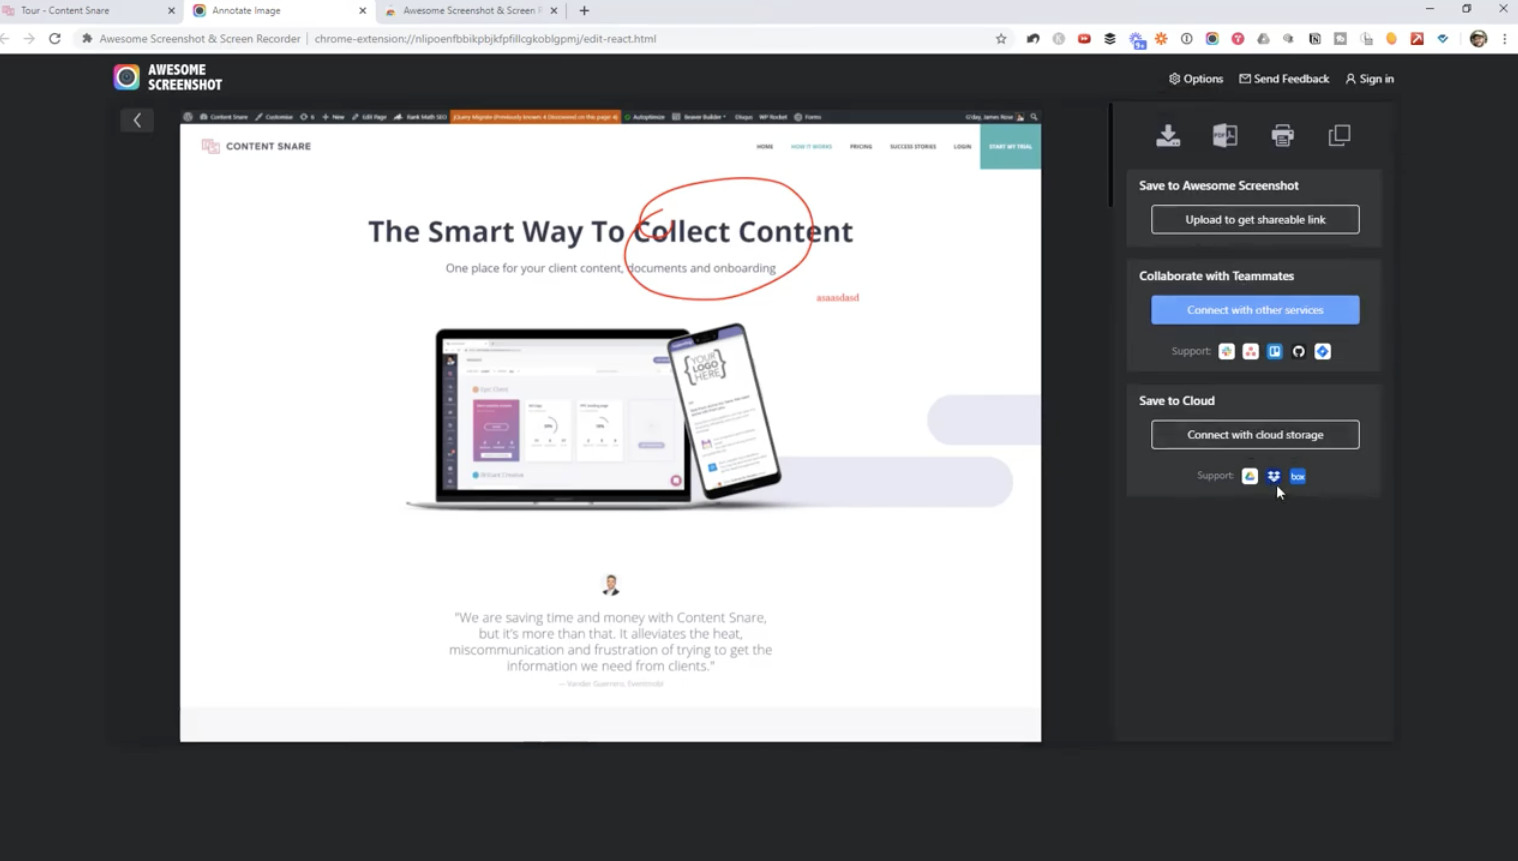
6. At the top of your page, you’ll see a new toolbar that gives you the flexibility of adding annotations to your screenshot. You can easily add annotations, text, and arrows like below and even crop sections out.
7. Once you’re done adding your annotations, click the done button at the right hand corner to save your changes.
8. A new window will pop up on the right with a range of options for saving and sharing your new screenshot through a share link, through dropbox, email, on Slack, etc. You can choose to manually save, or even copy the screenshot to paste it elsewhere.
So there you have it, two handy ways you can take screenshots of full websites, and even annotate them if you need them.
Get snappin’!
