In this Zapier Tutorial, you’ll learn how Zapier works and create your first Zap.
You’ll also see how to generate ideas of what you can automate, because getting started is often the hardest part.
Automation can save you an unbelievable amount of time. For busy business owners, this time is invaluable and can be used for much more important things like growing your business.
Zapier is a tool that makes it super easy to set up workflows. It can be a bit overwhelming at first, so this Zapier tutorial and video should help you get started as quickly as possible.
You’ll learn how to:
- Get started with Zapier
- Build your first Zap (from scratch)
- Generate ideas on what to automate in your business
In this Zapier example, I’ll go over an extremely popular automation. It’s a great place to start as you most likely already have a contact form and a CRM or email marketing platform set up.
We’ll add people that fill out your contact form to your CRM.
First though, an introduction to Zapier components.
If you prefer to learn by video, watch the Zapier video tutorial this instead of reading the post below. You’ll learn much faster than by reading, and also a few extra tips that aren’t in this written tutorial.
Zaps
A “Zap” is just Zapier’s work for an automation or workflow. It is a series of steps.
Triggers and Actions
The two main building blocks of Zaps are Triggers and Actions.
The easiest way to think about it is:
- When this happens (Trigger)
- Do this (Action)
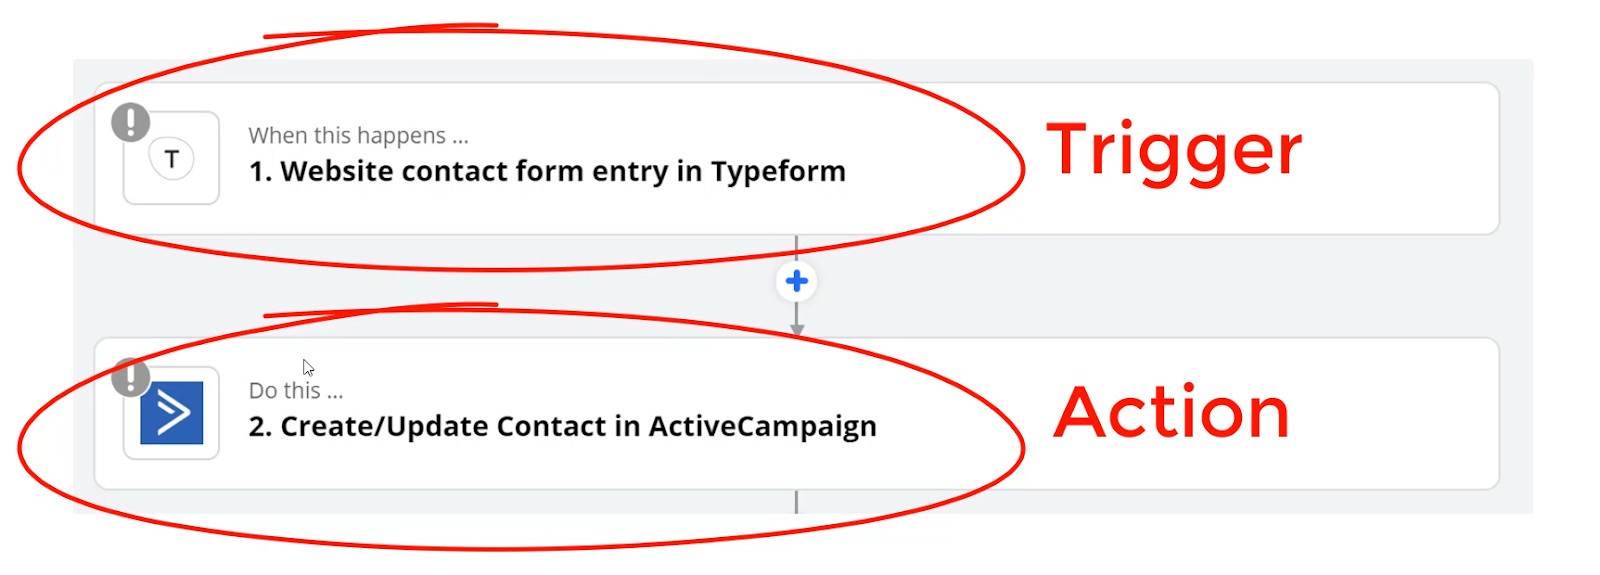
The simplest workflows (also called Zaps in Zapier) contain one trigger and one action.
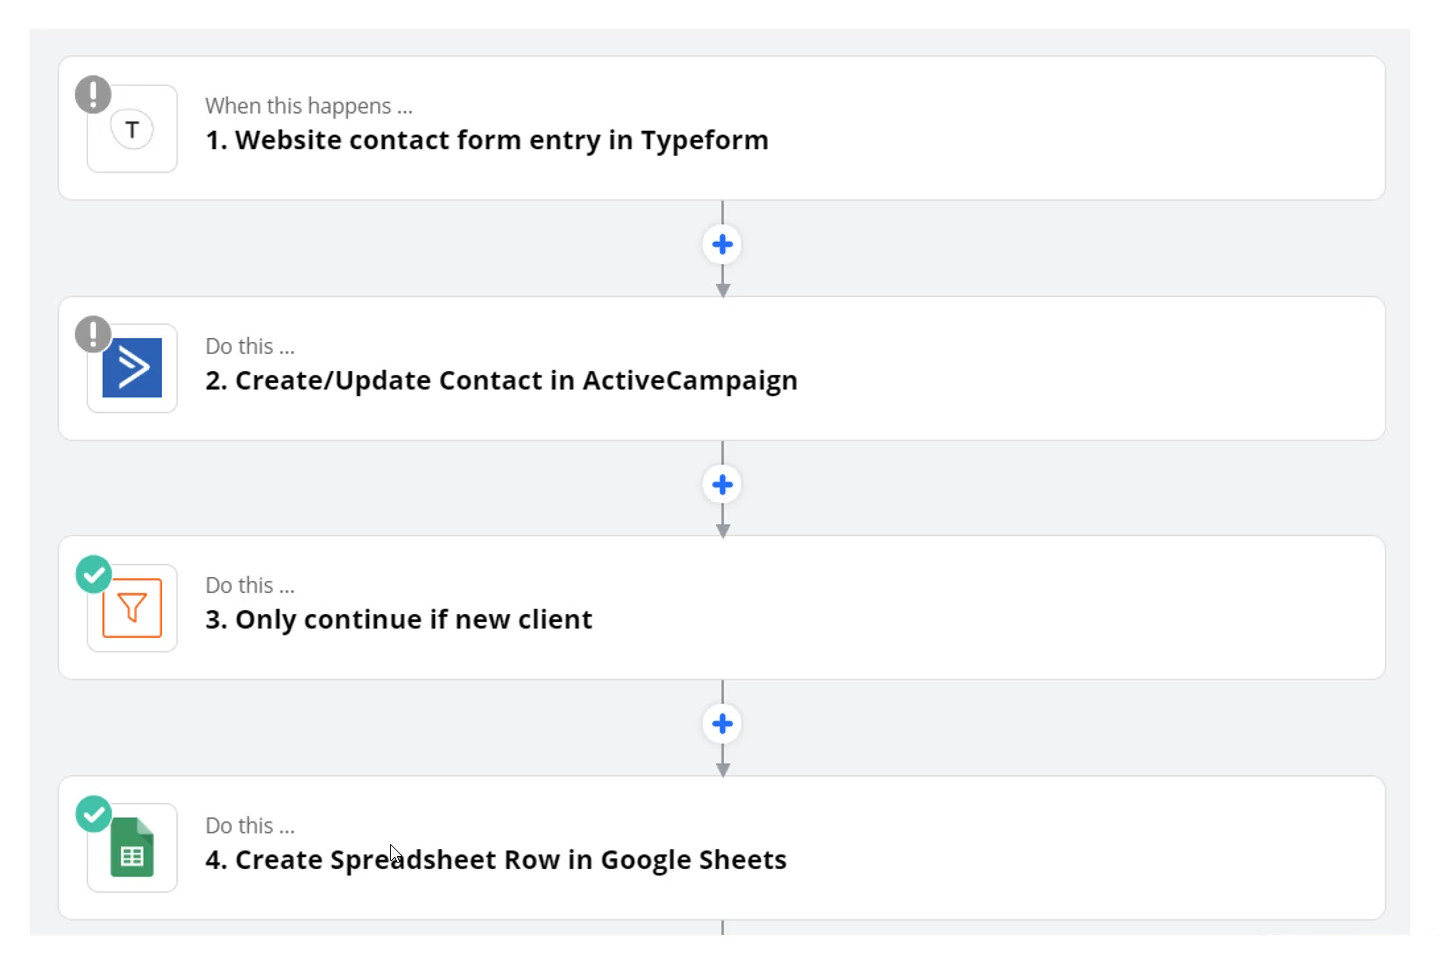
Filters
You can however expand workflows have multiple actions, and more advanced blocks like Filters. Filters make sure your workflows only run under certain conditions.
For example a filter might say “only add this person to my CRM if they ticked a box to say they are interested in our web design services”
Creating your first Zap
Prerequisites
Following the example of Contact Form -> CRM, we’ll use these two tools:
- Typeform
- Active Campaign
You can use any tool that has a Zapier integration, but I’m just using these for an example. The beauty of Zapier is once you know how to use it, you can integrate with just about any app you want.
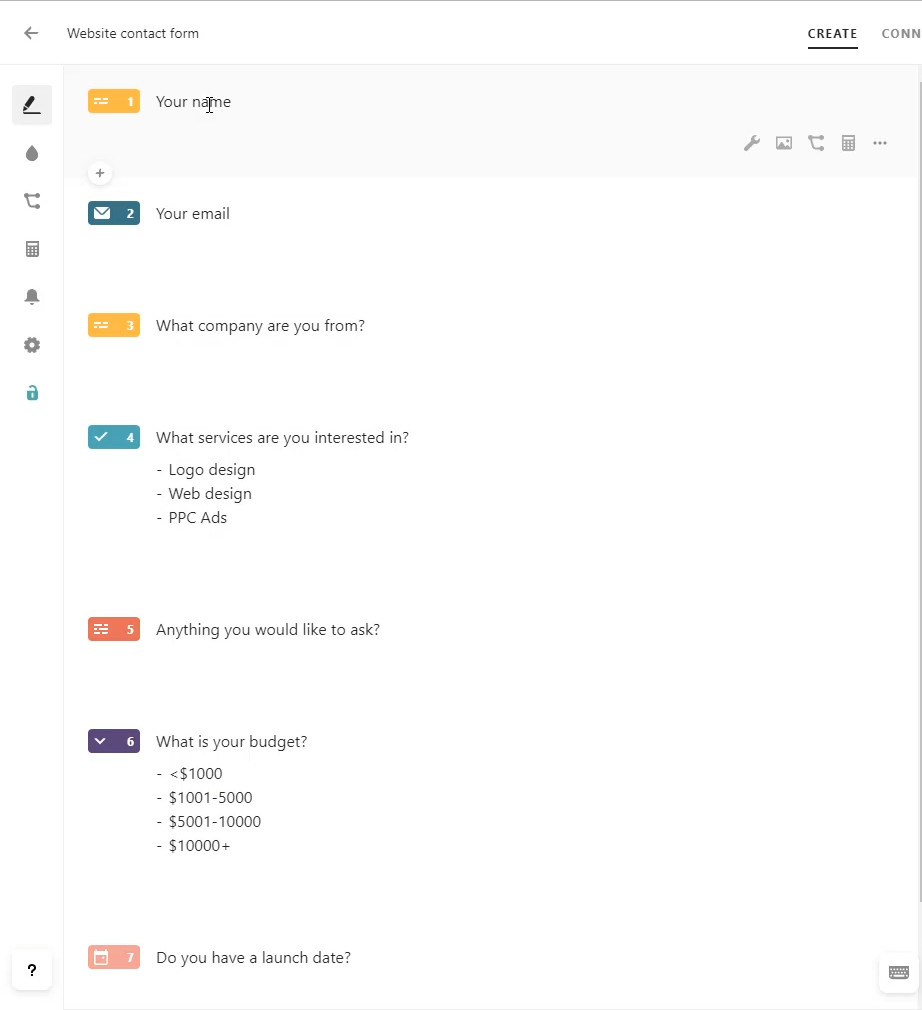
I’ve already created a contact form in Typeform with some questions:
And my I have an Active Campaign account ready to integrate.
Step 1: Create a Zap
To get started, click the orange “Make a Zap” button show at the top right of your account.
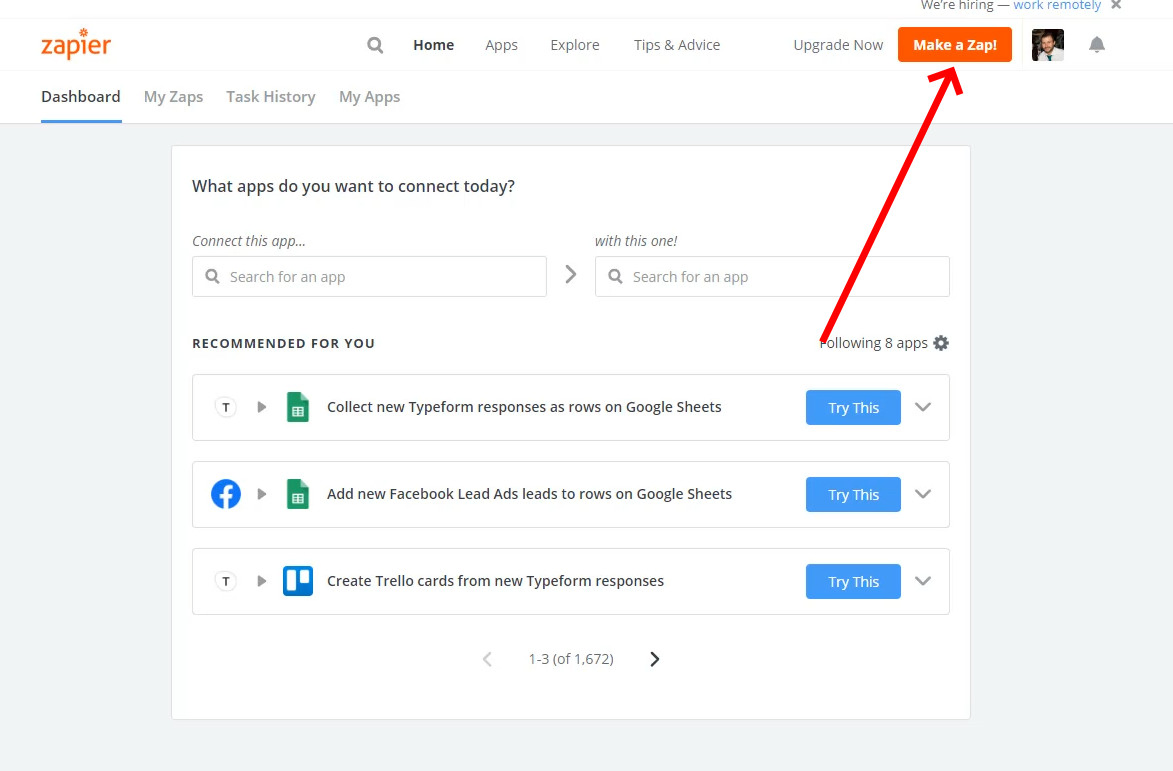
You’ll end up on a page that looks like this.
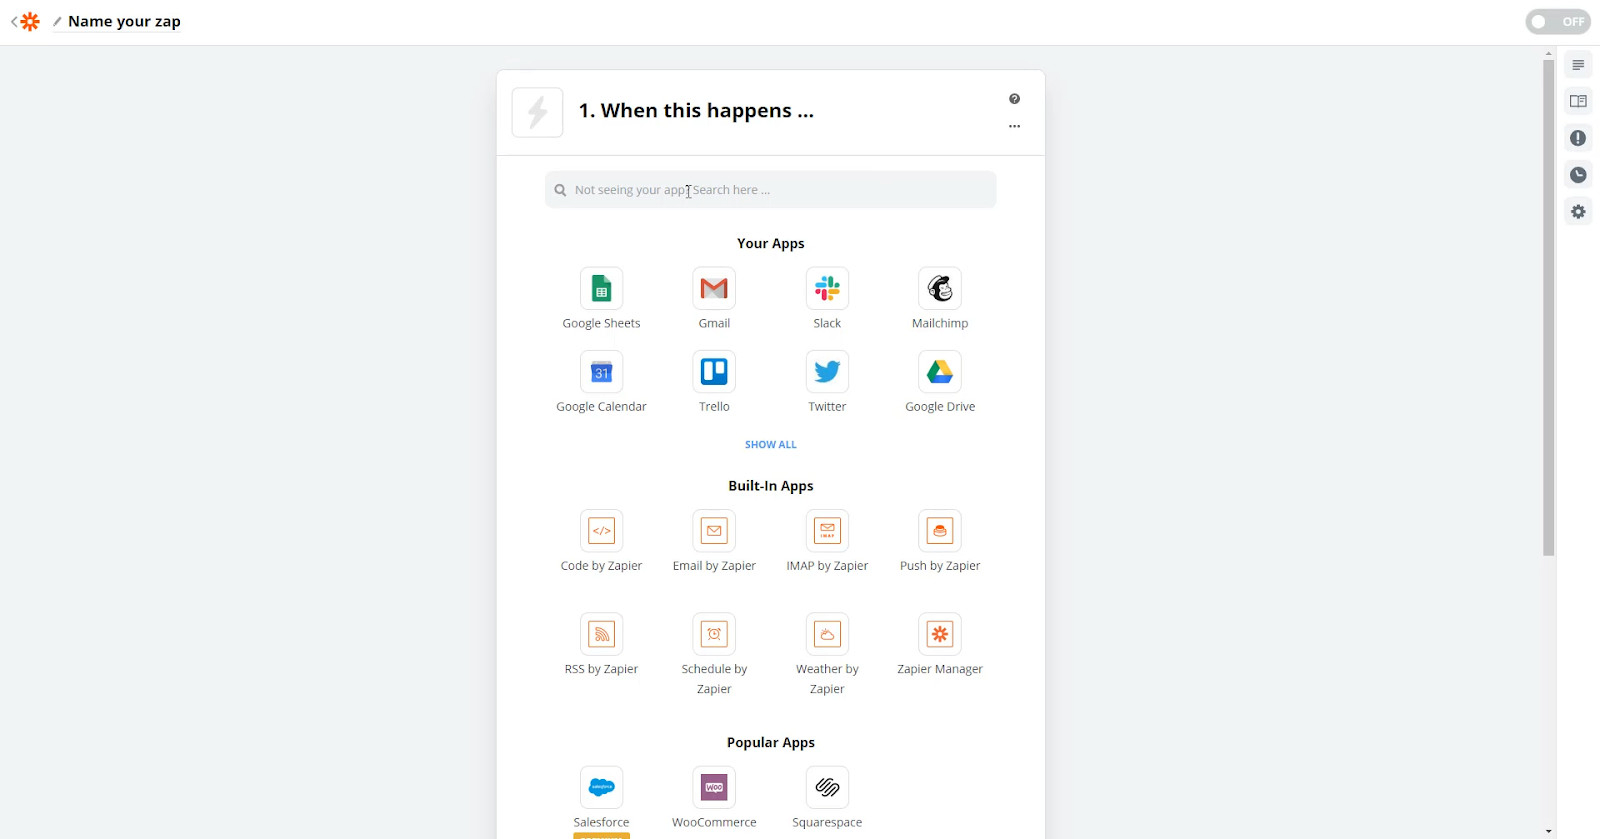
Step 2: Choose app and connect account
First, go ahead and search for Typeform in the Trigger area. It will ask you to connect your account.
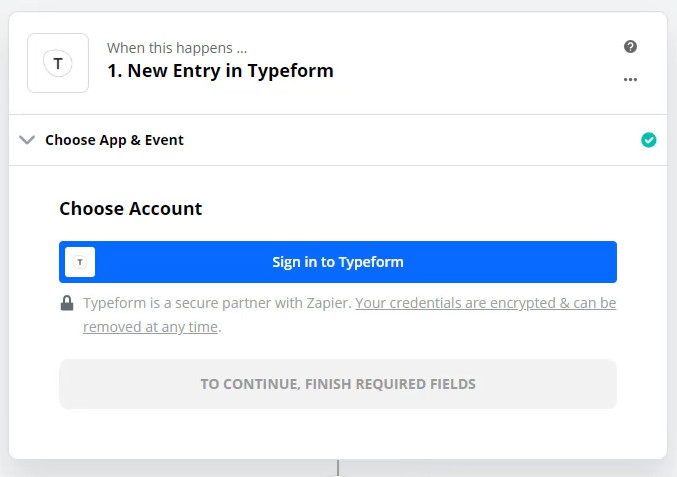
Go ahead and click the sign in button
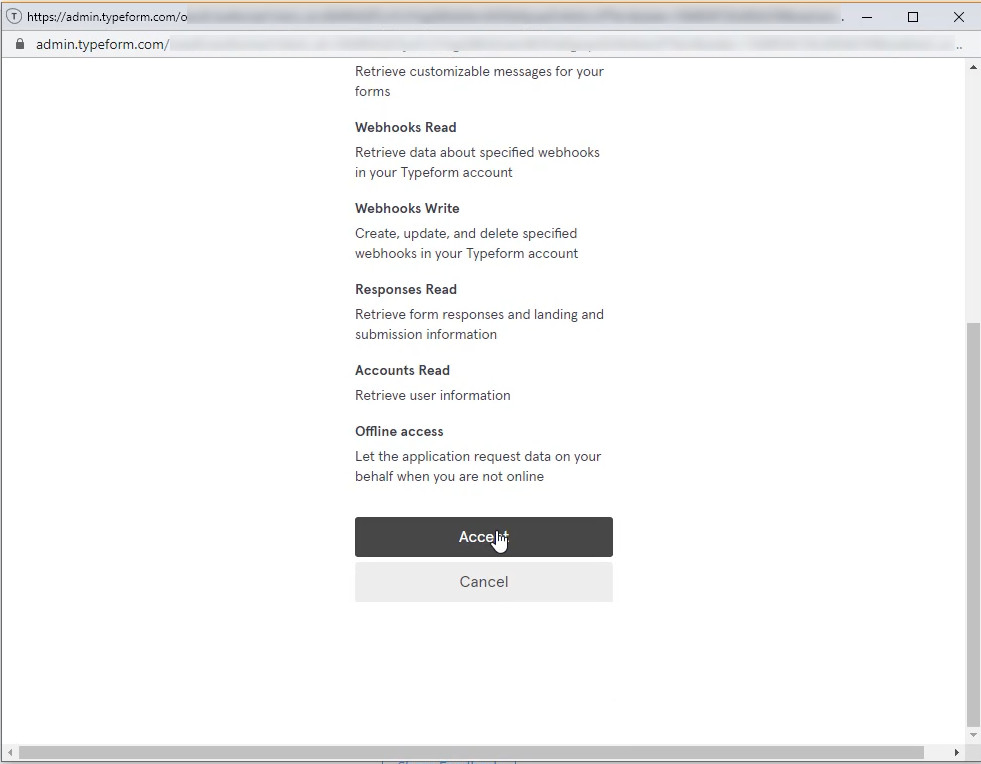
The connection process is different for each app, but there are usually some instructions on what to do. In this case you have to log in to Typeform and accept the permissions that Zapier needs access to.
Step 3: Choose Trigger Options
Now you have to set up the options for your Trigger. With Typeform, this is very simple. There is only one option – to choose which form to trigger on new entries.
So let’s choose our form.
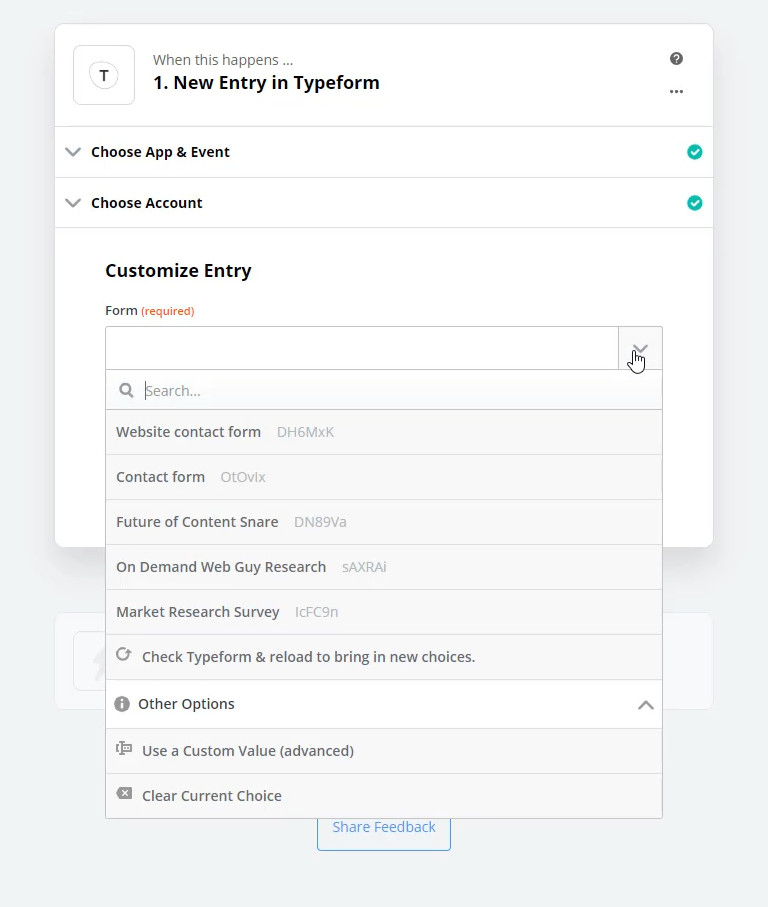
Then click the “Continue” button.
Step 4: Test the trigger
Once you have moved on to the next step, you’ll see this.
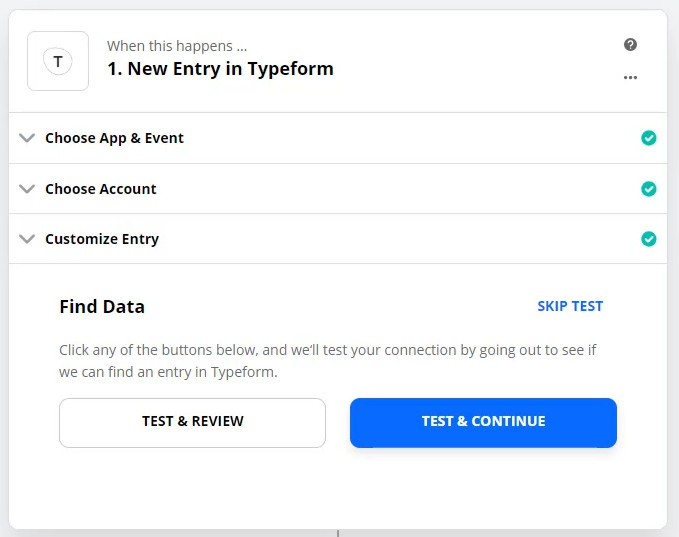
At this point, it’s a good idea to go and submit the contact form yourself, so you can control what data comes in.
Then click Test & Review.
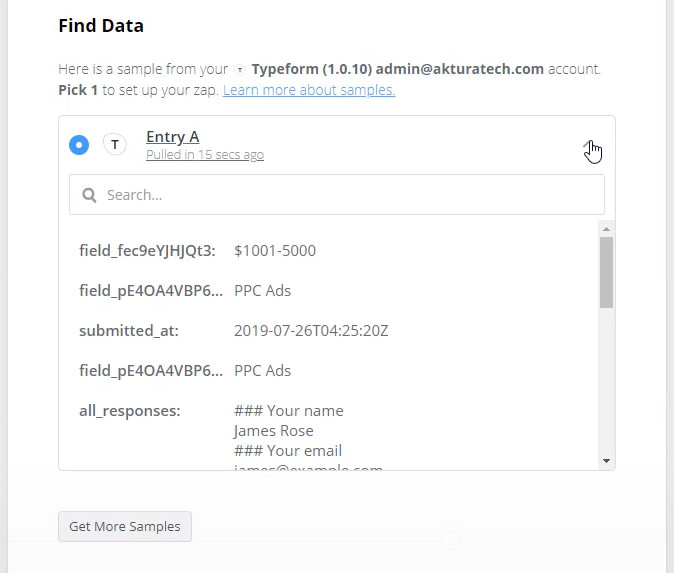
Zapier contacts Typeform, then brings in the submission.
Use the dropdown arrow to open up the data that just came in and scroll through to look at what info came back.
You can use the “Get More Samples” button to reload more if you submit the contact form again.
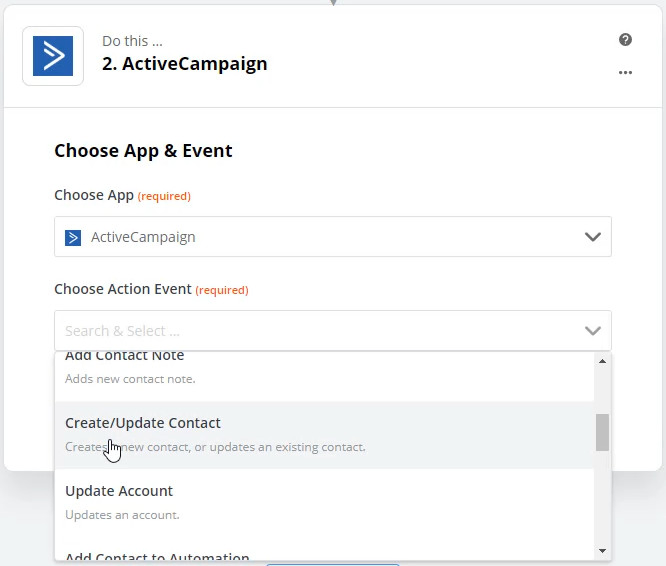
Step 5: Create the action & connect your app
Click “Done Editing” to move onto the action.
Like before, search for the app (Active Campaign) and add it in.
Then look through the action events to find the one we want. We want to add people to our contacts, so select “Create/Update Contact”
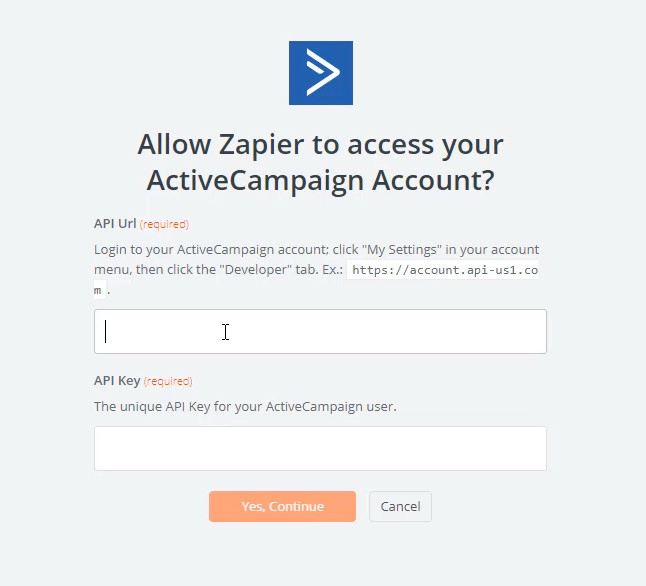
Moving onto the next step, we have to connect an Active Campaign account.
This time it’s a different kind of connection. We need to fill in these two fields, but Zapier gives us instructions on where to go to get that info in Active Campaign.
Step 6: Set up the action
This step is different depending on what app you’re using, and what Action you are doing.
I would highly recommend watching this Zapier tutorial video to see this in video form.
The main things you need to know are:
- Ensure any fields labelled as “required” are completed
- When there is a field with an arrow on the right, click the arrow to choose from options
- For other fields, you can add info from previous steps, like the action
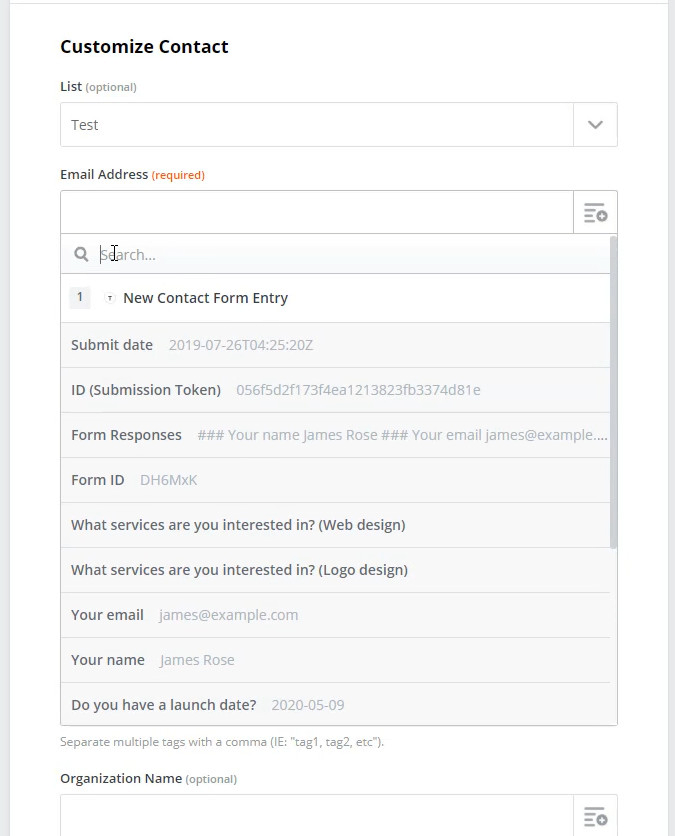
In the screenshot below, I’ve already clicked the dropdown for “List” and selected “Test” (this came from inside Active Campaign)
Then I clicked into the Email address field, and it is showing me all of the data I can add to the field from the Typeform Trigger.
You can then find the contact form email address in the list, or use the search box.
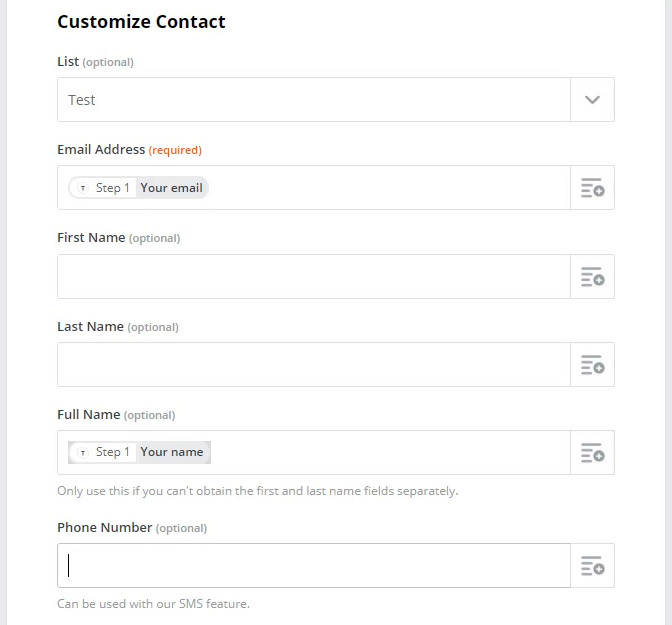
After adding the email and name, it looks like this:
Step 7: Test the action
Just like testing the trigger, now you should click Test & Continue so that Zapier attempts to add the contact to Active Campaign. If there is something wrong, it will tell you. Otherwise you should see this green box.
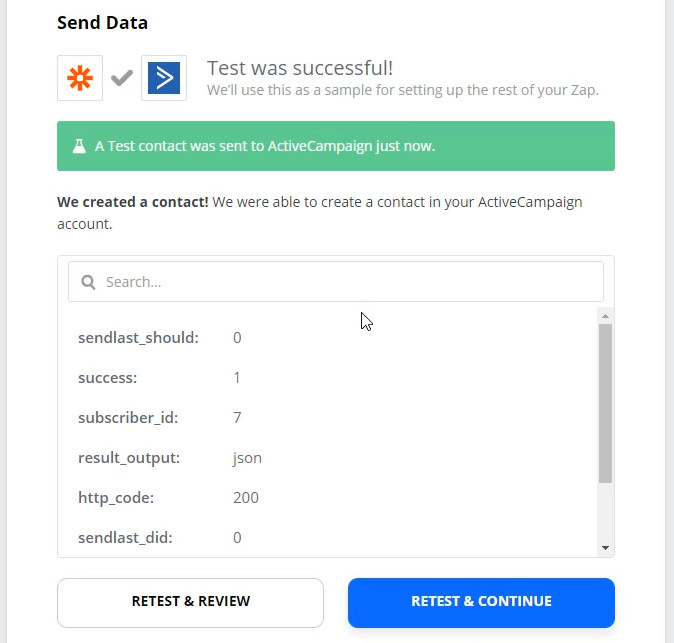
Now, jump over to Active Campaign and check if the contact was really added. Always check like this to make sure your Zap is configured correctly.
Step 8: Turn on the Zap
If all of the above is configured correctly, you’ll now have the option to turn your Zap on.
You can do this by clicking the button that shows up, or use the switch in the top right hand corner.
That’s it! Your first Zap is complete.
How to generate automation ideas
Exploring Zapier Apps
It’s well and good to know how to build workflows with Zapier, but often the hardest part is just learning what is possible.
Here are my favourite ways to begin generating ideas when you’re new with Zapier.
First is to go to the Apps page on the Zapier website.
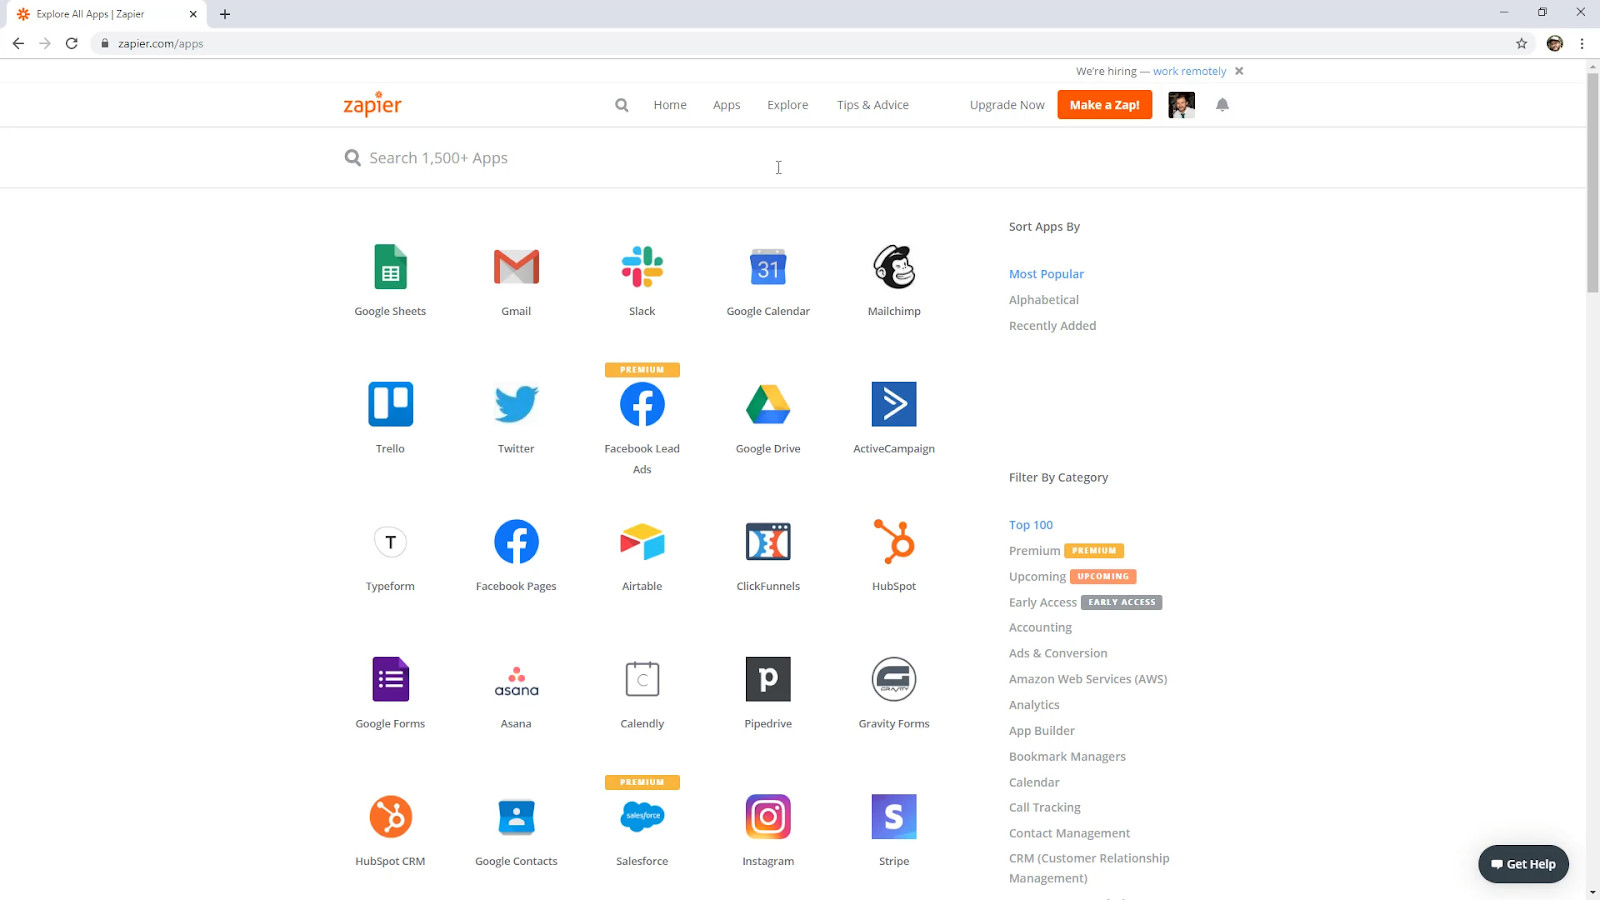
Here you can view all the different apps that Zapier integrates. Exploring these apps shows you what triggers and actions are available in each one.
Start by looking through the apps you are already using.
You can find them in the list, or use the search at the top.
First take a look at Google Sheets on Zapier.
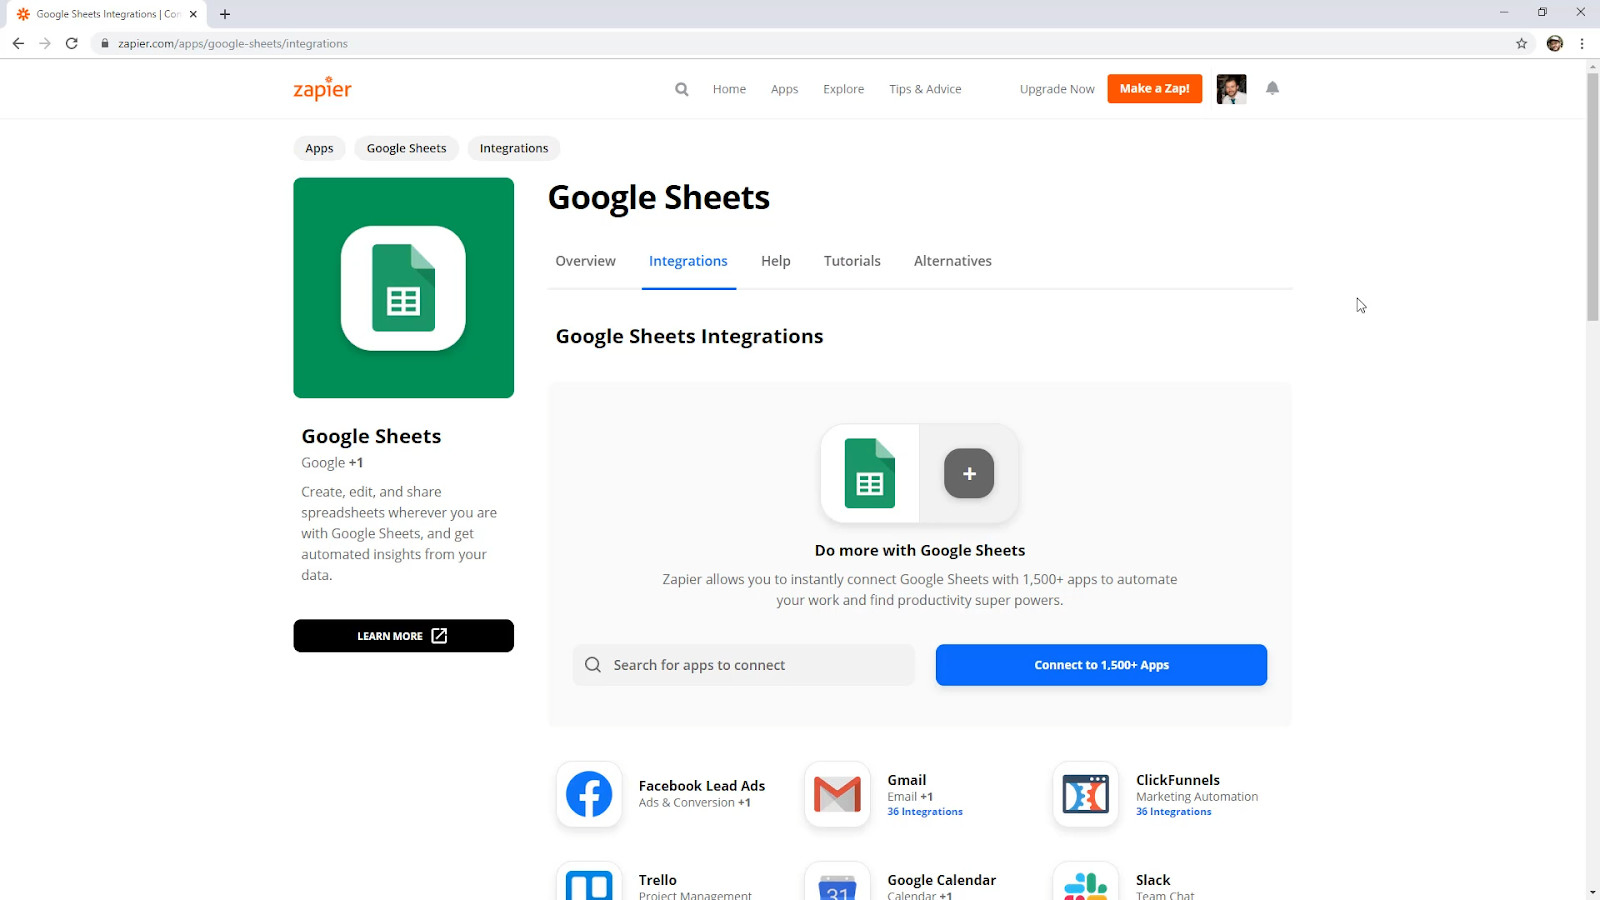
This page contains a lot of info where you can look at some suggested integrations. But the best part is right down the bottom.
Scroll down to the area where Triggers and Actions are shown.
You can switch between Triggers and Actions using the buttons at the top.
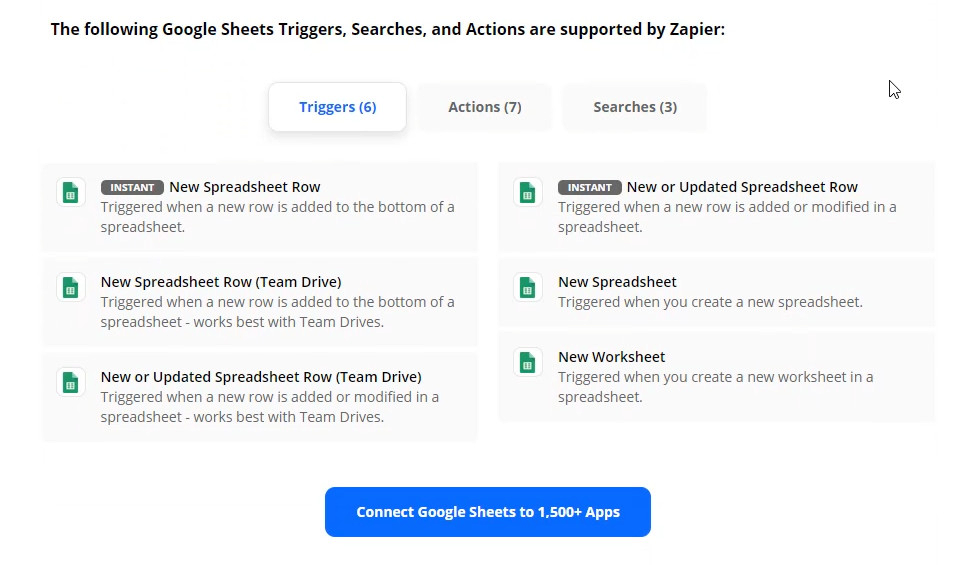
Look through the lists to see what kind of things Zapier supports for Google Sheets.
For example above, you can see that we could Trigger a Zap whenever:
- A new spreadsheet row is added
- A row is updated
- A spreadsheet is created
- A worksheet is created
Flip over to actions.
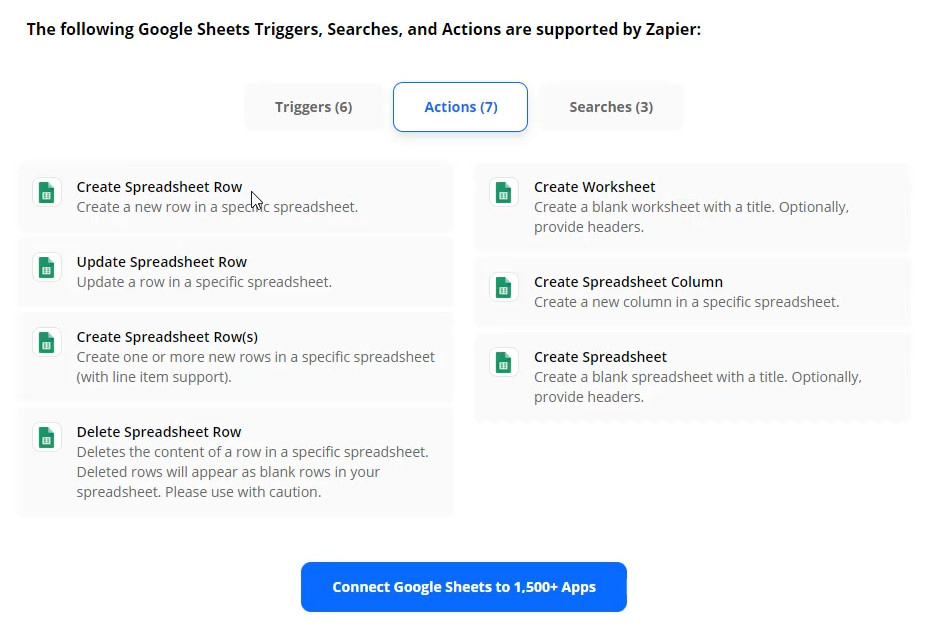
Some examples of Google Sheets actions are:
- Create a new row
- Update an existing row
- Create multiple rows
- Delete a row
- Create a column
These are things you can do in Google Sheets from your workflows. Maybe you want to add a spreadsheet row when a contact form is filled out.
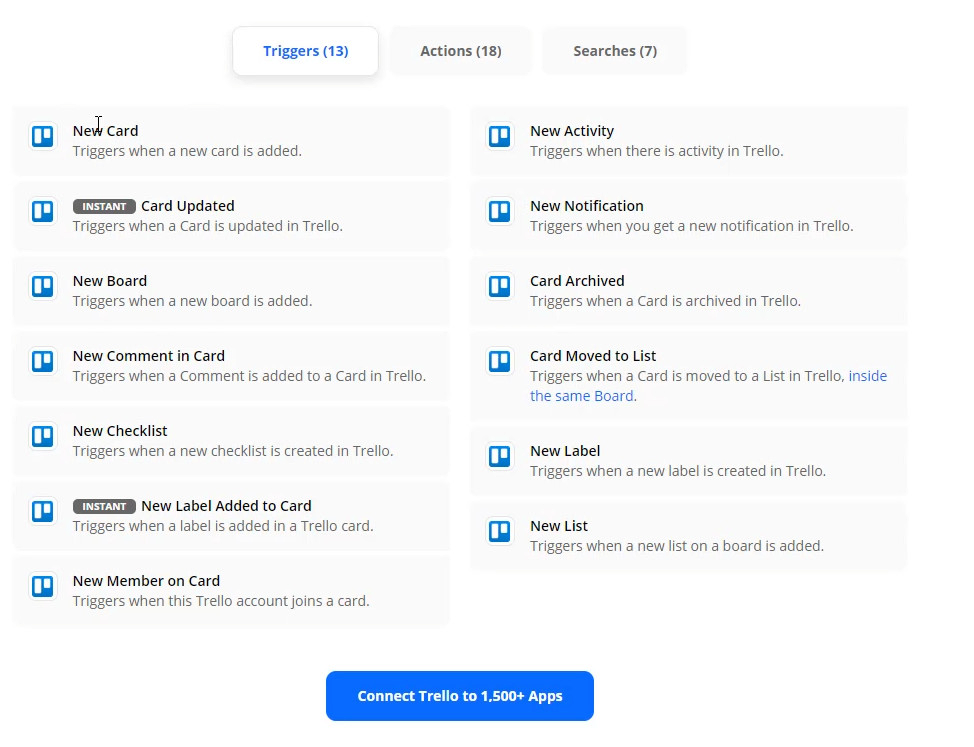
As another example, here are some of the Triggers available with Trello.
Once you build up some knowledge of the kinds of things that you can use in Triggers and Actions with the apps you’re already using, you’ll be able to piece together some workflows in your mind and then implement them in Zapier.
Using Zapier’s Explore Page
Another great way to generate ideas is to use the Zapier Explore page.
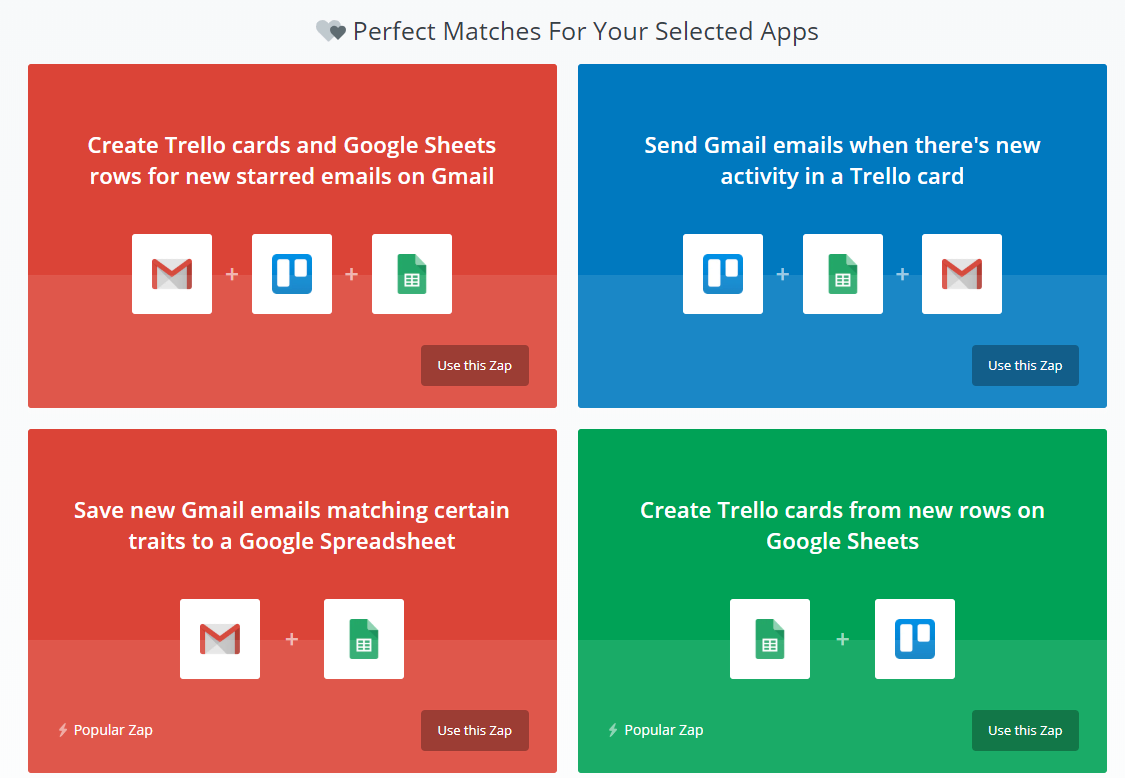
You can turn apps on and off to see some ideas. Below, you can see Google Sheets,Gmail and Trello are selected.
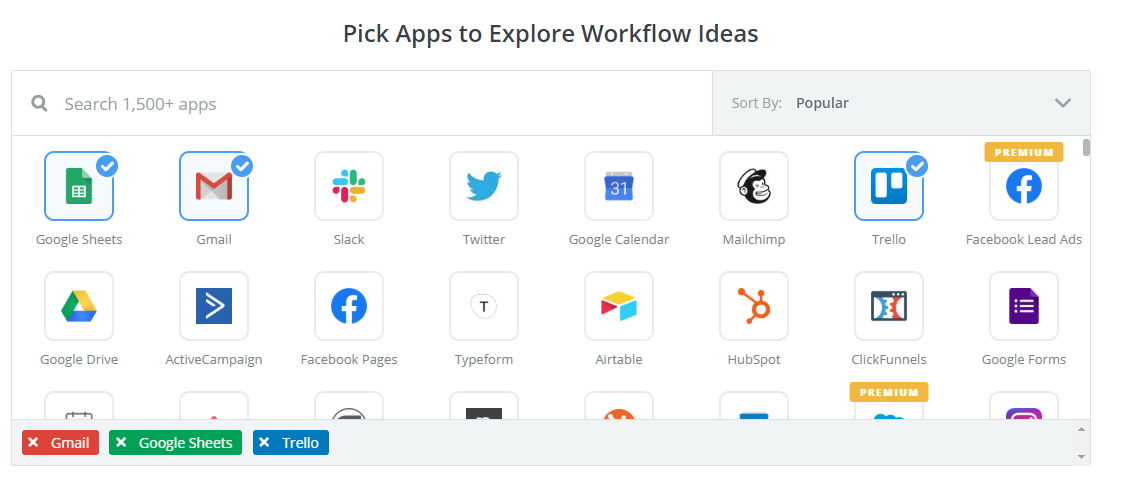
Below this, it shows some example workflows or Zaps that you could implement in Zapier. You can import them directly into your account by clicking “Use this Zap”